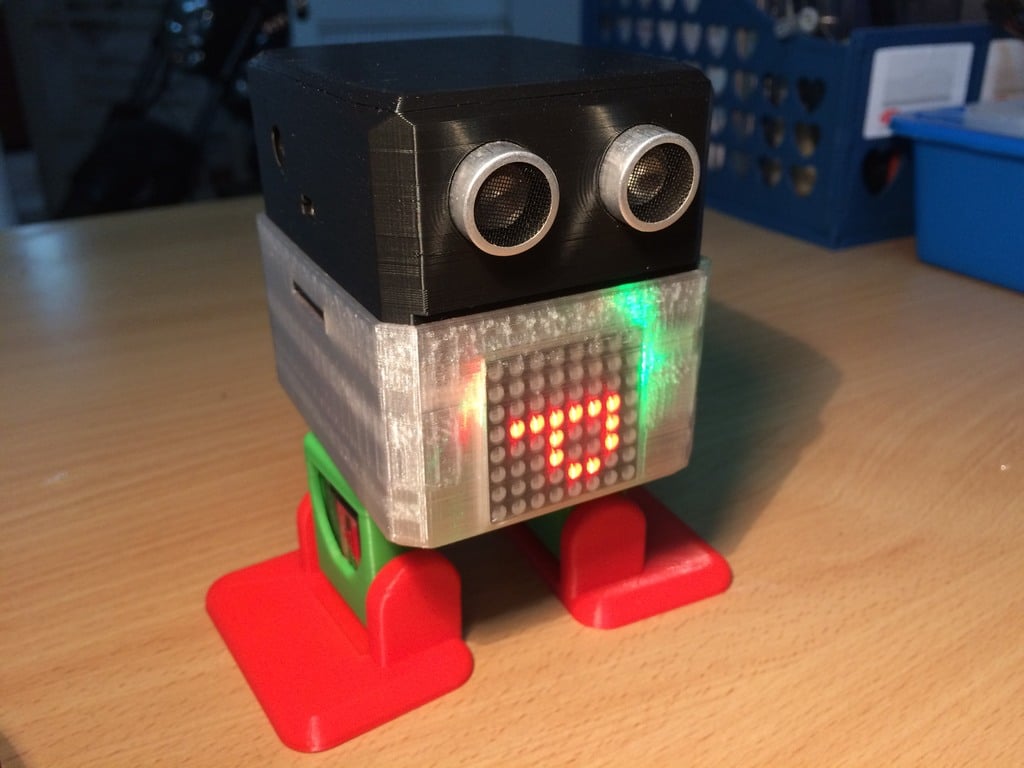
Otto DIY++ all in one
thingiverse
Otto DIY++ is a fresh redesign of the Otto DIY PLUS (https://github.com/OttoDIY/PLUS). This 3D model offers plenty of room for: bluetooth module, metal gear servo (MG90S), Led matrix mouth, rechargeable battery, light sensor, touch sensor, and more. And to make your life even easier, you can use the remaining screws in the servo pack to fix the arduino board and power switch. I. Parts List: 1. Arduino Nano + USB A to Mini-B cable 2. Arduino Nano Shield I/O Extension Board 3. HC-SR04 Ultrasound sensor 4. Mini servo MG90S x4 (each one comes with 2 pointed screws and one small screw) 5. 5V passive Buzzer 6. Female to Female breadboard connectors cable 7. 8.5x8.5mm self-locking Switch 8. HC-06 Bluetooth module 9. MAX7219 LED Matrix module (SDM) 10. Sound sensor (using LM393) with Analog output 11. Light sensor (using LM393) with Analog output 12. YFRobot touch sensor 13. Rechargeable Battery with separate charging and discharging wires + balance charger Mini cross screwdriver. (magnetized) II. 3D Printing Plastic Parts: 1. 3D printed head. 2. 3D printed body. 3. 3D printed leg x2. 4. 3D printed feet. III. Assemble Guide, Software and App: Otto++ can be programmed by Arduino and Scratch 1. Arduino lib: https://github.com/stembotvn/OttoDIY_Vbot/ 2. mBlock Extension for Scratch coding: https://github.com/stembotvn/OttoDIY_mBlock_Extension 3. README.md tells you how to connect: - Servo Hip left to D2 - Servo Foot Left to D4 - Servo Hip right to D3 - Servo Foot Right to D5 - Buzzer to D13 (Active High) - HC06Rx to Arduino D7 - HC06Tx to Arduino D6 - SRF04 Trigger to D8 - SRF04 Echo to D9 - Max7219 DATA (DIN) to D10 - Max7219 CS to D11 - Max7219 CLK to D12 - Sound Sensor to analog A6, - Light sensor Left to analog A1 - Light Sensor Right to analog A0 - Battery: (-) -> GND; (+) -> switch -> Vin (NOT 5V) 4. Bluetooth control - App: android Zowi app (by bq) - https://play.google.com/store/apps/details?id=com.bq.zowi&hl=en - Config: github.com/stembotvn/OttoDIY_Vbot/tree/master/examples/HC06_BT_config - Firmware: github.com/stembotvn/OttoDIY_Vbot/tree/master/examples/Otto_BT_ZowiAPP
With this file you will be able to print Otto DIY++ all in one with your 3D printer. Click on the button and save the file on your computer to work, edit or customize your design. You can also find more 3D designs for printers on Otto DIY++ all in one.
