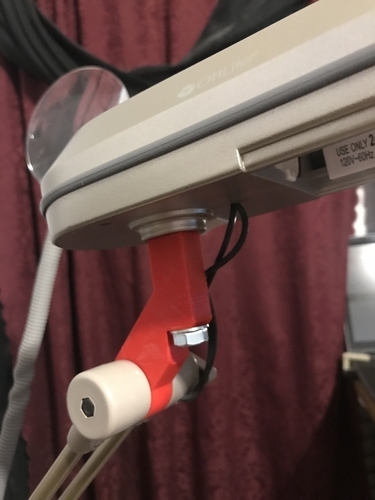
OttLite Swivel Mount Replacement Part
pinshape
I have a standing Ottlite that's been held together by duct tape, but I'm not satisfied with this makeshift solution. Enter my 3D printer, which has saved the day once again. I designed a replacement mounting arm using 3D Builder, and after a trip to Lowes for some hardware, I was able to connect it all up for under $5. The result is a sturdy and reliable Ottlite that's holding up great. Print Settings: Printer Brand: MakerBot Printer: MakerBot Replicator+ Rafts: Yes Supports: Yes Resolution: 200 mils Infill: 50% Notes: I always print with a raft because it gives me better results, so feel free to skip it if you prefer. I set supports for the larger bolt hole to ensure it was printed to perfection. With 50% infill, this part is rock solid and ready for anything. Post-Printing: Smaller Bolt Hole: The smaller bolt hole is a tight fit for the OEM bolt, but that's exactly what I wanted - minimal play and a secure hold. It's a deliberate design choice that ensures my Ottlite stays put. Large Bolt Hole: For the large bolt, I swapped out the OEM bolt for a 3/8" x 2 1/2" bolt with some flat washers and a locking nut featuring a nylon ring inset in the nut. This upgrade provides extra security and peace of mind.
With this file you will be able to print OttLite Swivel Mount Replacement Part with your 3D printer. Click on the button and save the file on your computer to work, edit or customize your design. You can also find more 3D designs for printers on OttLite Swivel Mount Replacement Part.
