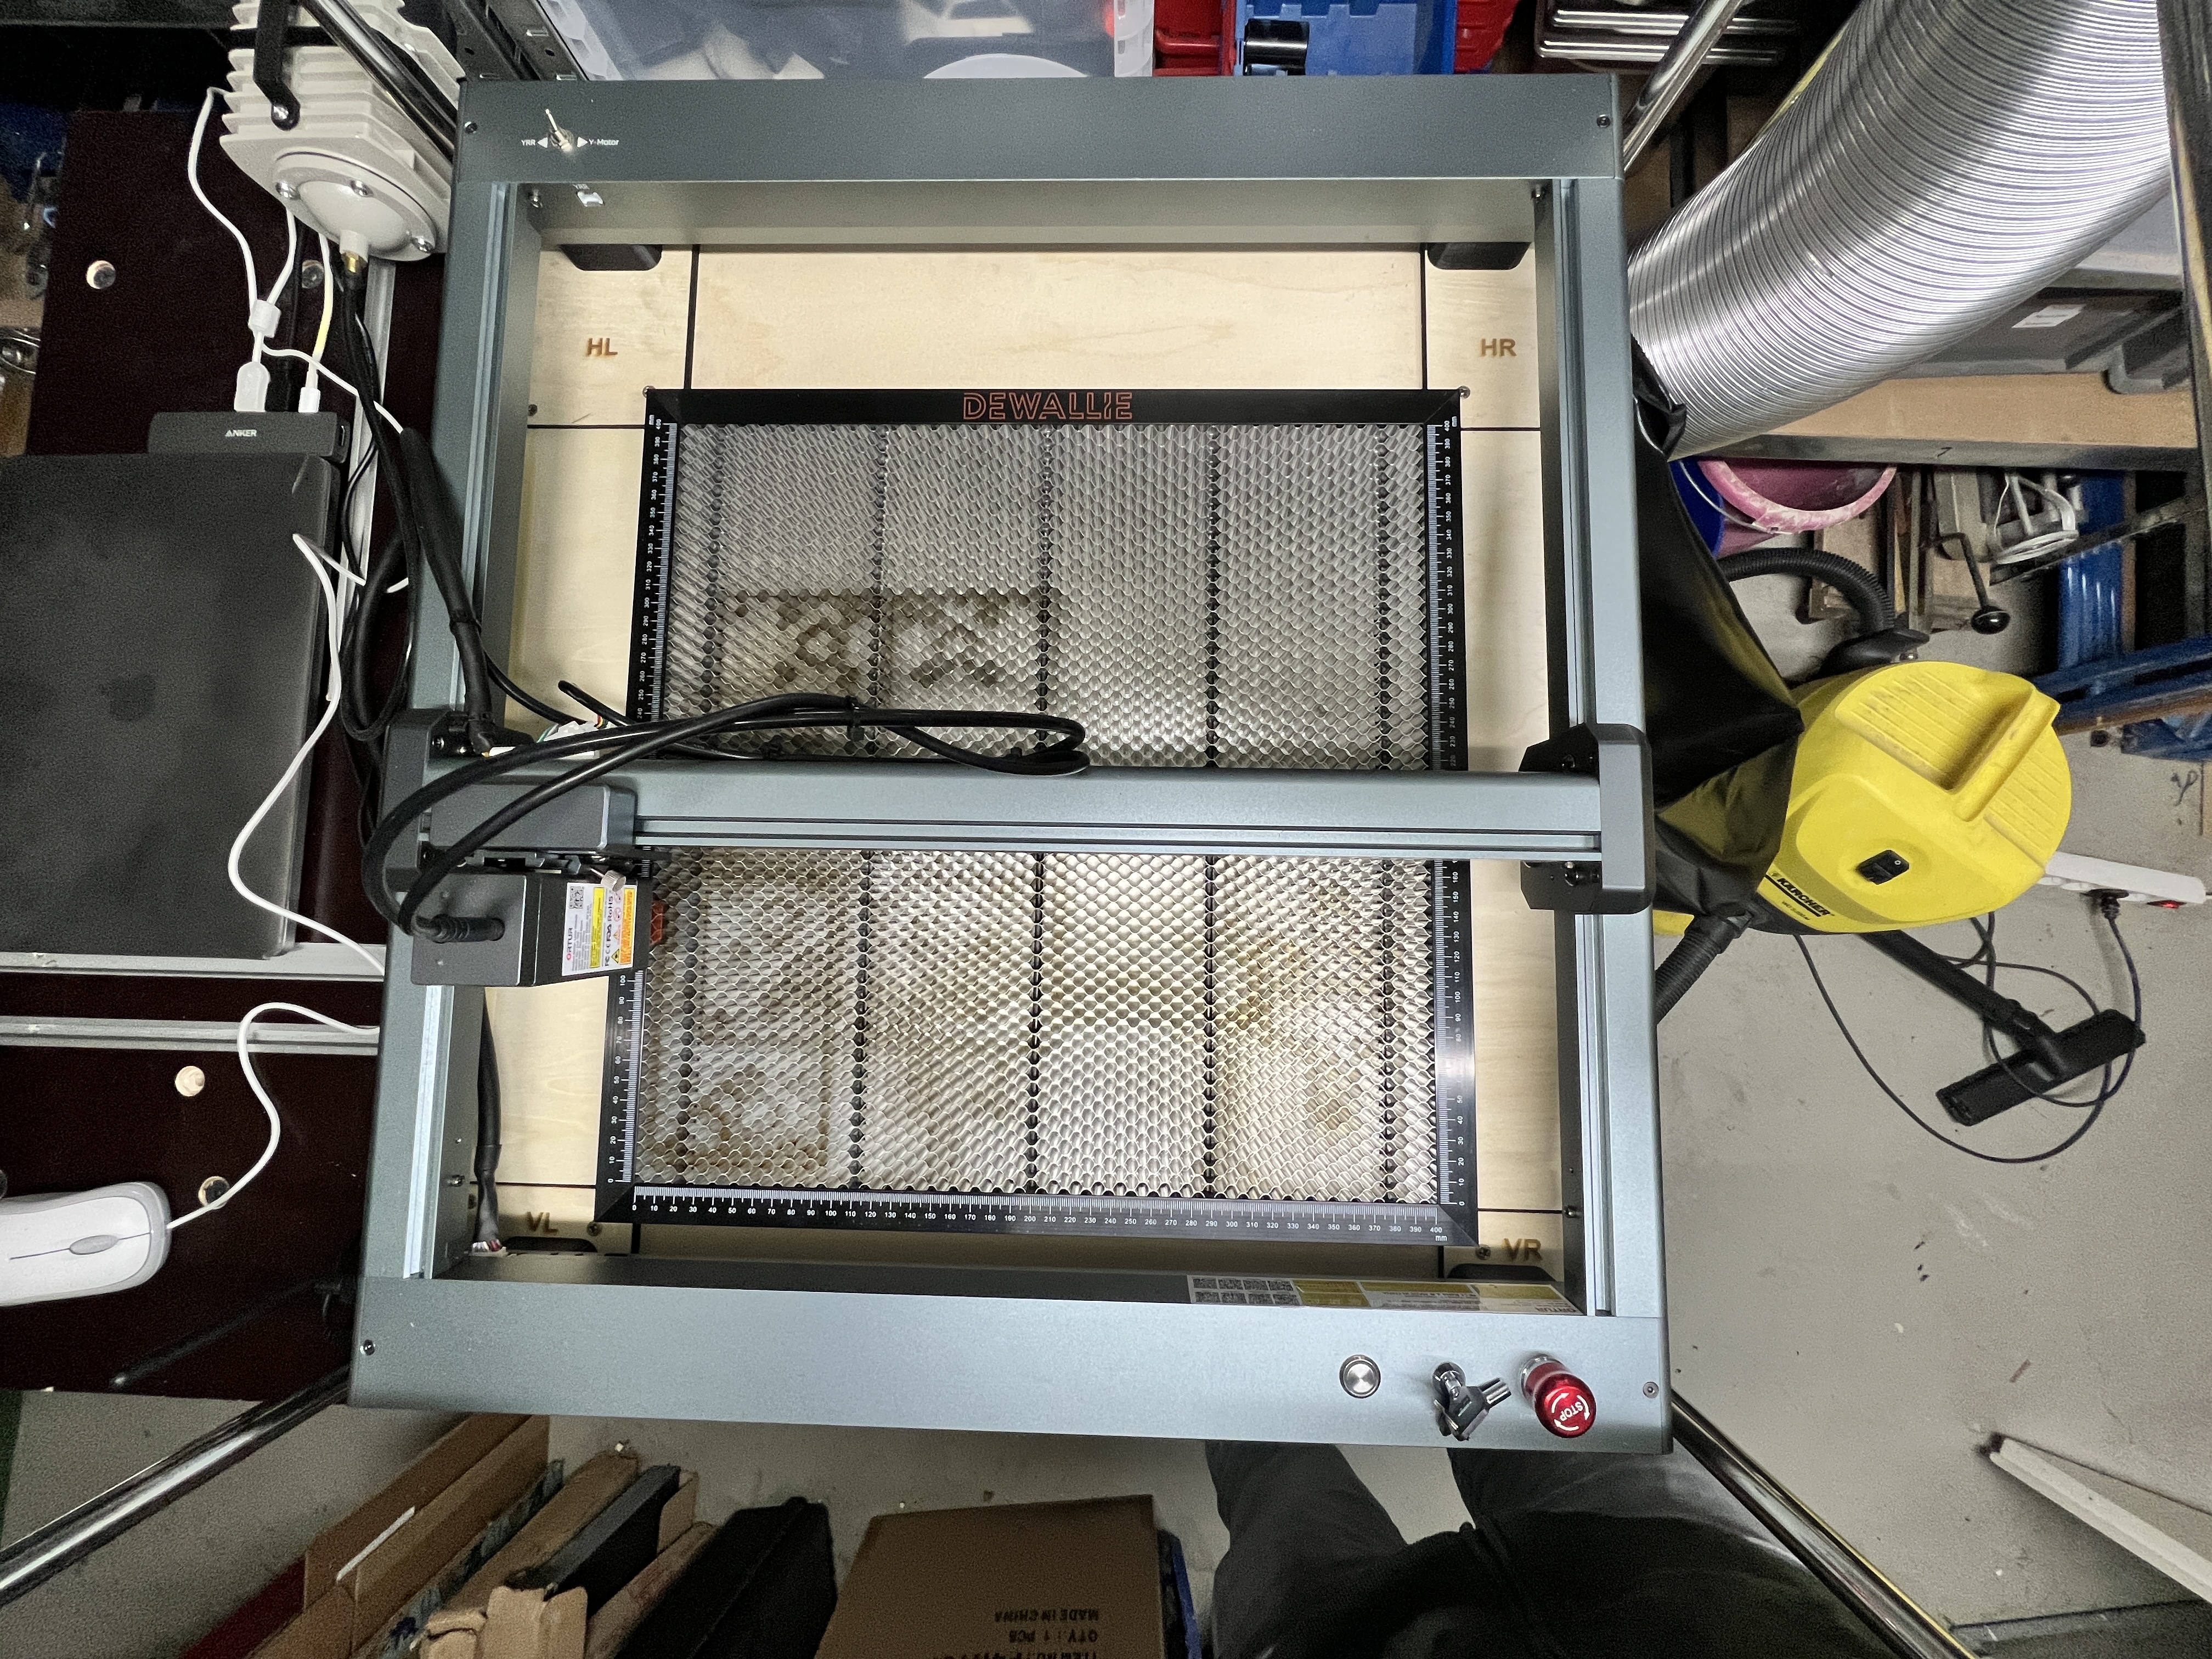
Ortur Laser Master 3 base plate & riser - 3 in 1 Function
prusaprinters
<p><i><strong>Deutsch:</strong></i></p><p>Die Grundplatten erfüllen 3 Funktionen:</p><ul><li>Durch die großen Löcher steht der OLM3 stabil und immer an der exakt gleichen Position</li><li>Durch die Ecken auf der Innenseite wird das Wabengitter genau so platziert, dass die Home-Position des Lasers exakt mit der Null-Position in der linken unteren Ecke des Wabengitters übereinstimmt</li><li>zwischen die oberen und unteren Ecken passt genau ein DIN-A2 Sperrholzbrett (420 x 594x4mm) als günstiges, austauschbares Opferbrett (ich habe darauf ein 400x400 Gitter gelasert)</li></ul><p>Auf die Grundplatten kann man bei Bedarf wie Lego-Steine die Riser-Füße aufsetzen. Es können auch mehrere Riser-Füße übereinander gesetzt werden.</p><p>Ich habe die Grundplatten aus 8mm Birkensperrholz gelasert. Ich habe aber auch STL-Dateien hochgeladen, falls Du die Grundplatten lieber drucken möchtest. </p><p>Die Grundplatten habe ich dann auf eine Basis-Platte geschraubt, die mindestens 600x650mm groß sein muss (dann passt es genau).</p><p>Das Wabengitter, dass ich benutze ist von der Firma DEWALLIE (gibt's bei Amazon). Das hat die Außenmaße 441x441mm.</p><p>Kleiner Tipp: Ich habe unter die Basis-Platte noch Füße geschraubt, so dass sie etwas höher kommt. Dann passt die Umhausung von Comgrow, weil die unteren Stangen des Zelts unter der Basis Platte entlang laufen können.</p><p>Nur zur Information: Der Mittelpunkt der Arbeitsfläche vom OLM3 ist (zumindest bei mir) nicht exakt mittig, deshalb sind die Grundplatten nicht symmetrisch. </p><p>Durch die herausstehenden Schraubenköpfe an der hinteren Seite des Lasers konnte ich leider auch die Riser-Füße nicht symmetrisch konstruieren. Deshalb muß jeweils 2x die Erhöhung für links hinten und vorne rechts und 2x die Erhöhung für vorne links und rechts hinten gedruckt werden.</p><p> </p><p><i><strong>English:</strong></i></p><p>The base plates (files named “Grundplatte…”) fulfill 3 functions:</p><ul><li>Thanks to the large holes, the OLM3 is stable and always in exactly the same position</li><li>The corners on the inside place the honeycomb grid exactly in such a way that the home position of the laser exactly corresponds to the zero position in the lower left corner of the honeycomb grid.</li><li>A DIN-A2 plywood board (420 x 594x4mm) fits exactly between the upper and lower corners as a cheap, exchangeable spoilboard (I lasered a 400x400 grid on it).</li></ul><p>If necessary, you can place the riser on the base plates like Lego bricks. You can stack the risers as you need ist</p><p>I lasered the base plates from 8mm birch plywood. I also uploaded STL files if you prefer to print the baseplates.</p><p>I then screwed the base plates onto a big thicker plate, which must be at least 600x650mm in size (then it fits exactly).</p><p>The honeycomb grid that I use is from DEWALLIE (available from Amazon). This has the external dimensions 441x441mm.</p><p>A little tip: I screwed feet under the big base plate so that it gets a little higher. Then the enclosure from COMGROW (also availiable from Amazon) fits around the OLM3, because the lower poles of the tent can run along under the base plate.</p><p>Just for information: The center of the OLM3 workspace is not exactly in the middle of the machine, so the base plates are not symmetrical.</p><p>Unfortunately, due to the screw heads nearby the feet on the rear side of the laser, I was also unable to construct the extension feet symmetrically. Therefore, the riser for the rear left and front right and the riser for the front left and rear right must be printed twice.</p>
With this file you will be able to print Ortur Laser Master 3 base plate & riser - 3 in 1 Function with your 3D printer. Click on the button and save the file on your computer to work, edit or customize your design. You can also find more 3D designs for printers on Ortur Laser Master 3 base plate & riser - 3 in 1 Function.
