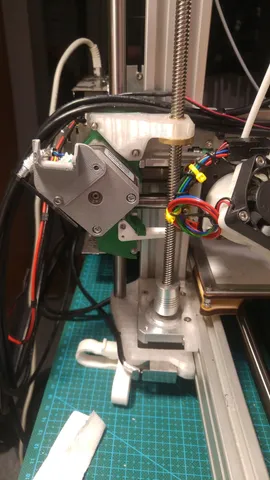
Ormerod z axis upgrade
prusaprinters
In the pursuit of a better alternative to the M5 lead screw i saw that acme lead screws have come down in price due to higher demand. After figuring out how to implement this upgrade i came up with this design. This upgrade requires three printed parts and a structural modification of your printer whichwill force you to recalibrate your printer. --PLEASE NOTE-- The screws holding the IR probe will come loose over repeated homing of the X axis IF YOU DO NOT LOWER THE X AXIS HOMING SPEED FROM F2000 TO F1000 OR LOWER, the probe does not recognize the end stop quickly enough to avoid a collision with the z axis screw. Bill of Materials: 437 4 M4x10mm cap 4 M4 t-nut 469 3 M4x10mm cap 3 M3x12mm countersunk 425 2 M3 x 50 cap 2 M3 x n/a countersunk X end stop 2 M2.5 x 6mm Print Settings Printer Brand: RepRap Printer: Ormerod 2 528.4 Rafts: No Supports: No Resolution: 0.2mm Infill: 25% Notes: I have used meshmixer to reorient the .stl files to rest on the platform the way i printed them. The parts are printed in transparent PET-G from devil design with no cooling fan. Post-Printing The 15mm gap Due to z wobble i feel it necessary to sand the 15mm thick "wedge" in part 437 and 469 to get a similar thickness on both parts. This is measured with a caliper. The gap moves the motor away from the 20x40 extrusion so the spindle of the stepper motor is located on the same plane as the M5 lead screw was in. Category: 3D Printer Parts
With this file you will be able to print Ormerod z axis upgrade with your 3D printer. Click on the button and save the file on your computer to work, edit or customize your design. You can also find more 3D designs for printers on Ormerod z axis upgrade.
