Openlock / Openforge Skull Cave Dungeon Entrance
thingiverse
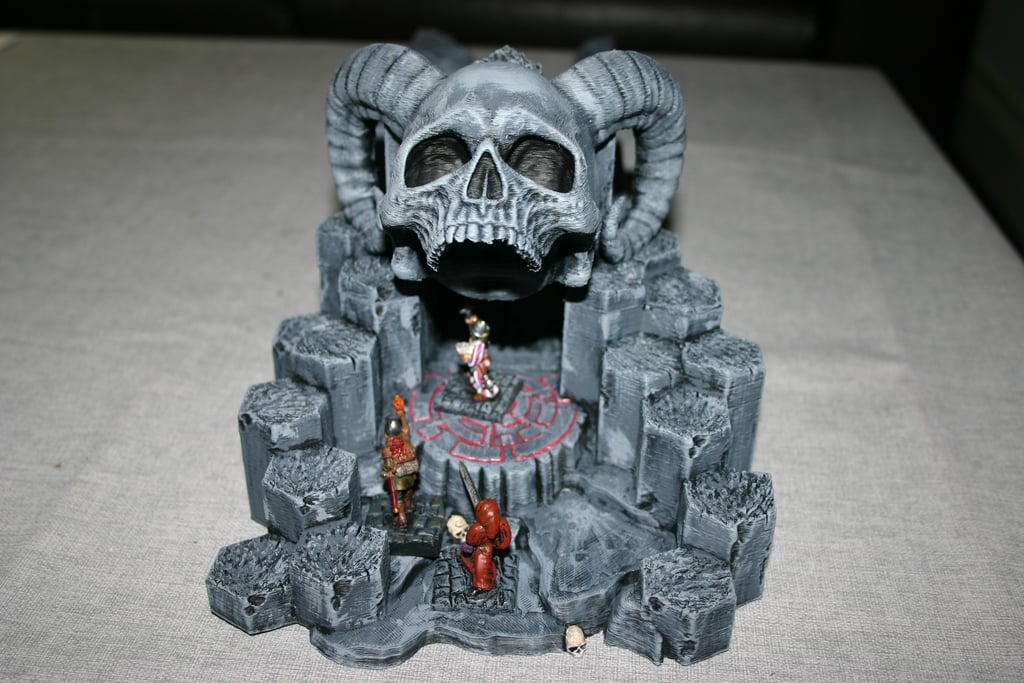
I took SnekyPete's Basalt Terrain Skull Temple and gave it a complete overhaul to turn it into an epic dungeon entrance. When I first laid eyes on his creation, I knew I had to put my own spin on it. To get started, I made some significant changes, including: - Resizing the entire structure to 80% of its original size so it would fit perfectly on my Ender without worrying about the print head getting in the way. - Adding a passageway that leads deep into the heart of the temple. - Incorporating a step down to ground level at the back, using a single large step rather than a flight of stairs. This design choice ensures that even a figure on a 25mm base can fit comfortably. Next, I added an Openlock triplex connector at the back for easy assembly and disassembly. To make it even more convenient, I split the temple into two separate parts connected by Openlock connectors. This allows for easier printing (no supports needed for the bottom half) and makes it simple to remove the skull during play to access your miniatures. For my test print, I used a layer height of 0.2mm, but you may be able to achieve even better detail on the horizontal surfaces with a layer height of 0.16mm. Be sure to add supports under the top half for the skull and horns, while the bottom half can be printed without any additional support. Check out the caves I've attached at the back in the photo – they're Devon Jones' OpenForge caves, available on Thingiverse: https://www.thingiverse.com/thing:3871687
With this file you will be able to print Openlock / Openforge Skull Cave Dungeon Entrance with your 3D printer. Click on the button and save the file on your computer to work, edit or customize your design. You can also find more 3D designs for printers on Openlock / Openforge Skull Cave Dungeon Entrance.