OpenForge 2.0 Wall Construction Kit
thingiverse
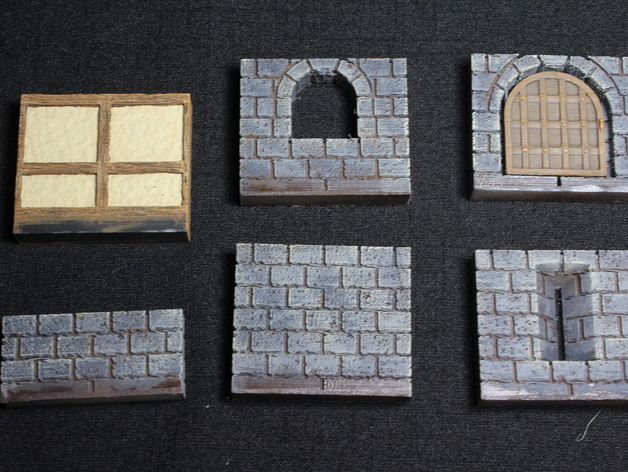
This is the foundation project for the OpenForge Wall Construction Kit. This project only contains the bases (stone and plain) that are used in the construction kit for building wall tiles. This project will be updated as new basic styles of walls and floors become available. Select a base, then follow the links below to choose a floor style and a wall style. Prime, paint, add magnets and filament rivets if you like, and glue. There are several things I'm trying to resolve with this moving forward. 1) There's practically an explosion of openforge pieces. To make all the possible combinations people might want, it results in potentially endless variety. Now if you want something that is a bit more special or an odd size, it's easy to put together. 2) For some tiles, Tudor especially, painting them in full tile form turned out to be a real pain. Now with this, you can print the tile, paint it and then assemble. This makes it much easier to reach awkward places on the parts. For instructions on how to get started with OpenForge, we have a set of tutorials. Want to sell OpenForge prints? Want to use OpenForge designs in your product, check out the license FAQ. OpenForge is now a patron-supported project. I use the resources that my patrons give me to create more sophisticated tiles with a greater level of detail. Please support me and I'll deliver an ongoing stream of awesome gaming terrain. You can find more about OpenForge and Masterwork Tools at our: Online catalog and backer site Website Forums (Mostly we use Facebook now) Twitter Facebook Post-Printing Tips 1) Most printers on the first layer will create a slight lip as the plastic is squeezed on the first layer. You'll want to use a razor to cut that off from both the floor tile and the wall, or else it can create a small gap. 2) I find painting tiles as pieces much faster than doing it post-assembly. I prime them as parts, paint them as parts, and only after that do I glue the piece together. 3) Make batches of bases. I find printing, painting, and assembling floor tiles + floor bases in batches and assembling those without a wall back really useful. They tend to be faster to paint and print than the backs, so it's easy to have a pile ready as I make new backs to go on them. Assembly Instructions 1) Put magnets in the base. You won't need them on one side for this step (where the wall will be). 2) Glue the floor to the base, using the wall to space it appropriately. I use cyanoacrylate glue (super glue). 3) Clamp. 4) In a few minutes, unclamp and add the last set of magnets and then the back, gluing on the bottom and where it meets the floor. 5) Re-clamp. Custom Section Floor Parts Cut-Stone Floor Parts Wood Floor Parts Trap Door Floor Parts Wall Parts Cut-Stone Wall Parts Wood Wall Parts Changelog 6/23/2016 - Initial creation. Total variations: 560 6/28/2016 - Added Tudor door backs. Total variations: 784 7/5/2016 - Added Tudor window backs. Total variations: 880 7/21/2016 - Added trap door floors. Total variations: 916 8/16/2016 - Added stone square doors. Total variations: 1012
With this file you will be able to print OpenForge 2.0 Wall Construction Kit with your 3D printer. Click on the button and save the file on your computer to work, edit or customize your design. You can also find more 3D designs for printers on OpenForge 2.0 Wall Construction Kit.