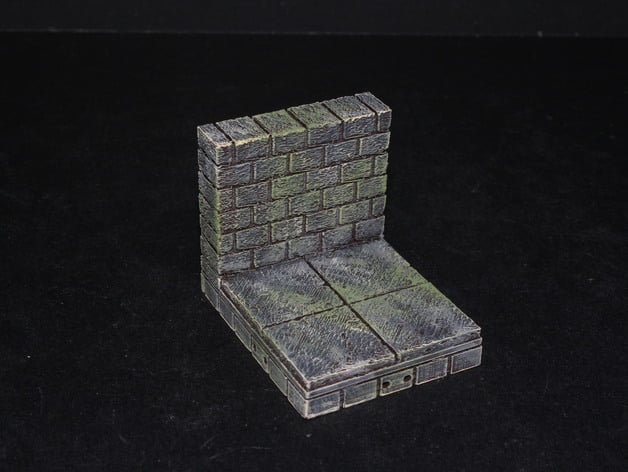
OpenForge 2.0 Cut Stone External Wall
thingiverse
Deprecated It is still possible to recreate the use case of this tile by using separate wall tiles. Go to Separate Wall Primary Walls and Separate Wall Primary Floors to get the most up-to-date version. Old Text OpenForge 2.0 This is the first set in the external wall cut-stone series for OpenForge. A lot has changed with how I do walls that don't sit on the base, and I've changed the name from "edge" to "external" wall in part to differentiate them. Read below and I'll explain. If you don't want to use the new attachable base, full tiles with bases attached are also uploaded with the name *.full_base.stl For instructions on how to get started with OpenForge, we have a set of tutorials. Want to sell OpenForge prints? Want to use OpenForge designs in your product, check out the license FAQ. For instructions on how to get started with OpenForge, we have a set of tutorials. Want to sell OpenForge prints? Want to use OpenForge designs in your product, check out the license FAQ. OpenForge is now a patron-supported project. I use the resources that my patrons give me to create more sophisticated tiles with a greater level of detail. Please support me, and I'll deliver an ongoing stream of awesome gaming terrain. You can find more about OpenForge and Masterwork Tools at our: Online catalog and backer site Website Forums (Mostly we use Facebook now) Twitter Facebook Post-Printing Instructions For assembly instructions, painting videos, and other extra information, see the instructions on the cut-stone wall. External Wall Tiles As I add new tiles to this set, I'll link back here, and continue to grow the instructions on how to best use the external wall tiles. Historically, with the edge wall tiles, the wall was the same thickness as the normal tiles. This made edge tiles kind of a pain to use, as there was a fairly odd gap that sat between tiles when you tried to line them up. With the external wall tiles, the wall is now 12.5mm, which is exactly half the width of a tile square. This size makes reasoning about external wall tiles much easier, and has the benefit of making them completely compatible with tiles made using HirstArts molds. First and foremost, what this means is if you place two of the external walls back to back, they take up exactly one square of space. Second, this eliminates the need for edge buffers, and we can have half widths of floor, which is much easier to use, and frankly looks a lot better. As this new set gets going, I'm going to release half-floor tiles, as well as a small set of adapters that make working with the external wall tiles substantially easier. As those get added, I'll document here how to best use these parts. Two external walls back to back now line up with the grid (Better photo forthcoming) Changelog 5/30/2016 - Added 0.5 increments of walls for use in assembling wall pieces using parts as per the cut-stone external door
With this file you will be able to print OpenForge 2.0 Cut Stone External Wall with your 3D printer. Click on the button and save the file on your computer to work, edit or customize your design. You can also find more 3D designs for printers on OpenForge 2.0 Cut Stone External Wall.
