Open XY blocks with adjustable belt tension - for original Ultimaker (8mm gantry rods)
prusaprinters
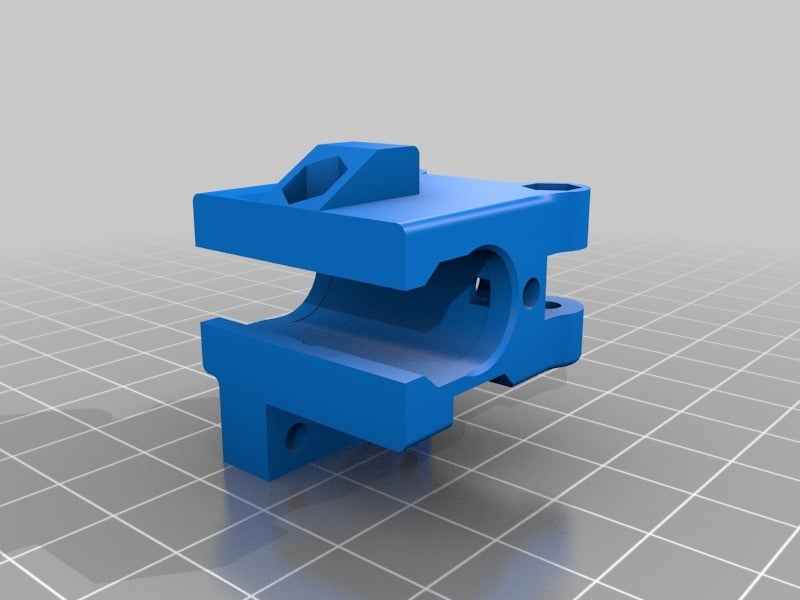
<p>These blocks can be replaced without having to dismantle the rods and pulleys, after of course removing the original blocks. The belt tension is adjustable through a banana cam. The gantry can be easily removed without undoing the blocks.</p> <p>The 6mm gantry rod version will be posted soon.</p> <h3>Print instructions</h3><h3>Category: 3D Printer Parts Summary</h3> <p>These blocks can be replaced without having to dismantle the rods and pulleys, after of course removing the original blocks. The belt tension is adjustable through a banana cam. The gantry can be easily removed without undoing the blocks.</p> <p>The 6mm gantry rod version will be posted soon.</p> <h3> Instructions</h3> <p>Print all parts with 0.1mm layer and 100% infill.<br/> Required parts for each block:<br/> 6x M3 M6mm socket bolt<br/> 5x M3 nut<br/> 1x M3 square nut<br/> 2x tube (3mm inside, 6.3mm outside diameter, 6.5mm length) plastic or metal. I used cuts from my old Bowden tube.</p> <p>Make sure you have all parts ready before dismantling the gantry, rods and pulleys!</p> <p>Assembly:<br/> Re-assemble the rods, belts and pulleys as normal without the blocks, just the brass journal bearings in place. Don't tighten the sync pulleys, but tighten the driving ones (motors).<br/> Place blocks on the rods and assemble the key wedges, don't tighten. Slide in place the blocks over the journal bearings. slightly tighten the bolt.<br/> One block at a time:<br/> Place the square nut in its captive location.<br/> Screw the bolt few threads through the square nut.<br/> Slide the banana in place.<br/> Capture the belt under the hinge screws passing through the tube cuts acting as rollers.<br/> Position the gantry and secure rods on the blocks using the brackets. Gently tighten bolts.<br/> Tighten the belts using the adjusting bolts, enough to remove slack and hear the belt give a tone. You can balance all belts to give the same tone. Don't over-tighten!<br/> Square the gantry and tighten the pulleys. You may want to use a thread locking compound like Loctite Blue. Remember that to untighten later, you will have to heat the grubscrews or use acetone to dissolve the thread lock.</p> <p>Level the platform and start printing.</p> <p>Enjoy!</p> <p>If you like this design, feel free to donate and ask for improvements:<br/> <a href="https://www.paypal.com/cgi-bin/webscr?cmd=_s-xclick&hosted_button_id=AW57FTXN35YZE">https://www.paypal.com/cgi-bin/webscr?cmd=\_s-xclick&hosted\_button\_id=AW57FTXN35YZE</a></p>
With this file you will be able to print Open XY blocks with adjustable belt tension - for original Ultimaker (8mm gantry rods) with your 3D printer. Click on the button and save the file on your computer to work, edit or customize your design. You can also find more 3D designs for printers on Open XY blocks with adjustable belt tension - for original Ultimaker (8mm gantry rods).