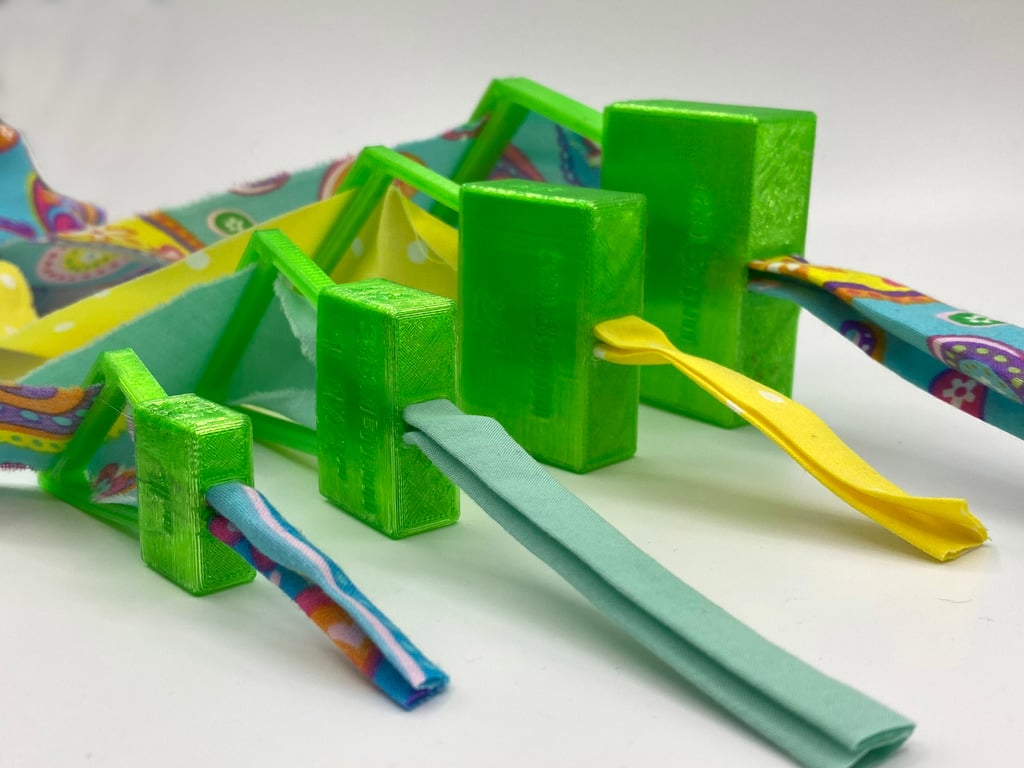
One-shot Bias Tape Maker
thingiverse
One-shot bias tape maker. Edits: * 4/12/2019: Replaced STLs with 2v6, which are easier to thread and have a better fit with the pegs, using way less filament because they replace the input block with an input guide. * 4/13/2020: Replaced STLs with 2v15. These models reduce the height of the blocks and the size of the input guide for faster print time, providing a better fit for the pegs into the holes. * 4/14/2020: Added STLs for 3v6, which further reduce print time, replace thin spacing pegs with built-in solid pegs, and improve all fit for easy snap-in assembly. * 4/16/2020: Added STLs for 3v9-11. These models further reduce print time and replace the spacing pegs with a better alternative, with the 2 1/2" mode now using a taller input guide that fits better. * 4/17/2020: Added STLs for 4v2, which only use the last block and an input guide to make the fold, printing faster and easier to thread. Thanks to @Dixon3dprinting for experimenting and letting me know that only the last block is needed to fold the fabric. * 4/17/2020: Replaced STLs for 4v2 with 4v3, which now has some hooks to hold on to the input guide, making it easier to set the right fit based on dimensions. Removed STLs for version 2v15 because 3v9/11 have proven stable to use and print. * 5/5/2020: Removed 3v* files because 4v*s have proven stable. This bias tape maker handles the two-stages of bias tape making in a single pass, folding the fabric into a loop and then folding it again in half. The output strip can go directly into the iron or into the sewing machine. Available Input Sizes: * 1.00" (25.40 mm) * 1.25" (31.75 mm) * 1.50" (38.10 mm) * 1.75" (44.45 mm) * 2.00" (50.80 mm) * 2.50" (63.50 mm) * 3.00" (76.20 mm) * 4.00" (101.6 mm) Untested - By popular demand * Need another size? Ask and I can render an STL for you. * Note: The output size is 1/4th the input so 3/8" (9.5mm), 1/2" (12.7mm), and 5/8" (15.8 mm). How to use: Assemble as illustrated in the photo and run the tape. Here is a how-to video: https://youtu.be/9r0nX6GE1Sc. A video for the older version lives at https://youtu.be/4WB6Jxeqejk. Note, the towel I use helps adjust the height of the iron relative to the output block. The towel also warms up without burning and makes the ironing process more effective so you can go faster. My daughter set up an online store for anyone who wants one and doesn't have a 3D printer. You can order here https://www.etsy.com/listing/798388313/one-shot-double-fold-bias-tape-maker-1-1. I've replaced the metric 40mm, 50mm, and 60mm tape sizes with imperial 1.5", 2.0" and 2.5" because they are virtually identical and some people use pre-cut tape to imperial sizes. This refers to the input size. The output strip size will be 1/4 of the input. How to print: * Easy: Set everything to 3 or 4 perimeters, use ~3% infill. * Fast: Set everything to 2 perimeters and 0% infill. Reinforce the mounting pegs with 4 perimeters. Add 3% infill to the body of the 2 1/2" size. I'm printing on a Prusa MK3 set to print at 150% and the small ones print in ~45 mins.
With this file you will be able to print One-shot Bias Tape Maker with your 3D printer. Click on the button and save the file on your computer to work, edit or customize your design. You can also find more 3D designs for printers on One-shot Bias Tape Maker.
