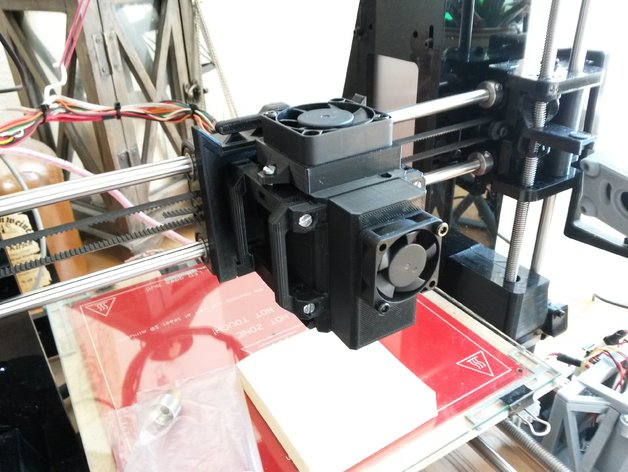
Odicforce laser mount for my Quick Fit Carriage
thingiverse
A custom mounting plate is needed to secure a 2W blue laser module specifically designed for use with my Quick Fit Carriage (http://www.thingiverse.com/thing:1670305). The laser module itself consists of several components from Odicforce, which cost approximately 80€. These parts include: - A high-powered 1.6W+ blue laser diode capable of exceeding 2W - An AR coated lens for optimal performance - A 2.5A laser current source with TTL capabilities for precise control - A laser heatsink, measuring roughly 30mm x 31.5mm x 60mm in size (contrary to the listed dimensions on the website) - Eye protection glasses are recommended for safe operation To assemble this module, you will need: * 40mm 10x 10mm M3 screws and nuts * A Sub-D 26-HD male connector * Soldering skills are required for assembly The laser's cooling fan output is used as the input signal for the TTL driver. However, it must be converted to a 5V signal from its original 12V, and also must disconnect the ground instead of the 12V. To ensure efficient cooling, I opted for a larger 40mm fan over the standard 30mm fan, which blows away smoke and efficiently cools the laser. The module is situated within a closed channel to maximize heat dissipation. Print Settings: Please choose an appropriate printing orientation based on my custom support structures or geometry. Note that reorienting the parts myself can sometimes cause Solidworks to break drawing relations between solids.
With this file you will be able to print Odicforce laser mount for my Quick Fit Carriage with your 3D printer. Click on the button and save the file on your computer to work, edit or customize your design. You can also find more 3D designs for printers on Odicforce laser mount for my Quick Fit Carriage.
