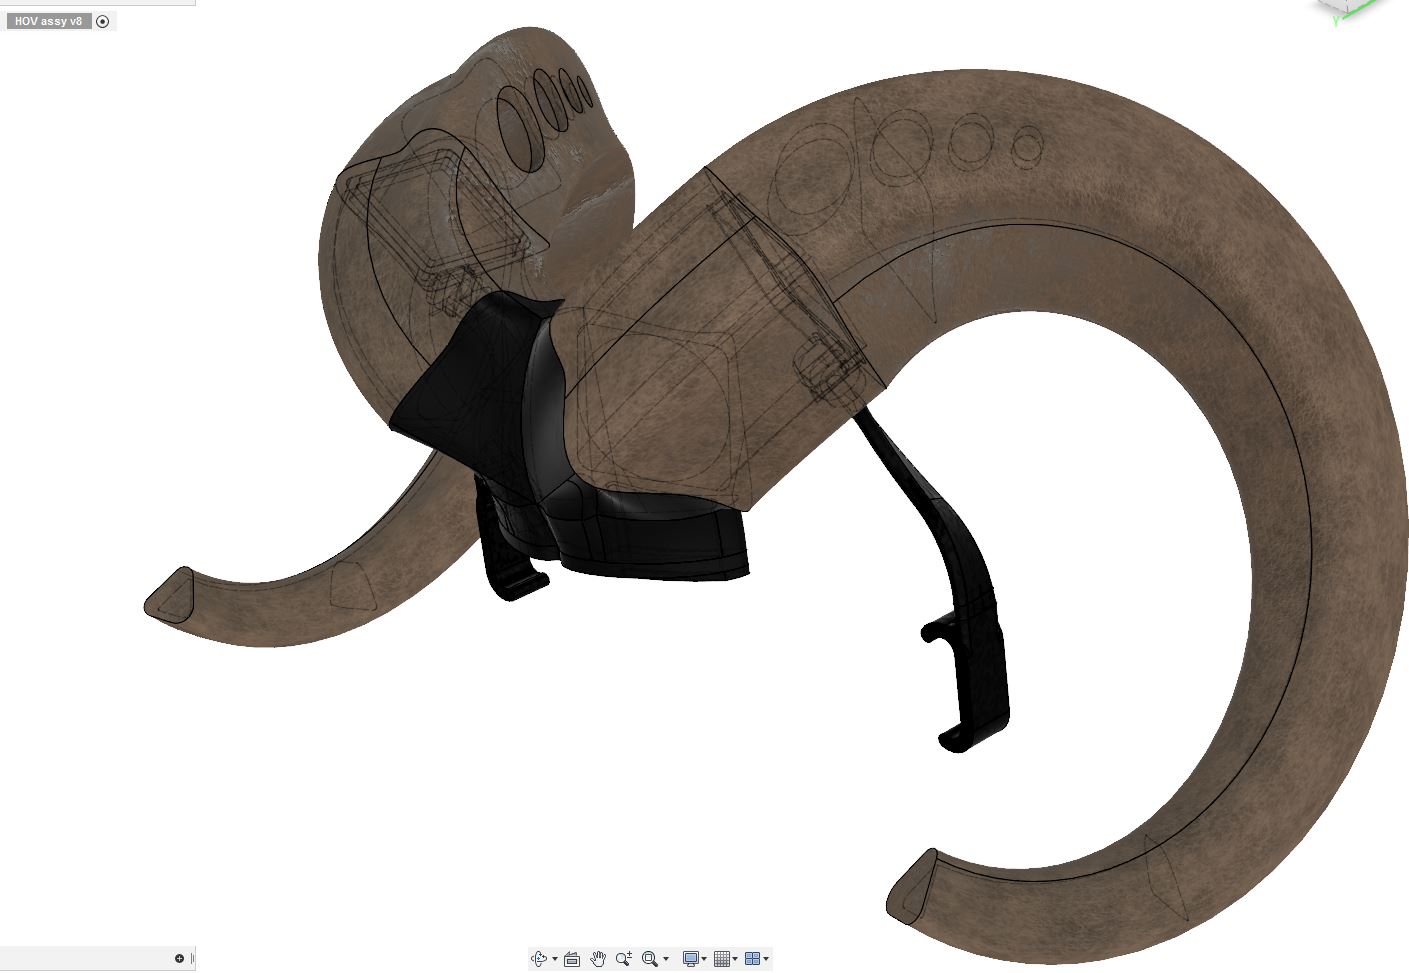
Oculus Horns of Cooling
prusaprinters
<p>Tiefling horns to go with your Oculus Rift. These magical items bestow a +2 saving throw against heat damage. These also impart +2 Charisma when interacting with a Geekubus (but -2 Charisma for all other creatures). The magical effect comes from two 40x40x20 fans - one located in each horn which direct a cool breeze into the helm of the wearer.</p> <h3>Print instructions</h3><h3>Category: Toy & Game Accessories Print Settings</h3> <p><strong>Printer Brand:</strong> Solidoodle</p> <p><strong>Printer:</strong> <a href="http://amzn.to/2nz3pIE">Solidoodle 3</a></p> <p><strong>Rafts:</strong> Yes</p> <p><strong>Supports:</strong> Yes</p> <p><strong>Resolution:</strong> 0.3mm layer height</p> <p><strong>Infill:</strong> 50%</p> <h3> Post-Printing</h3> <p><strong>Parts needed</strong></p> <p><em>Note</em> This project requires cutting into the Oculus faceplate insert.</p> <p>Parts needed:<br/> 1) Two 40x40x20 fans. Spend a few dollars more for the nice, quiet ones. I first used a set of $4 40x40x10 fans and they were unable to move any noticeable air and made a lot of noise when I turned my head due to the gyroscopic loading on the bearings. I ended up with Noctua NF-A4x20 and they were night and day better. Barely audible but still created a nice air flow. The extra 10mm width is important since the air path is somewhat restricted - 10mm fans really don't do well with any static pressure.<br/> 2) Heat shrink tubing<br/> 3) Wire<br/> 4) Connectors<br/> 5) Power supply (5V or 12V depending on the fan chosen)</p> <p>Other tools needed:<br/> 1) Soldering Iron<br/> 2) Drill<br/> 3) Coping saw<br/> 4) Sharpie</p> <p><strong>Printing</strong></p> <p>You will need to print one each of the base, horn, and support as-is and one each of the horn and support mirrored (Hint Gcode M579 can be use to avoid reslicing). All will need supports.</p> <p><img src="https://media.prusaprinters.org/media/prints/15141/images/142260_4f8221d8-5462-4426-9f52-8bca0216b357/20180723_142114_15141.jpg" width="800"/><br/> <img src="https://media.prusaprinters.org/media/prints/15141/images/142261_b14331a3-fba5-4b86-9f68-5770b21137f1/20180722_141952_15141.jpg" width="800"/></p> <p><em>Printing</em></p> <p><strong>Wiring</strong></p> <p>If you use a 4 wire fan like the Noctua, you only need the first two wires (power and ground) but I went ahead and brought out the fourth as well in case I am compelled to add a PWM generator to provide speed control at a later date.</p> <p>After printing the base fish the wires through and join the power and ground to a connector of your choice. Press fans in place allowing them to follow the profile around to their seeat.<br/> Apply power to test. I am currently using an AC wall adapter and a long wire to power mine. Plan to explore tapping into the 5V coming in on the Oculus cable in the near future but that is a later project.</p> <p><img src="https://media.prusaprinters.org/media/prints/15141/images/142262_e1a13fae-4556-465d-96a3-c72bd8d20cca/20180804_143249_15141.jpg" width="800"/><br/> <img src="https://media.prusaprinters.org/media/prints/15141/images/142263_c64d799f-ad50-4471-aed3-e70abe5e89d4/20180804_143436_15141.jpg" width="800"/><br/> <img src="https://media.prusaprinters.org/media/prints/15141/images/142264_abb067fb-4339-41e1-9c5e-a426b6dfe062/20180805_045628_15141.jpg" width="800"/></p> <p><em>Wiring</em></p> <p><strong>Test fit</strong></p> <p>Once the fans are installed, install the two supports and test fit it to your Oculus Rift. Bring it straight down and snap the two supports over the headband to secure.</p> <p><img src="https://media.prusaprinters.org/media/prints/15141/images/142265_5eb9fef9-ebc9-4e37-910f-1001e4666c07/20180805_050829_15141.jpg" width="800"/></p> <p><em>Test fit</em></p> <p><strong>Cutting air passages in faceplate</strong></p> <p>An opening will need to be cut in the Oculus faceplate insert to allow the air to pass. I did this in four steps:<br/> 1) Use the sharpie to mark the area to be removed<br/> 2) Use a knife to cut away the rubber at the interface<br/> 3) Use a drill to drill a pilot hole<br/> 4) Use a coping saw to cut the remaining.</p> <p><img src="https://media.prusaprinters.org/media/prints/15141/images/142266_fd417117-0af8-45b1-8130-60e0978a803e/20180805_065603_15141.jpg" width="800"/><br/> <img src="https://media.prusaprinters.org/media/prints/15141/images/142267_fdeecf8b-35e4-40d6-b09d-e13dd1b7a7ae/20180805_072019_15141.jpg" width="800"/></p> <p><em>Cutting air passages in faceplate</em></p> <p><strong>Modifying Rift Lens Adapter (if used)</strong></p> <p>If you are using a Rift Lens Adapter by @jegstad, you will also need to provide an air passage through them. You can try cutting into your existing or just print out a new insert from the variant I uploaded here:</p> <p><a href="https://www.prusaprinters.org/prints/15142-vented-rift-lens-adapter">https://www.prusaprinters.org/prints/15142-vented-rift-lens-adapter</a></p> <p><img src="https://media.prusaprinters.org/media/prints/15141/images/142268_26ff66a1-5453-488a-8893-160c745ed7ce/20180805_130041_15141.jpg" width="800"/></p> <p><strong>Add horns</strong></p> <p>Glue the horns in place and you are done! Snap the modified faceplate back into the Rift followed by your Horns of Coolness. Power it up and enjoy!</p> <p><img src="https://media.prusaprinters.org/media/prints/15141/images/142269_bd45ed3b-b935-4150-b5b0-77f661b4f3de/20180805_131019_15141.jpg" width="800"/><br/> <img src="https://media.prusaprinters.org/media/prints/15141/images/142270_dd3faf79-32e4-432a-ba46-6d57f4e0adb6/20180805_131124_15141.jpg" width="800"/></p> <p><img src="https://media.prusaprinters.org/media/prints/15141/images/142271_654c2304-63f0-46da-b512-3367dfa0620d/20180805_124217_15141.jpg" width="800"/></p> <p><em>Also makes a nice Oculus Touch holder. ;-)</em></p>
With this file you will be able to print Oculus Horns of Cooling with your 3D printer. Click on the button and save the file on your computer to work, edit or customize your design. You can also find more 3D designs for printers on Oculus Horns of Cooling.
