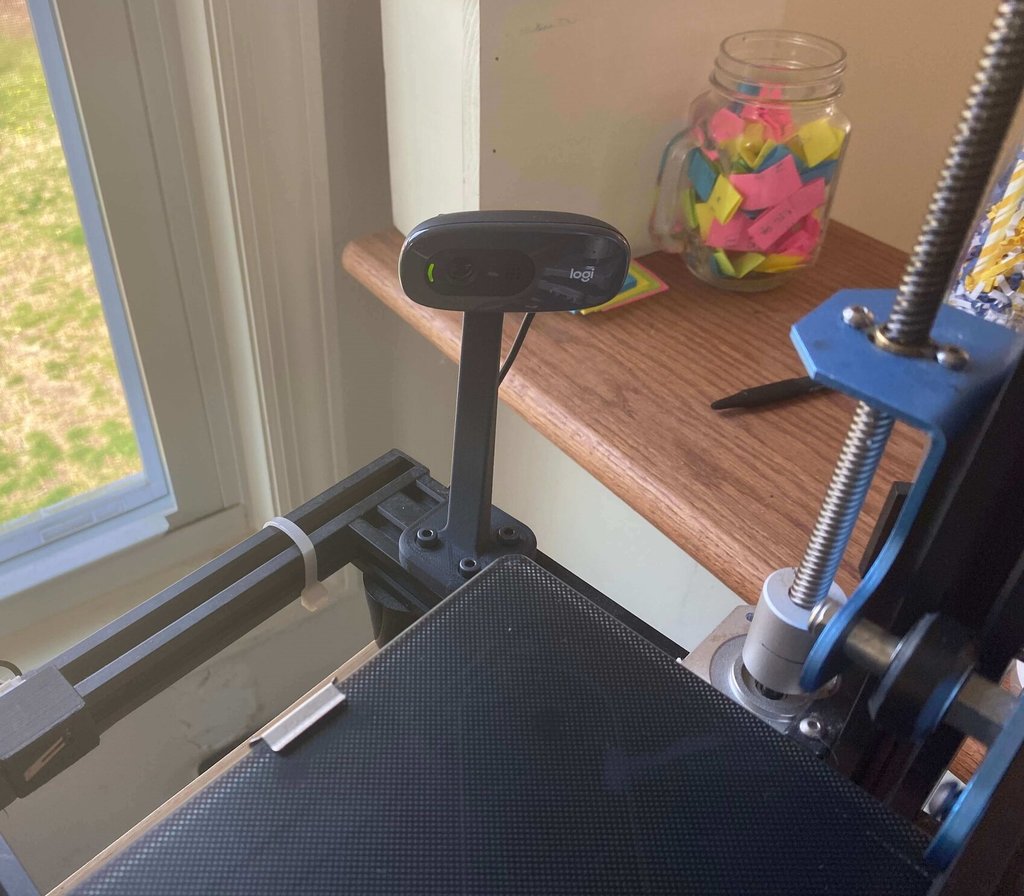
Octoprint Webcam Mount for Logitech C270 and any V Slot 3D Printer
thingiverse
I wanted to mount a webcam to my 3D printer to monitor prints and take timelapses, but none of the webcam mounts for 3D printers out there seemed to have all the requirements I wanted, so I made my own! Here are all the design features I took in mind when designing this thing: - I wanted to be rigid and 1 piece (there are some mounts out there that are articulable and are composed of many links, but I didn't want to get into building one because they are usually flimsy (subject to vibrations), they sag over time, and they require you to have a lot of hardware (nuts and bolts) to make them. Not to mention the fact that you will change where the camera is pointing every time you bump it, move the printer, etc. - I wanted it to be able to be printed without supports. - I wanted it to be mounted securely (no vibrations for reliable webcam feed), but also with the least amount of hardware required to assemble it. This print reuses the existing camera shaft in the Logitech C270, so all you need are 4 M4 V-Slot nuts (or 4 nuts with the 3d printed V-slot adapter) and 4 12mm long M4 bolts. - I wanted it to be compatible with most 3d printers, and it is compatible with any 3D printer that uses 20x40 mm aluminum extrusion at the bottom, which are most of them (i.e. Ender 3, CR10, etc). - I wanted the camera feed to give you a good view of the 1st layer to be able to know if you have to intervene or not at the beginning of ever print. - I wanted the mount to be able to be located at the back of the printer, so it is not on your way when you service/remove parts etc. - I wanted it to have a low profile (not portrude inside the printing area, or outside the footprint of the printer). That way you can just "set it and forget it" and not even know its there. ASSEMBLY: I recommend hooking the camera to the mount before you mount it on the printer. The camera has a couple of silicone covers where the shaft to rotate it up and down is. Remove the covers from both sides, they're glued on. On one side you will see a small Philips screw. Unscrew it, and now you can push the shaft out of the mount. Now insert that same shaft onto the mount you just printed (it's keyed, so it only goes in one way) and push it through the camera. Screw the tiny screw back on, and you're set! All you have to do now is slide at least 1 V-Slot nut onto your printer fraim rails (the aluminum extrusion) and bolt it on with a bolt (recommended 12mm in length). I do recommend having it bolted down with 3 bolts though. Due to the geometry of the mount, the fourth bolt is tricky to tighten, but you are not likely to notice any difference if you just skip that one. NOTE: This mount was designed with the CR10 - V2 printer in mind, but it is likely to work with your printer. Depending on your printer size/shape, the camera might not be pointing straight at the middle of the build plate, though it is unlikely. I do not have access to any other printer at the moment, so I can't tell you if it works with yours, but if it doesn't and you want me to edit this thing to work with yours we can work together prototyping an edited version. CUSTOM MODELS: This print is highly parametric in its design. If enough people want me to edit this and make the camera aim at a different angle or different height, let me know and I'll post and edited version.
With this file you will be able to print Octoprint Webcam Mount for Logitech C270 and any V Slot 3D Printer with your 3D printer. Click on the button and save the file on your computer to work, edit or customize your design. You can also find more 3D designs for printers on Octoprint Webcam Mount for Logitech C270 and any V Slot 3D Printer.
