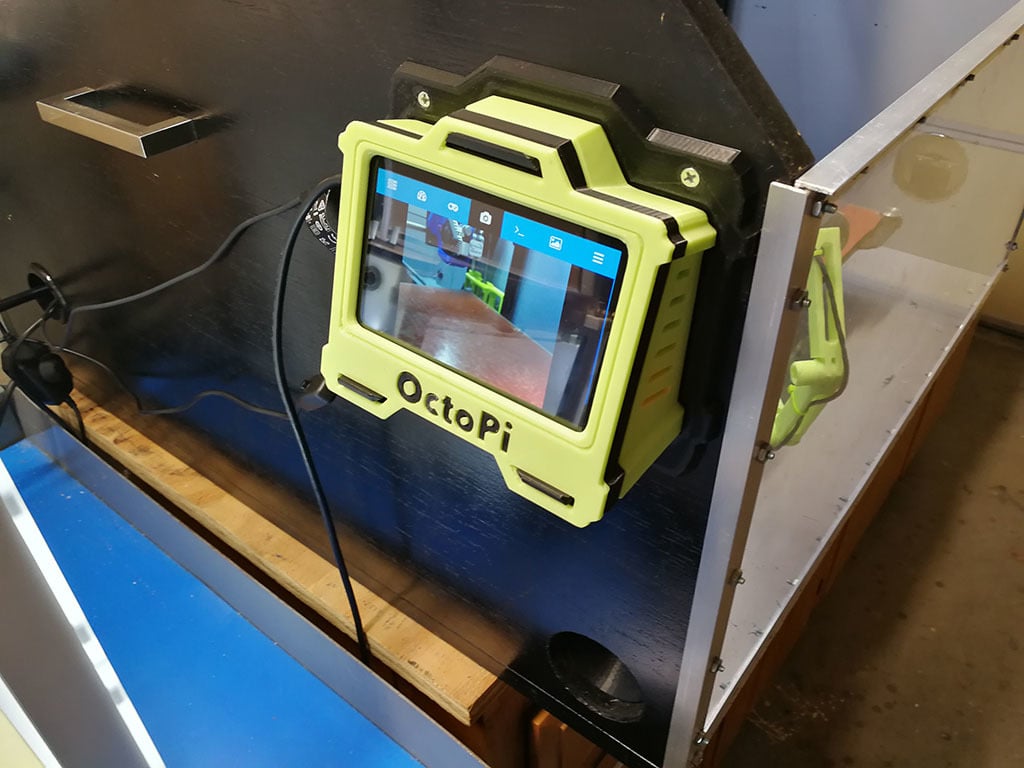
OctoPi 5" Touch Screen Enclosure
thingiverse
Enclosure for a 5" OctoPi Touch Screen I attach this case to my Lulzbot Taz 6 and Ultimaker 2+ for touchscreen control via Octoprint. The design allows the enclosure to sit on a flat surface or use the included mounting bracket to attach to a vertical surface. This case is designed to be printed in two colors, accenting the front markings and complementing the Ultimaker aesthetic. [https://imgur.com/q2D6kRR](https://i.imgur.com/q2D6kRR.jpg) [https://imgur.com/TGZx7AV](https://i.imgur.com/TGZx7AV.jpg) The screen is fantastic, being the perfect size for a touch controller. It is easy to assemble as it connects with only one ribbon cable and the Pi mounts directly to the back. The screen runs without any extra drivers and is powered by the DSI connection. I bought mine on Amazon, but it can also be found on eBay: [Amazon: 5 Inch Capacitive Touch Screen W DSI Connector](https://www.amazon.com/gp/product/B07KKB5YS9/ref=oh_aui_detailpage_o05_s00?ie=UTF8&psc=1) [eBay: 5 Inch TFT Capacitive Touch Screen 800x480 DSI Connector](https://www.ebay.com/itm/5-Inch-TFT-Capacitive-Touch-Screen-800x480-DSI-Connector-for-Raspberry-Pi-2-3-3B/312318563583?hash=item48b7a314ff:g:5s8AAOSwmUBb65Aq:rk:5:pf:0) Note: The screen includes directions on how to configure the display orientation, but does not detail how to orientate the touch controller too. If rotating the screen display use both of these lines in the Pi config file: display_rotate=2 lcd_rotate=2 I wanted all cables to exit out one side only, so I added a 90-degree mini USB adapter to route the power cable the same direction as the USB cables. [90 Degree USB Male to Micro Female Plug Adapters](https://www.amazon.com/gp/product/B01C6031MA/ref=oh_aui_detailpage_o06_s00?ie=UTF8&psc=1) UPDATE: The cable and PSU below will provide better power so Pi does not display a lightning bolt in the right corner indicating the Pi's power supply is marginal or insufficient for its requirements. This solution includes a slightly thicker cable, fewer connections, and better PSU. [5 ft USBMicro to USB Right-Angle](https://www.adafruit.com/product/1318) [ZMI V2 Charger Wall Adapter for iPhone](https://www.amazon.com/gp/product/B06XRLQHSY/ref=ppx_yo_dt_b_asin_title_o00_s00?ie=UTF8&psc=1) There are several YouTube tutorials online, and this is the one I used by Joe Mike Terranella. [OctoPrint Tutorial Series : Video 1 - OctoPi Setup and Configuration](https://www.youtube.com/watch?v=vKmLAnb4KrA&list=PLGc0ilxmLZs8UwoQMdpOkYF4gZMMu_Qro)
With this file you will be able to print OctoPi 5" Touch Screen Enclosure with your 3D printer. Click on the button and save the file on your computer to work, edit or customize your design. You can also find more 3D designs for printers on OctoPi 5" Touch Screen Enclosure.
