Nozzle Box - Hex
prusaprinters
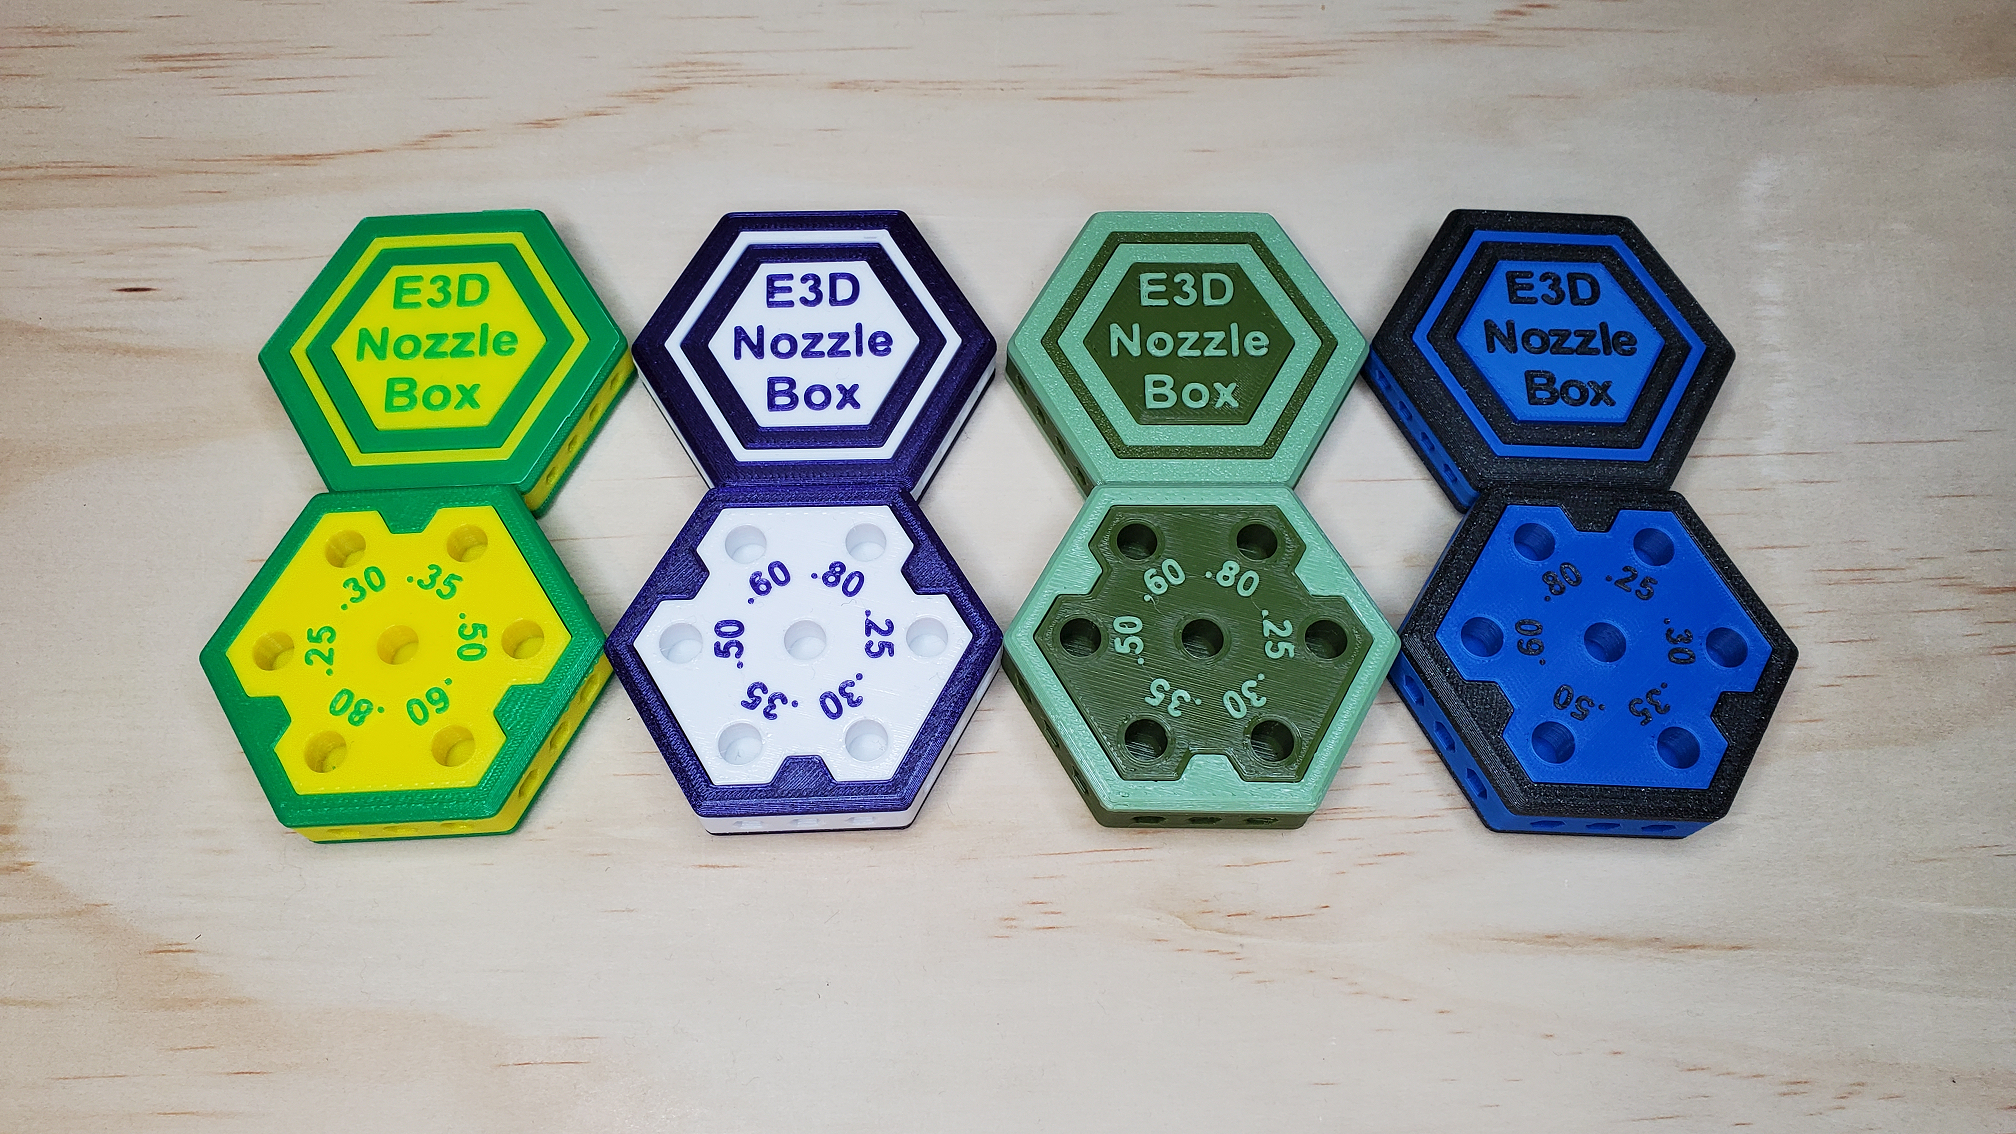
<p>This is a nozzle box meant to hold the E3D V6 nozzle fun pack. This is a medium-hard skilled print as it requires tight tolerances and makes use of embedding both magnets and other 3D printed pieces. I have created a tutorial below on how to print this nozzle box with some quick tips along the way. I strongly suggest you go through it below before printing parts. </p><p><strong>Note:</strong> If there is interest, I plan on updating with some more customization (different Logos, slightly different designs etc…). I did print these on both the Prusa Mini and MK2.5S and came out great following the steps below. If there are any issues with files or pieces, please do comment. </p><h4> </h4><h4> </h4><h4>Choosing your colours</h4><figure class="image"><img src="https://media.prusaprinters.org/media/prints/131510/rich_content/473d0030-51c5-4761-9d5d-1aa9c2ee462d/c.jpg#%7B%22uuid%22%3A%22ceed2f4c-b383-463e-8418-f1a31929a0d8%22%2C%22w%22%3A1801%2C%22h%22%3A1005%7D"></figure><p>I suggest choosing two colours that contrast well. As you'll see in the above photo I tested out the files using a few different colours and different materials (PLA and PETG). Incase you were curious of the exact filaments and colours I used, they are listed below.</p><ul><li>Amaz3d Green [PLA] and Hatchbox yellow [PLA]</li><li>Prusament Galaxy Purple [PLA] and Kodak White [PLA]</li><li>Prusament Pistachio Green [PETG] & Filaments.ca Olive Drab [PETG]</li><li>Prusament Galaxy Black [PLA] & Ecotough [PLA] 2.0</li></ul><p><strong>Note:</strong> Certain files will need to be printed in different colours, refer to photos for reference.</p><p> </p><h4>Printing the files</h4><ul><li>Ensure a to use a layer height of 0.20 for all files (important for tolerances of embedding printed pieces).</li></ul><p><strong>1. </strong>Note that you <strong>cannot</strong> print the “Main Body” and "Top Body" until you have printed the embedded top and bottoms pieces. As such I suggest by starting with printing these 2 files which will be embedded later on. </p><ul><li>“Embedded Top” and “Embedded Bottom”</li></ul><figure class="image image_resized" style="width:80.89%;"><img src="https://media.prusaprinters.org/media/prints/131510/rich_content/6ac52b28-28d3-4283-bec2-a53252aee1df/embedded-pieces.jpg#%7B%22uuid%22%3A%2212d5074c-9592-4310-9482-161fc92ed967%22%2C%22w%22%3A3165%2C%22h%22%3A1702%7D"></figure><p>It is <strong>extremely important</strong> that these pieces have no warping while printing. Reason being is that these will be inserted into another print with tight tolerances. The following are some precautions I took to ensure good first layer adhesion and avoiding warping. </p><ul><li>Print one file at a time to minimize time on print bed</li><li>Freshly clean your print bed with soapy water</li><li>Adjusted elephants foot compensation (in Prusa Slicer advanced mode) to 0.05 from the standard 0.2 (increases first layer surface area on the build plate)</li><li>Ironing on top most layer </li><li>Add a brim if necessary</li><li>Lastly Inspect both pieces top and bottom for any warping or bits of plastic to remove</li></ul><p> </p><p> </p><p><strong>2. </strong>Next with that same filament already loaded start printing these next 3 files together and swap to the other colour for the text on top (add colour change for the final three layers of the print).</p><ul><li>“Top Part A”, “Top Part B” and “Top Insert”.</li></ul><figure class="image"><img src="https://media.prusaprinters.org/media/prints/131510/rich_content/4a68ab0a-246e-4e44-a4ff-d7e13065b8eb/extra-for-priming.png#%7B%22uuid%22%3A%229216a985-45d9-40ad-8611-bb8a97e48860%22%2C%22w%22%3A1602%2C%22h%22%3A1037%7D"></figure><p> </p><p><strong>Note: </strong>A small tip when swapping filament colours I tend to add an additional item so that after swapping filaments, it “primes it". As in generally the first few seconds after changing colours usually does not print well ruining the top text (especially with PETG). You can preview the printing sequence in PrusaSlicer for the first layer to see where it will print first after changing colours (See below).</p><p> </p><figure class="image"><img src="https://media.prusaprinters.org/media/prints/131510/rich_content/97824c7c-2af0-48ea-9fd6-e4f922f0b6b6/preview.png#%7B%22uuid%22%3A%2251b54dfd-66af-4205-9049-3cf5ab074dbc%22%2C%22w%22%3A1476%2C%22h%22%3A985%7D"></figure><p> </p><p><strong>3.</strong> Now print the “Main insert” </p><p>Same idea as above, this time I added a block to prime the first layer of the filament swap. You can find this purge block in the file folders below if you would like to use it too. </p><figure class="image"><img src="https://media.prusaprinters.org/media/prints/131510/rich_content/099017a8-d72d-42c3-b2f0-317d7a11b745/main-insert.jpg#%7B%22uuid%22%3A%227057cd48-3686-43e2-abf3-9d3132b9a8a5%22%2C%22w%22%3A2880%2C%22h%22%3A1743%7D"></figure><p> </p><p><strong>Note: </strong>The “Main Insert” and “Top Insert” have an offset of 0.15mm to slide into the main parts. This worked really well on both my Mini and MK2.5S. Incase you need a bit more clearance, I added another file for each with an offset of 0.20mm.</p><p> </p><p> </p><h3>Printing the Main and Top bodies</h3><p>Also really important that there is no lifting/warping for these 2 main pieces. Follow similar steps above for good first layer adhesion.</p><p> </p><h4>Embedding Magnets and 3D Printed Pieces</h4><h5> </h5><h5>Tolerances</h5><p><i><strong>Magnets</strong></i></p><p>Next we can print the two Main pieces that will require embedding both magnets and the 3D printed pieces mentioned above. I made two different magnet sizes available (5x2mm and 6x3mm) to increase chances you may have one of them on hand. I <strong>strongly suggest</strong> using the 6x3mm as it provides a nice strong connection.</p><p>You will also notice that I have the same files containing two different tolerances in the file name. I hate using super glue while printing, so I like to use tight tolerances to embed my magnets using friction. The other file has a lower tolerance incase you can't print the tighter tolerances. </p><p>If you want to try using the tight tolerance versions, I suggest that you print my magnet tolerance calibration: <a href="https://www.prusaprinters.org/prints/137418-magnet-calibration">https://www.prusaprinters.org/prints/137418-magnet-calibration</a> first before printing.</p><p>I struggled with tight tolerances for the galaxy filaments as I found the sparkles or particles seemed to affect embedding the magnets. I went with the loose tolerances and using super glue when printing these.</p><p> </p><p>For the magnets I have the "tight" tolerance set to .07. and the "loose" tolerance set to .20</p><p>6mm</p><ul><li>Tight = 6.07 mm size holes</li><li>Loose = 6.20 mm size holes</li></ul><p>5mm</p><ul><li>Tight = 5.07 mm size holes</li><li>Loose = 5.20 mm Hole sizes</li></ul><p> </p><p><i><strong>3D printed pieces</strong></i></p><p>The standard “Embedded Top” and “Embedded Bottom” files have a tolerance of 0.25mm, this should fit nice and snug as there is a bit of bulge (similar to a hull line when printing a Benchy) when going from the thick base to thin walls of the main body and top body (about halfway up in photo below). My tolerance already accounts for this so no need to worry if you see this when printing. Again expect a tight press fit in all corners to be laying flat but incase the standard files wont fit I have also added some additional tolerance files just incase.</p><figure class="image"><img src="https://media.prusaprinters.org/media/prints/131510/rich_content/a1ad00e8-5e89-4598-b56d-70507a51e1df/hull-line.png#%7B%22uuid%22%3A%22414d8f43-0fd9-4719-9665-5243aee8fd28%22%2C%22w%22%3A1361%2C%22h%22%3A891%7D"></figure><p> </p><p> </p><p><strong>Pausing to insert </strong>“Embedded Top”<strong> piece onto the </strong>“Top Body”</p><figure class="image"><img src="https://media.prusaprinters.org/media/prints/131510/rich_content/c843e5c1-7cd4-4d03-b514-158df7877d8f/top-pause-embedded-piece.jpg#%7B%22uuid%22%3A%22d217438e-a516-4e1e-a938-48ab88276fb8%22%2C%22w%22%3A2775%2C%22h%22%3A1797%7D"></figure><p> </p><ul><li>Notice orientation of the Top body, flip the orientation 180° when you load the file.</li><li>Pause print in slicer just before it would start printing in mid air, there is a gap of 0.20 between embedded top and and Top body,<ul><li>Ex. If you're printing the <strong>6x3mm magnet</strong> Top body version, right click and pause @ layer 9.20 mm.</li></ul></li><li>This will be a pretty tight fit, you will have to press down decently hard on all corners ensuring it is flat. </li><li>I like to place the side that will be printed on, on the plate for a couple minutes before placing it on the print to warm it up.</li><li>Ensure no gaps below after placing and should align nicely above.</li><li>If there is any lifting off from the bed while the top body is printing there is a good chance this will not work out, use brim if needed.</li></ul><p> </p><p> </p><p><strong>Pausing to insert magnets</strong></p><figure class="image"><img src="https://media.prusaprinters.org/media/prints/131510/rich_content/0cace43b-603a-4d4b-b163-de0da96c63e3/embedded-magnets-top.jpg#%7B%22uuid%22%3A%228ecb5f80-d105-4842-912b-5027cf3f6adb%22%2C%22w%22%3A3252%2C%22h%22%3A2226%7D"></figure><ul><li>In slicer, pause just before the printer will fill the gaps for the magnet holes<ul><li>Ex. If you're printing the <strong>6x3mm magnet</strong> Top body version, right click and pause @ layer 12.40 mm.</li></ul></li></ul><p> </p><p><strong>Top Body finished printing</strong></p><figure class="image"><img src="https://media.prusaprinters.org/media/prints/131510/rich_content/a20224dc-6efe-437a-bd7c-5aae3bae379c/top-finished.jpg#%7B%22uuid%22%3A%22f6122df0-dc3f-4328-96a6-0d2c1a4db266%22%2C%22w%22%3A3348%2C%22h%22%3A2268%7D"></figure><ul><li>Insert and glue the top insert, top parts A & B</li></ul><p><img src="https://media.prusaprinters.org/media/prints/131510/rich_content/234887a0-2303-4944-99ae-c3911a8f4db2/pic12final.png#%7B%22uuid%22%3A%22c79345cb-473d-47bd-8434-72a93efc7001%22%2C%22w%22%3A1124%2C%22h%22%3A778%7D"></p><p> </p><p><strong>Repeat the same process above for the Main body and insert the Main insert</strong></p><p>The Main body will already be in the correct orientation when importing file into slicer.</p><figure class="image"><img src="https://media.prusaprinters.org/media/prints/131510/rich_content/76ba5996-c426-41dd-9ee5-56184aeec1b8/pic4.png#%7B%22uuid%22%3A%2294b4bb4a-3f25-4f64-a29f-d6ea7bee6181%22%2C%22w%22%3A1343%2C%22h%22%3A999%7D"></figure><p> </p><p><strong>All Done!</strong></p><p> </p><figure class="image"><img src="https://media.prusaprinters.org/media/prints/131510/rich_content/13b04494-53d4-4412-b1c5-e5ca53812b05/pic-5.png#%7B%22uuid%22%3A%2258924d87-4070-4658-8d28-8b3c6109062e%22%2C%22w%22%3A1375%2C%22h%22%3A1017%7D"></figure>
With this file you will be able to print Nozzle Box - Hex with your 3D printer. Click on the button and save the file on your computer to work, edit or customize your design. You can also find more 3D designs for printers on Nozzle Box - Hex.