Nozzle Box
prusaprinters
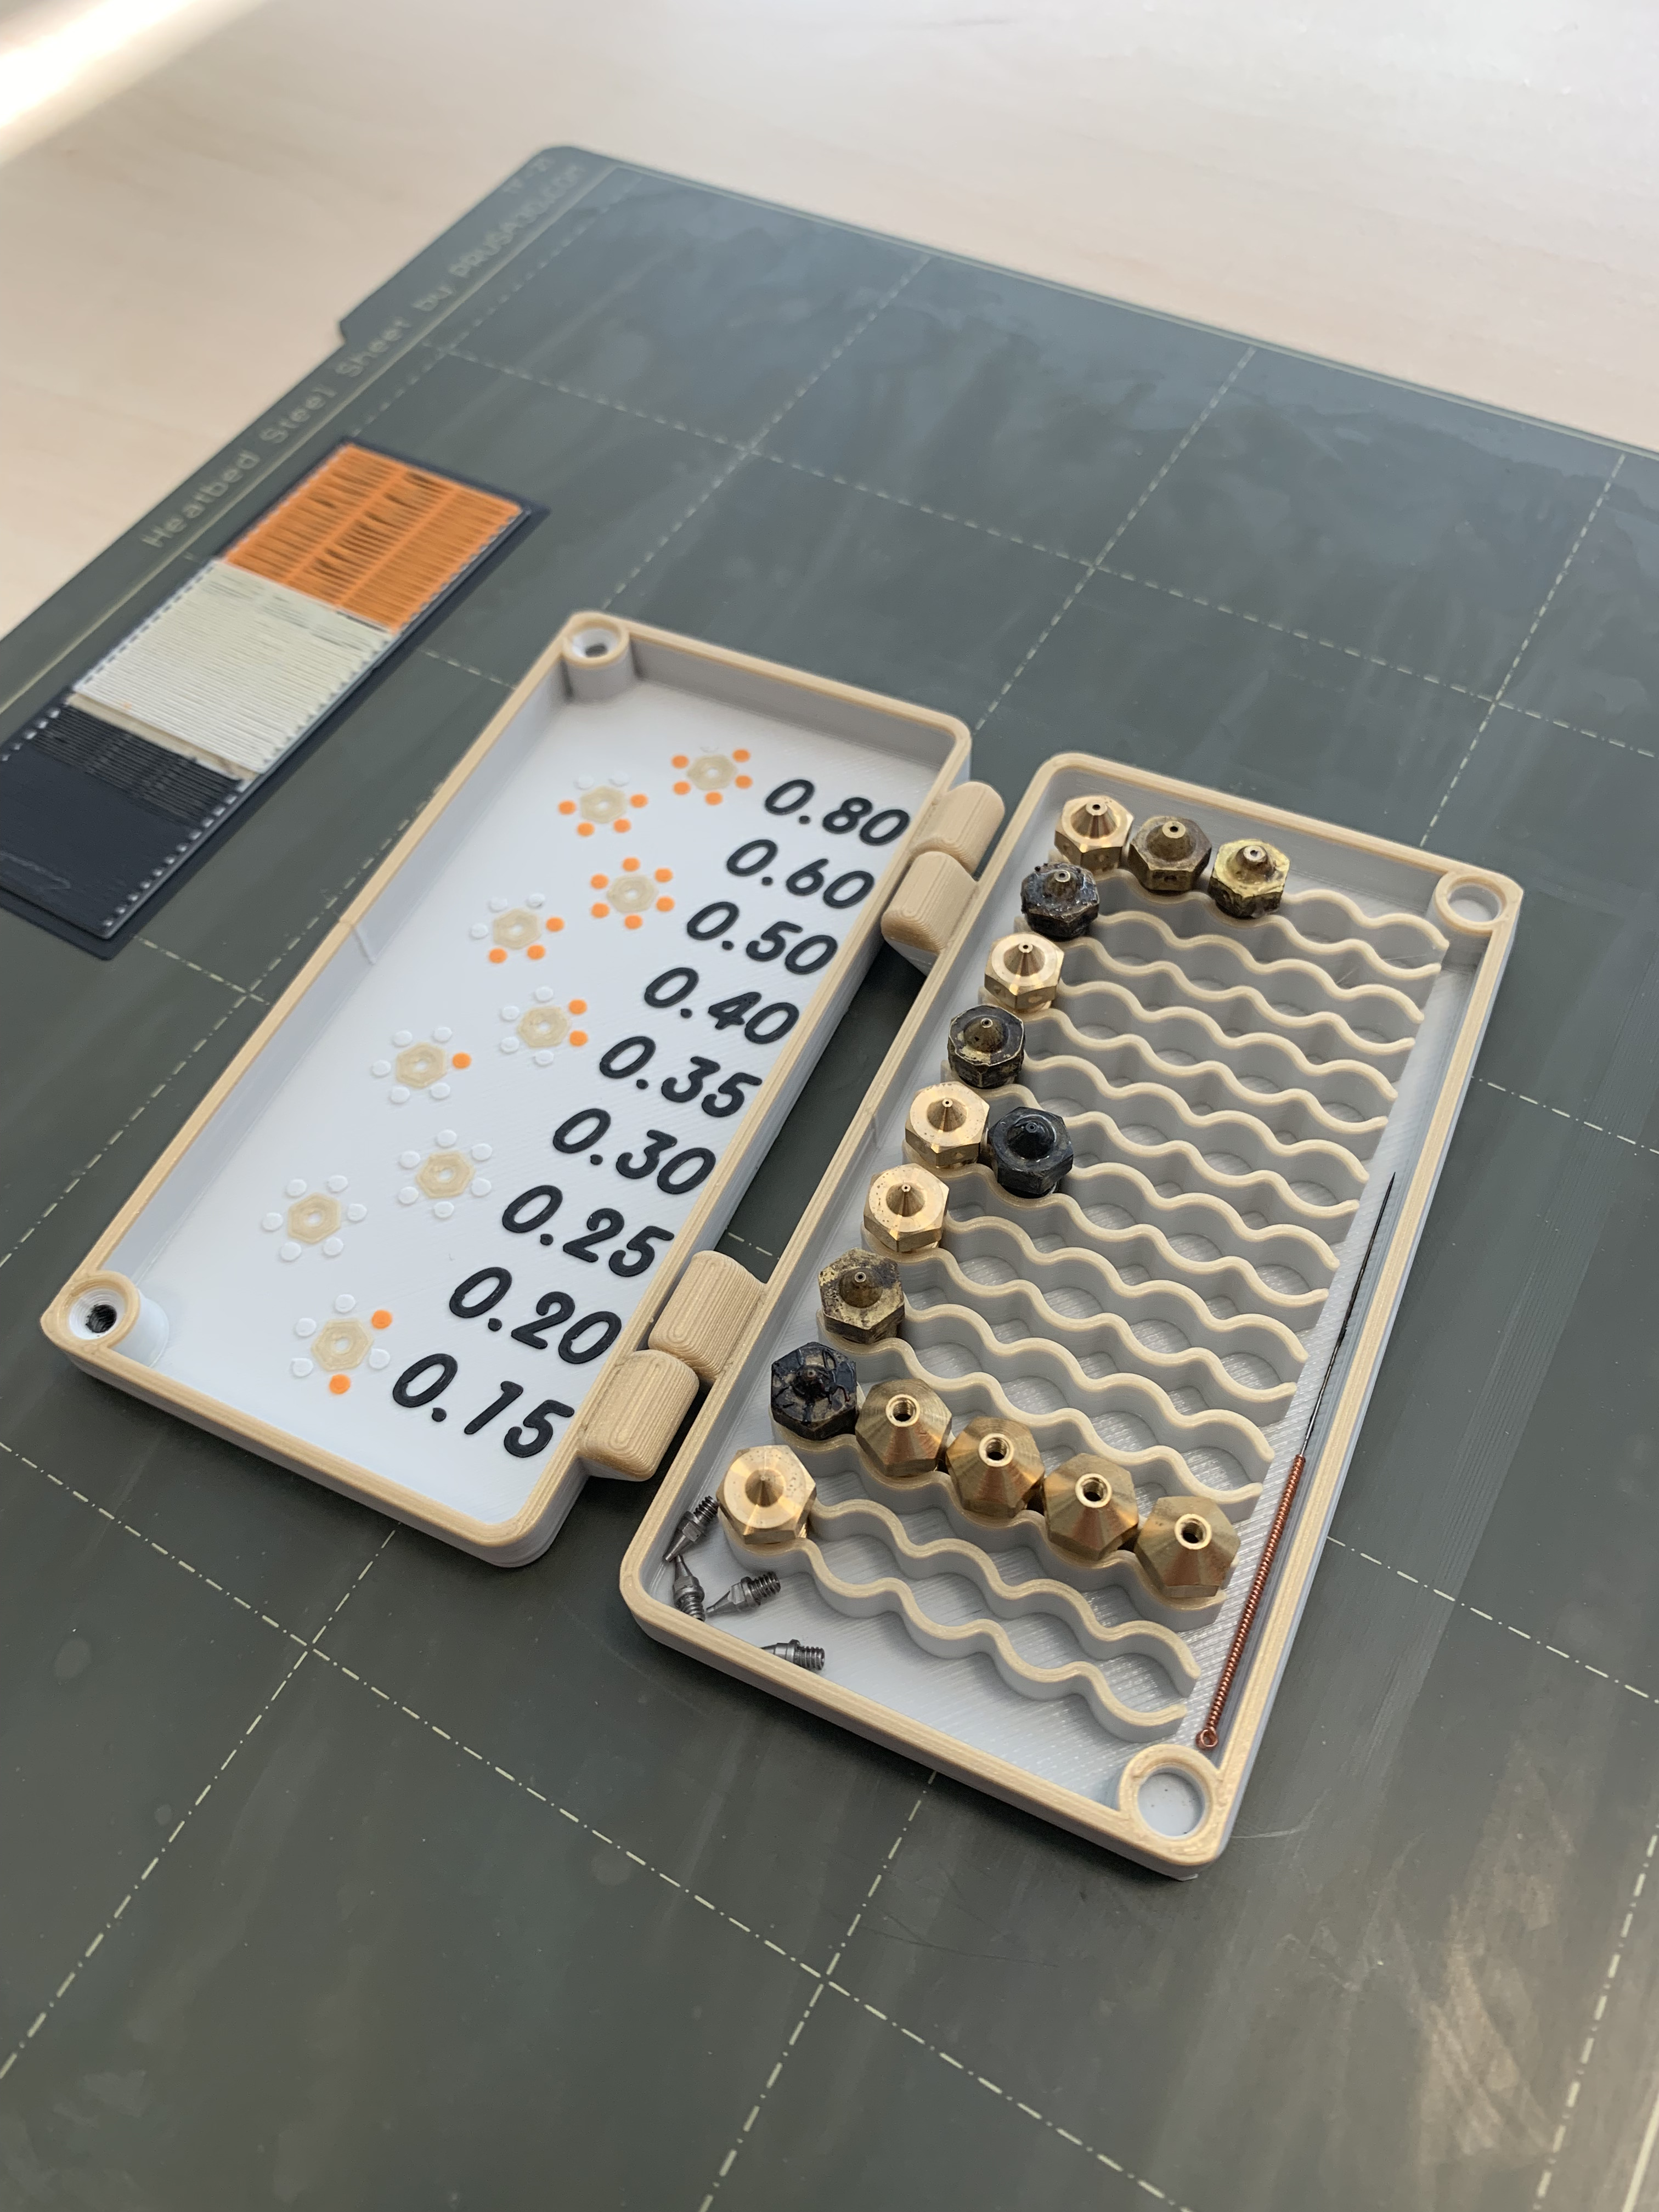
<p><strong>This is a 4-colored nozzlebox and you can print it on any 3D-Printer!</strong></p><p>I printed my Nozzle Box with an Prusa i3 MK3S</p><p> </p><p><strong>You need additionaly:</strong></p><ul><li>2x 5x3mm Magnets</li><li>2x M3x6 Countersink Screws</li></ul><p> </p><p>----------------------------------------------------------------------------------------------------------------</p><p><strong>UPDATE 04.04.2022:</strong></p><p>→ uploaded “NozzleBox_HigherContrast.3mf” / all color accent layers are 0.4mm high</p><p>----------------------------------------------------------------------------------------------------------------</p><p> </p><h4>So what i did in PrusaSlicer:</h4><h5>1. First, add three more extruders:</h5><p>→ go to “<strong>Printer settings</strong>" → “<strong>General</strong>” and set “<strong>Extruders</strong>” to <strong>4</strong></p><h5>2. Add the Tool change G-code:</h5><p>→ go to TAB “<strong>Custom G-code</strong>" and add <strong>M600</strong> in “<strong>Tool change G-code” </strong></p><h5><strong>3. Activate Wipe Tower</strong></h5><p>this was very important to me, because the extruder is not extruding the right amount of plastic after the color change. </p><p>→ go to <strong>“Print settings”</strong> click on TAB <strong>“Multiple Extruders” </strong>and enable the Checkbox</p><h5>4. import the 3mf-file, do not let the slicer recalculate any dimensions of the object, and when asked, if the object should imported as an multi part object, press “Yes” </h5><h5><strong>5. Set the desired color to the parts in the right part-list</strong></h5><p>→ You can click and hold down shift to select a bunch of parts in the list, right click and chose your desired extruder</p><h4>Slice it, than it should look like this:</h4><figure class="image"><img src="https://media.prusaprinters.org/media/prints/154769/rich_content/48ebd575-de75-4cdb-9026-c490b1e6fcf9/sliced.png#%7B%22uuid%22%3A%221c988023-4acc-4a06-85c8-ac4b54fcd2cc%22%2C%22w%22%3A1913%2C%22h%22%3A1157%7D"></figure><h5><strong>→ </strong>i did an extra color change on layer 37</h5><p> </p><h5>6. Print the sliced Gcode, make sure the slicer window is not closed while printing. </h5><h5>Here you can see the color and order of the color changes.</h5><p> </p><h4>Some nice Infos to 3mf files: </h4><p>https://blog.prusaprinters.org/3mf-file-format-and-why-its-great_30986/</p>
With this file you will be able to print Nozzle Box with your 3D printer. Click on the button and save the file on your computer to work, edit or customize your design. You can also find more 3D designs for printers on Nozzle Box.