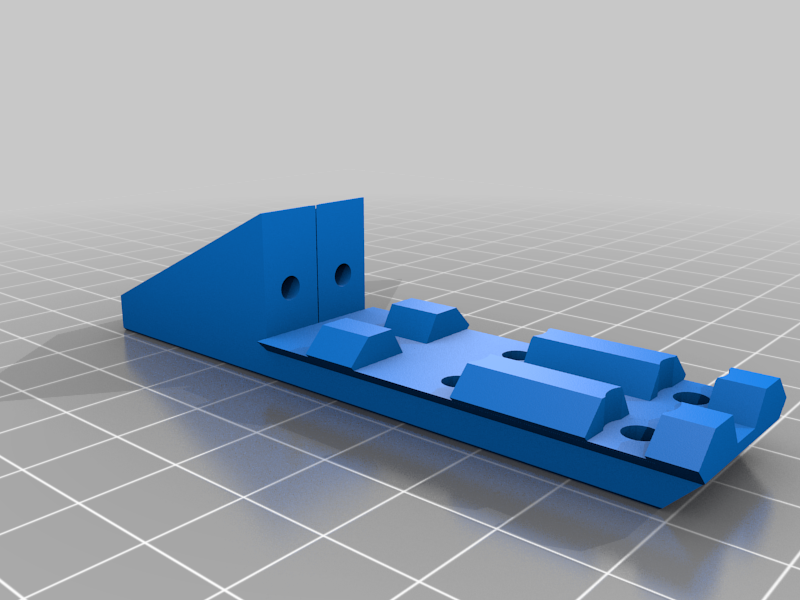
Novritsch SSX-23 Slide Rail for M3x10 screw and protective glass
thingiverse
English version below! Das ist ein weiterer Remix von der Novritsch SSX-23 Slide rail von janmensik. Um die Optik zu schützen habe ich die Schiene verlängert und einen Keil angesetzt um an diesem Eine Plexiglasscheibe zu befestigen welche die eigentliche Linse vor Beschuss schütz. Um die Stabilität etwas zu erhöhen liegt der Keil auf dem vorderen Teil des Schlittens auf. Natürlich ist ein Loch im Keil um die Hop-up-Schraube bedienen zu können. Die Montage am Schlitten erfolgt wie im Vormodell mit 4x M3x10 Schrauben. Das Schutzglas ist in der Ausführung 4mm stark und wurde mit 2x M3x10 Schrauben montiert. Es würden Scheiben mit einer Stärke von bis zu 8mm reinpassen. Bei meiner Variante stehen die Schrauben leider ein klein bisschen über. Ich habe ein bisschen Klebeband zum Schutz vor Kratzern drauf gemacht aber das sieht man kaum noch wenn allen montiert ist. Kann im Grunde ohne Support gedruckt werden. Montage: Das Loch für die Schutzglasschrauben ist 3mm. Für die Leichtgängigkeit einmal nachbohren. Glas zurechtschneiden und in die Position einsetzten. Von vorne mit einem 3mm Bohrer das Glas anbohren, braucht gar nicht viel sein. Glas wieder entnehmen und an den angebohrten Stellen mit einem 2,5mm durchbohlen. In die 2,5mm Löcher mit einem M3 Geschwindeschneider Gewinde schneiden. Montage mit M3 Schrauben. This is another remix of the Novritsch SSX-23 slide rail by janmensik. To protect the optics, I lengthened the rail and used a wedge to attach a plexiglass pane to it, which protects the actual lens from being shot at. In order to increase stability, the wedge rests on the front part of the slide. Of course there is a hole in the wedge to be able to operate the hop-up screw. As in the previous model, it is mounted on the carriage with 4x M3x10 screws. The protective glass is 4mm thick and was mounted with 2x M3x10 screws. Discs with a thickness of up to 8mm would fit in. In my variant, the screws unfortunately protrude a little bit. I put some tape on it to protect it from scratches but it's hard to see when it's all mounted. Can basically be printed without support. Assembly: The hole for the protective glass screws is 3mm. Drill once for ease of movement. Cut the glass and put it in position. Drilling into the glass from the front with a 3mm drill doesn't need to be much. Remove the glass again and punch through the drilled areas with a 2.5mm. Tap the 2.5mm holes with an M3 tap. Mounting with M3 screws.
With this file you will be able to print Novritsch SSX-23 Slide Rail for M3x10 screw and protective glass with your 3D printer. Click on the button and save the file on your computer to work, edit or customize your design. You can also find more 3D designs for printers on Novritsch SSX-23 Slide Rail for M3x10 screw and protective glass.
