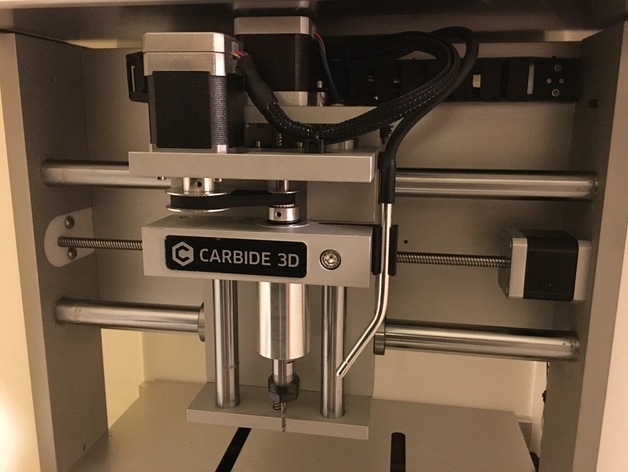
Nomad 883 Pro Air Mod
thingiverse
The Air-Holder is a brilliant innovation posted by Danny Harper for the SO3. Modified specifically for the Nomad, it's an ingenious tube grip that holds the custom air nozzle and attaches to the existing Nomad spindle clamp. Learn how to create cutting-edge projects in my micro-fab lab! Check out the tutorials and get inspired! Support the creation of more videos by visiting: http://www.diy.engineering/sponsor Here are the essential components I used for this modification: Air-Pump: Apollo Horticulture 35 Watt 40-LPM Commercial Air Pump with 6 Outlet Plastic Divider Air Nozzle: Campbell Hausfeld MP5143 Pistol Grip Blowgun Hose: Lee's Sleek Airline Tubing, 8-Foot, Black Follow these steps to install the Air-Holder on your Nomad: 1) Print the Air-Holder part using a 3D printer. 2) Remove the back and top panel of the Nomad 883 (remove 9x 3 mm cap head screws + 2x 6 mm button screws, remove the back, raise the front door, and slide the top out). 3) Take off the press-fit aluminum nozzle from the pistol grip blow gun. Protect the tube with tape, use pliers to twist it, then pull it straight out carefully. 4) Feed the tube through the drag-chain starting at the spindle side. 5) Pull excess tubing through the electronics access port (leave ~10" excess tube on the spindle side). 6) Lightly zip tie the tube to the spindle motor wiring at the entrance of the drag chain. 7) Drill a 1/4" hole in the back panel at the desired location for the tube to exit the machine. 8) Install the top panel. 9) Run the line through the back panel hole (feed through grommet if used). 10) Install the back panel (start with 2x 6 mm button screws at the bottom, then install 9x 3 mm cap head screws). 11) Go to the spindle-side and cut the tube slightly longer than the wires going to the spindle motor. 12) Remove the 6 mm spindle clamp bolt (note the torque of the bolt for reassembly). 13) Apply neoprene foam to the air-holder to ensure a snug fit without interfering with the spindle clamp. 14) Install the 6 mm spindle clamp bolt (apply noted torque from step 12). 15) Heat the end of the tube and install the nozzle into it (insert 1/2"). 16) Snap the nozzle into the air-holder and adjust its position and angle. 17) Confirm clearance in all positions of the spindle, adjust as needed. 18) Heat the opposite end of the air line to install the air pump, insert it on the barbed pump connector. 19) Turn on the pump prior to milling operations for a nice chip-clearing solution. 20) Now go thank Danny Harper for the idea!
With this file you will be able to print Nomad 883 Pro Air Mod with your 3D printer. Click on the button and save the file on your computer to work, edit or customize your design. You can also find more 3D designs for printers on Nomad 883 Pro Air Mod.
