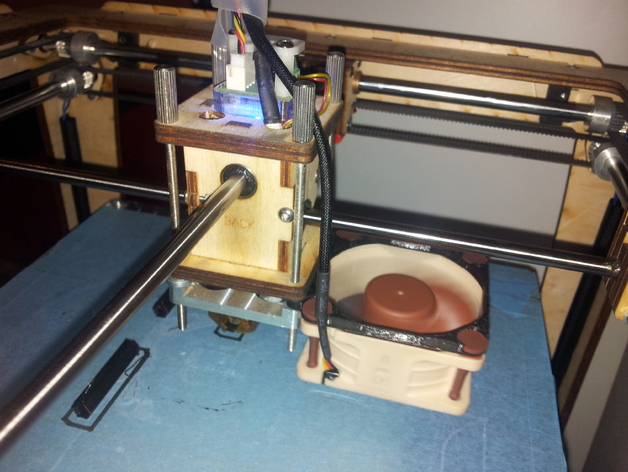
Noctua Fan Holder
thingiverse
Embrace innovation with the new, ditching the old. Introducing a fan holder customized for Noctua NF-A6x25 fans, slightly larger than its predecessor but without issues. The enhanced Noctua fan significantly boosts airflow over objects. Vibration pads integrated within the design provide exceptional noise reduction. To upgrade, obtain a Noctua 60mm fan (NF-A6x25 FLX, around $18 on eBay) and these materials: (8x) washers for the hotend. Follow the instructions below: 1. From the Noctua Fan box (part nr.6), take out the 4x Rubber Anti-Vibration Mounts and insert them into the Fan Holder completely. 2. Pass the Rubber Anti-Vibration Mounts through the fan's holes, ensuring proper orientation (refer to photo). 3. Dispose of the old fan. 4. Unscrew the long studding screws (4x) from their positions. 5. Detach the colored horseshoe from beneath the tightener securing the bowden tube. 6. Position the Noctua Fan Holder between the aluminum plate and wooden part 8B. 7. Secure the holder with long studding screws (2x). 8. Fill the other side of the aluminum plate with washers until it aligns with wooden part 8B, then screw in the long studding screws. 9. Push the bowden tube deeper into place. 10. Reinstall the colored horseshoe beneath the tightener to secure the bowden tube. 11. Disconnect the connector of the Ultimaker's extension cable from its pins. 12. Connect the Purple wire to the Red wire and the Blue wire to the Black wire on the Noctua Fan connector. 13. Restart the Ultimaker or reset 'Sleep' on the Ulticonroller, and you're all set!
With this file you will be able to print Noctua Fan Holder with your 3D printer. Click on the button and save the file on your computer to work, edit or customize your design. You can also find more 3D designs for printers on Noctua Fan Holder.
