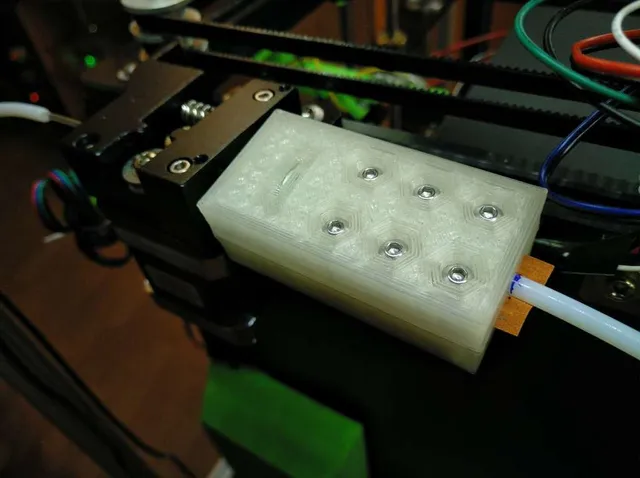
No-Slip Bowden Clamp
prusaprinters
NOTE: PRINT TWICE AND MOUNT BOTTOM TO BOTTOM. (Pictures are from previous blocky prototype) I was fed up with the bowden tube coming loose after a while when the tiny teeth inside the repurposed pneumatic fitting at the extruder outlet broke down from push/retract forces that they weren't designed to handle. So I made this replacement, which uses a M6 screw tube with 4mm inner diameter originally meant for a hotend, a washer, two M6 nuts, eight M3 screws + nuts to tighten everything up, and a piece of sandpaper that locks the PTFE bowden down. Use one layer of sandpaper only, and clamp it as pictured. It'll provide friction on one half of the bowden, and lock itself between the PLA blocks. After a few hours of printing, the bowden has not pulled out at all, and I was able to dial down the retraction length as well. Currently working on an improved version that offers a twist-lock action between bowden clamp and extruder mount so I can prepare several heads/nozzles each with its own bowden. Print Settings Printer: TronXY X5S Rafts: No Supports: No Resolution: 0.25mm Infill: 20% Notes: Used a 0.6 mm nozzle and five shells. This results in a massive piece. You may get away with less infill and shells, but I went for "oversize" since I didn't want to risk any mishaps due to PLA fatigue. Post-Printing ============= Things you may need to do after printing Depending on the printer's quality, you may need to fix both pieces together, then drill out the bowden hole with a 4.5 mm drill bit if it's too tight. I also had to heat up the throat pipe and nuts to melt them into place as the space was just a bit too tight. Category: 3D Printer Parts
With this file you will be able to print No-Slip Bowden Clamp with your 3D printer. Click on the button and save the file on your computer to work, edit or customize your design. You can also find more 3D designs for printers on No-Slip Bowden Clamp.
