No sanding bearing oldham
thingiverse
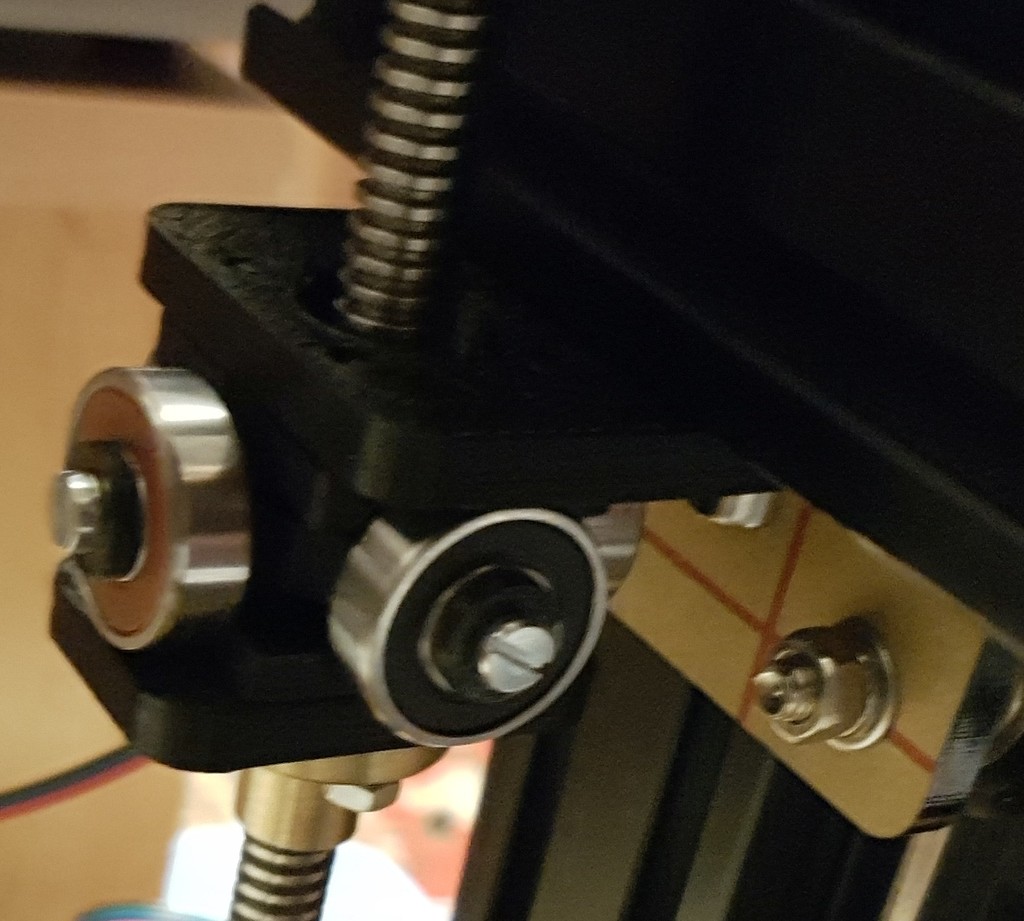
<h2>Description</h2> This is a precision-designed nosanding bearing Oldham coupler for Tevo Tarantula printers. It's engineered to be small and simple to print. For updates, check the bottom. <h2>Printed Parts List</h2> 1 x Top 1 x Bottom 1 x Bearing cross 2 x Guide 4 x Washer Use the corresponding STLs for your bearings (626 or 608). Guides are identical. <h2>Non-Printed Parts List</h2> X Gantry Mount: 2 x M4 screws + 2 x M4 T-nuts (same as stock) Bearing Screws: 4 x M3 x 12-14 mm screws Bearings: 4 x 626RS or 4 x 608RS bearings. RS is for protection from dust. Tools: 3 mm tap, 3.5 mm and 4 mm drill bits. <h2>Functional Description</h2> This Oldham coupler was designed by me after observing Vascojdb's design and recognizing the benefits of bearings and no-sanding approach in an Oldham. So, the same goals: 1) Use bearings instead of plastic-on-plastic. 2) Utilize the polished side of plastic facing the glass bed, instead of sanding it. 3) Almost no need to sand anything. 4) Print all at once, with no supports. 5) Minimum number of different parts. After a question about using common spinner bearings (608), I created a modified design to fit those. <h2>Printing Tips</h2> Print with low speed. Place the two guides on opposite sides of the build plate to give time for the plastic of the pins to cool. Use drill bits to enlarge holes to proper dimensions. If the holes for guide pins are too large (actual dimensions are 4.4 mm and pins are 4 mm), after measuring actual dimensions, adjust corresponding constraints in FreeCAD files, export new STLs, and reprint. Use tap for bearing screw holes to avoid causing stress in small bearing guides. <h2>Installation and Usage Tips</h2> 1) Install bearings on the BEARING CROSS. 2) Mark a pair of bearings (back/left; front/left;...) to check guide size to corresponding pair. 3) Check if guides can slide almost free between their corresponding bearing pair. They should face bearings with shorter sides. Sand shorter sides against flat surface if there's not enough clearance. Try to keep sanded sides parallel. 4) Pay attention when mounting guides to top and bottom pieces. They should be mounted on the bottom printing surface - the smooth one. Also, those pins fit very tight, and if you need to disassemble them for some reason (additional sanding, replacement...), it's best not to pry them but tap through holes. 5) Fit top piece to X gantry in such a way that when Zrod is free, it will be in the center of hole in TOP piece. 6) Insert Zrod into bearing cross paying attention to orientation marked in step 2. 7) Screw brass nut to bottom piece and screw it on to Zrod. 8) Pay attention to orient bottom piece in such a way that back/front bearings step on it and top piece steps on left/right bearings. <h2>Others</h2> Designed in: FreeCAD Attached files: STL and FCStd Material: Used PETG, but PLA should be strong enough if not in heated enclosure Take note that I did not actually print and test the 608 design. Just redimensioned parts to fit those. There should not be any problems since other makes are all with 608 bearings, but if you encounter any, please let me know, and I will make necessary adjustments. Please post your makes and if you have any comments/suggestions/..., feel free to post a comment. 2018.04.19 Added newer versions of FreeCAD files (v2). The bearing axes of the bearing cross are defined differently, giving ability to make its thickness proper number (5.6 and 6 mm respectively)
With this file you will be able to print No sanding bearing oldham with your 3D printer. Click on the button and save the file on your computer to work, edit or customize your design. You can also find more 3D designs for printers on No sanding bearing oldham.