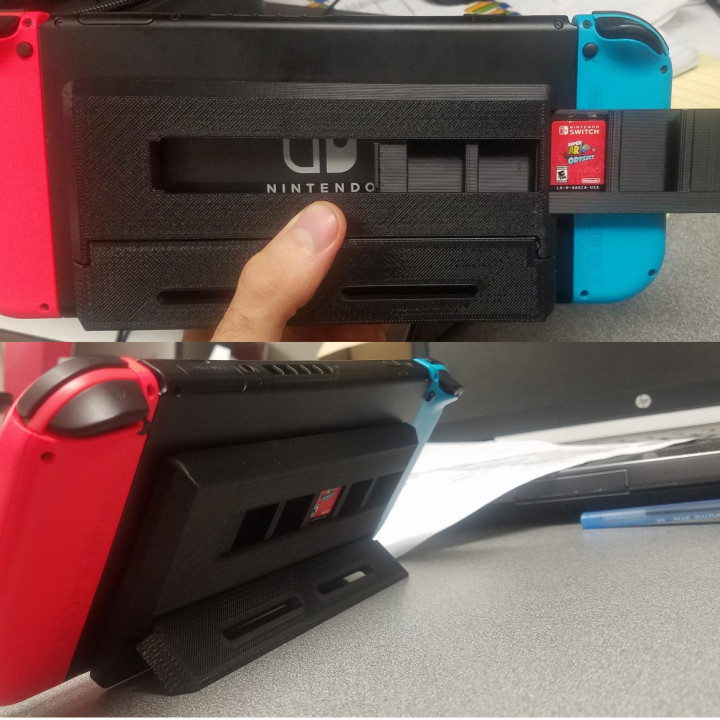
Nintendo Switch Backpack V2
myminifactory
Updates: refined kickstand joint design, relocated slider for easier access, and integrated a component for improved fit against the Nintendo Switch. Assembly Instructions: rotate the Nintendo Switch's kickstand past its normal limit to release it from its original position. Next, insert the specially designed kickstand component into place. Align the video game storage slider with the gap on the main body part of the assembly. Press the main body firmly onto the back of the switch, ensuring that the pegs on both components are securely aligned. Finally, insert the backpack's kickstand into its designated slot so that the beveled edge matches perfectly with the main body. The assembled accessory is designed to hold up to 5 games and features a significantly more robust kickstand than the standard one built into the Nintendo Switch. When fully extended, the kickstand should stop at a precise angle. However, users may need to adjust the kickstand's position by scaling it plus or minus 1mm depending on their machine's material properties (ABS vs PLA). The provided files are optimized for ABS printing, so if using PLA, slight adjustments to the kickstand design may be necessary. This custom accessory was created using a uPrint SE Plus 3D printer.
With this file you will be able to print Nintendo Switch Backpack V2 with your 3D printer. Click on the button and save the file on your computer to work, edit or customize your design. You can also find more 3D designs for printers on Nintendo Switch Backpack V2.
