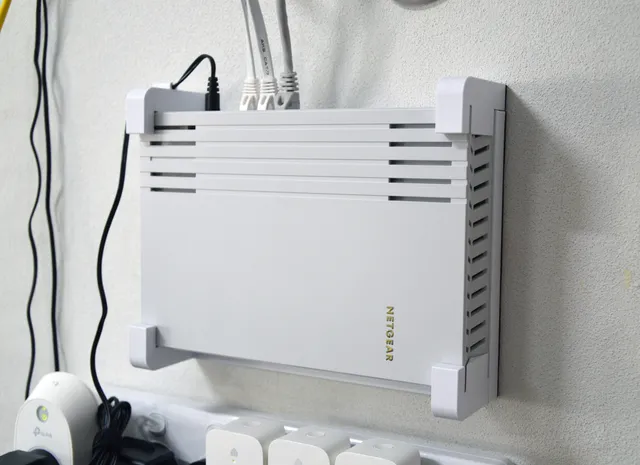
Netgear WAX202 / WAX206 Wall Mount Frame
prusaprinters
This is a sturdy wall mounting frame for the Netgear WAX206 wireless router - it should also fit the WAX202 which has the same dimensions. It was designed to resist warping in summer heat as my router lives in the garage and experiences the afternoon sun.Original configuration:Frame.stl (Be aware that this frame is 230mm long, please check your bed size before printing. There is an open frame option available if you cannot print the larger frame)BotRight.stlBotLeft.stlTopLeftCable.stlTopRight.stl You'll need the following screws:2 x 6g 25mm pan head (to fix frame to wall)2 x M5 35mm round head (to attach bottom right and left corner holders)Please make sure that your printer is calibrated correctly to print dimensions accurately. Printed length should be no shorter than 230mm and width no shorter than 170mm for the frame. Built in tolerance is 1mm in both X, Y and Z axes. Highly recommend checking printed dimensions of frame before printing the whole thing.Print the drill guide (DrillGuide.stl) to accurately mark holes on wall. Hole distance should be 215mm, center to center measurement.PrintingPLA+3 walls on a 0.6mm nozzle3 top and 3 bottom50% infillLayer height 0.2 - 0.28, lower is better for corner holdersSupport is required for frame and top corner holdersFrame should be printed flat on build plate. You'll need supports for the larger recessed M5 screw heads.For corner holders, please see the following for the correct orientation to print. OptionsTop HoldersYou have the option to provide strain relief for the power supply cable using either top corner holders (TopLeftCable.stl and TopRightCable.stl) or if you prefer plain corner holders (TopLeft.stl and TopRight.stl).Open FrameI have included files for just the left and right rails of the frame for those who cannot print the full 230mm frame. Highly recommend printing the drill guide diagonally and checking that the overall length of the guide is no less than 230mm to ensure correct placement on the wall. I have also included the rails with bottom corner holders already attached so that you don't need to use M5 screws and save a bit of time printing, however, I'm not sure how this affects the clearance for the recessed screw head for the 6g wall mount screws.
With this file you will be able to print Netgear WAX202 / WAX206 Wall Mount Frame with your 3D printer. Click on the button and save the file on your computer to work, edit or customize your design. You can also find more 3D designs for printers on Netgear WAX202 / WAX206 Wall Mount Frame.
