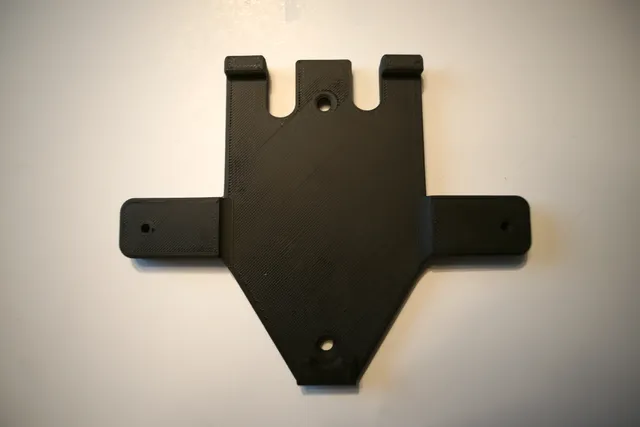
Netgear Nighthawk AC2300 Wall Box Adapter
prusaprinters
House had an empty high-mounted wall box to which we could run ethernet, so this adapter allows you to mount the Netgear box right “on to” the box. The adapter plate has plenty of holes so that you can run wires from inside the box to plug into the Nighthawk.You could mount the adapter directly to the wall anywhere you want (you should do it on top of a stud). There is a space designed between the plate and the Nighthawk so you could run both power and ethernet from various directions as needed.COMPATIBILITYNot sure. The label on my Nighthawk was AC2300.Space between the two mounting holes on the device is 120.5mm C-C in the model.If you send me your Nighthawk model which worked, I'll add it here.PRINTINGI did prototyping in PLA, but the pictured version is printed in eSun ABS+. I think PLA should be fine, the only problem might be if the Nighthawk gets really hot - the PLA will start to deform.No SUPPORTS needed, V12 probably has the model oriented the wrong way by default, sorry. Print on the flat side of the model.My final print was done with a 0.4mm nozzle, 0.2mm layers, 15% Cubic fill, 3 Perimeters. Seemed strong enough to me - usage is completely static after installation.HARDWAREYou need two screws long enough to pass through this adapter and into the wall box's faceplate screw holes. These can be countersunk or not. I think the choice in screw won't be important as long as it is the right thread and length.Two wood or metal screws which can cut into the adapter pilot holes on the wings. These must also fit the Nighthawk's slot mounting holes. A panhead screw for example. Just pick well enough so the Nighthawk won't fall off the wall later.INSTALLATIONYou might need longer screws than are used for a standard faceplate - ooops, sorry.Put the screws onto the wings and test the fit to the back/bottom of the Nighthawk.Plan wire routing. In particular during step 2Mount adapter to the wall box using the two countersunk screw holes. Don't overtighten - adapter should be snug against the face of the wall.Pull and prepare power and ethernet wires for final positioning, secure those if needed.Mount Nighthawk onto screwed wings, make sure it securely drops onto both screws and won't fall off the wallAttach power and ethernet cable(s)Go watch some sea otters on YouTube to test that it worksPost a makeVERSIONSVersion 12 files are the first release - I decided to make my life easier and just use the number in Fusion360. STL, 3MF and F3D files.
With this file you will be able to print Netgear Nighthawk AC2300 Wall Box Adapter with your 3D printer. Click on the button and save the file on your computer to work, edit or customize your design. You can also find more 3D designs for printers on Netgear Nighthawk AC2300 Wall Box Adapter.
