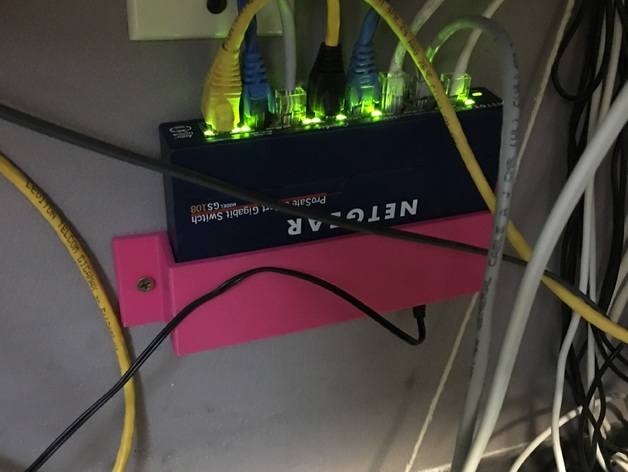
Netgear GS108 8-Port Switch Wall Mount
thingiverse
I wanted to clear some desk space by removing my Netgear GS108 8-Port Switch from the desk. The Ethernet cable layout on the desk was cumbersome, so I decided to turn the switch with its ports facing the wall - the cables came up from below and between the wall and desk. To make this more practical, I designed a wall mount for the switch so the ports faced upwards and were easily accessible. Print Settings Printer Brand: MakerBot Printer: MakerBot Replicator 1 Rafts: No Supports: No Resolution: .2mm Infill: 30% Notes: I printed this bracket using PLA. For better bed adhesion, I print the first layer at 85% height and 60% speed. I also include a single layer skirt with five outlines. The heated build platform is set to 60° C. My extruder temperature is 195° C. Post-Printing Cleaning away the skirt With a sharp knife, I cut away the five-outline skirt around the mount. Attaching the wall mount bracket I attached my bracket to drywall, so I used two E-Z Ancor Twist and Lock Self-Drilling Drywall Anchors (available at any home improvement store). How I Designed This Using calipers I pulled out my trusty calipers and measured the switch's width, length, and height, rounding to the nearest millimeter. Then, I added an extra millimeter for good measure. SketchUp With measurements in hand, I quickly sketched the bracket.
With this file you will be able to print Netgear GS108 8-Port Switch Wall Mount with your 3D printer. Click on the button and save the file on your computer to work, edit or customize your design. You can also find more 3D designs for printers on Netgear GS108 8-Port Switch Wall Mount.
