Netatmo wind gauge adhesive baseplate
thingiverse
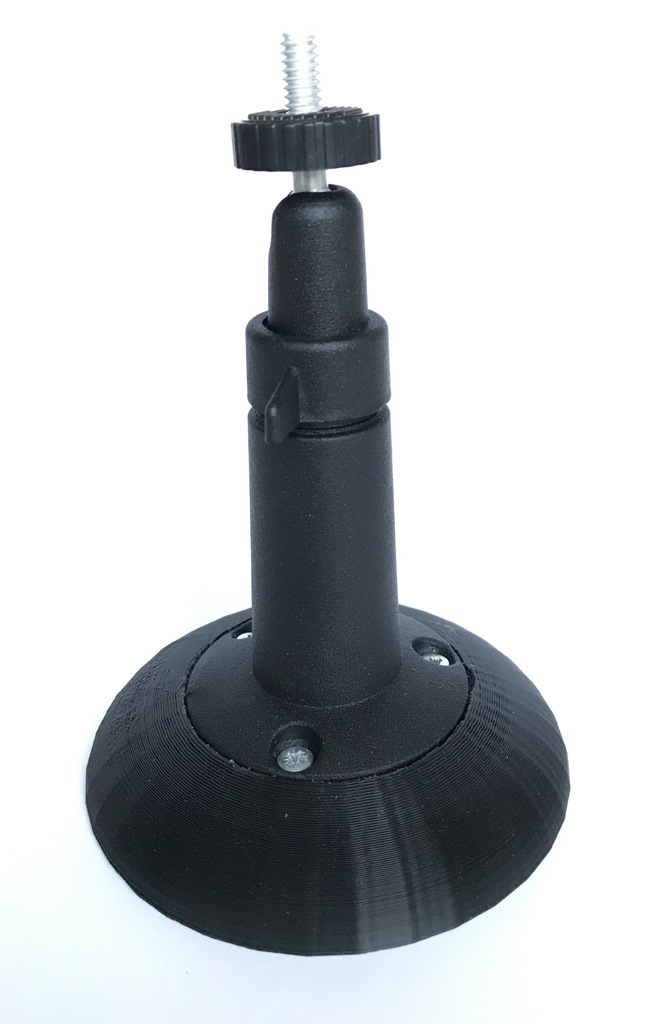
Background: My wind gauge needs a sturdy anchor, but I lack a suitable pole - I'm stuck attaching it directly to my chimney's sheetmetal. I used double-sided tape to stick the gauge to the chimney earlier, but this made battery changes and adjustments cumbersome. So, I decided to create a mount using Tinkercad and 90 minutes of printing time. This way, I can screw on the factory wind gauge mount and stick it to the chimney with double-sided tape again. I designed it for seamless integration. This setup has several advantages: - Easy adjusting and battery replacement - Higher airflow placement should yield more accurate readings - A sleeker appearance compared to sticking the gauge directly to the chimney **Warning: This design is untested, and outdoor environment-friendly tape may not last. Use at your own risk!** To assemble, use three small screws (18x3 or similar) to attach the factory mount to the baseplate.
With this file you will be able to print Netatmo wind gauge adhesive baseplate with your 3D printer. Click on the button and save the file on your computer to work, edit or customize your design. You can also find more 3D designs for printers on Netatmo wind gauge adhesive baseplate.