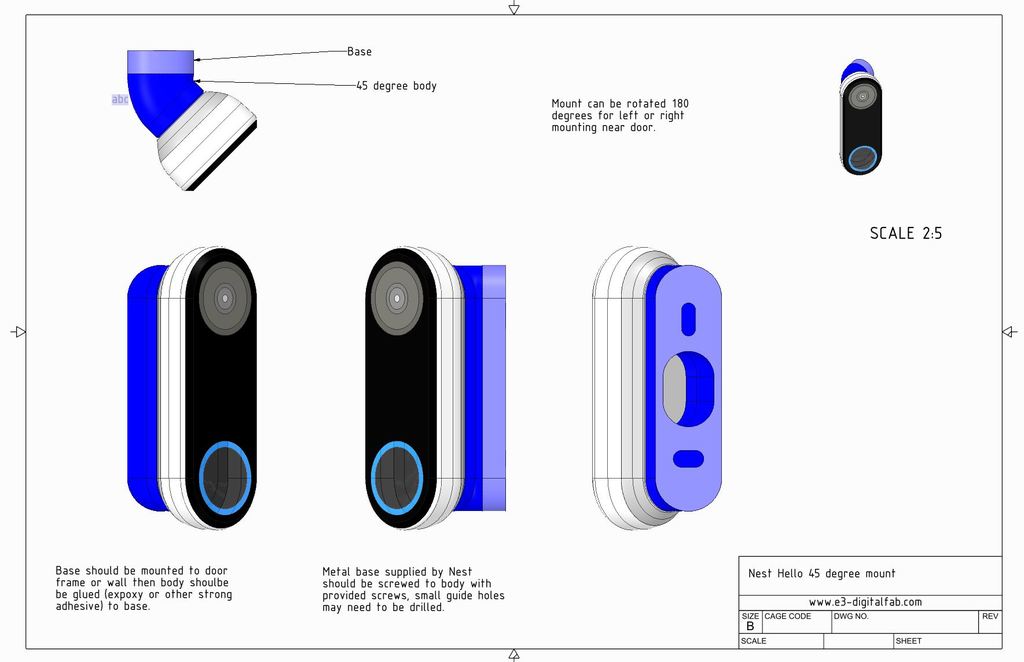
Nest Hello 45 degree mount and 1/4 inch spacer plate
thingiverse
I just replaced my dead Ring Pro doorbell with a new Nest Hello Doorbell. While browsing a forum, I came across someone seeking a 45-degree mount, which inspired me to create one myself. Previously, I designed a spacer/mounting plate that is 1/4 inch thick to provide extra room for wires and cover existing holes. It consists of two parts: the base, which is flat and mounts to the wall or door frame, featuring holes for screws and wires. The body, on the other hand, is the 45-degree portion with guides but no holes for mounting screws that attach the metal mounting plate supplied by Nest to the 45-degree base. There's also a pass-through hole for wires that aligns with the metal plate and the base. To assemble it, print both parts in their loaded orientation and install the base plate first. I recommend attaching the metal plate to the 45-degree adapter using self-drilling screws or predrilled holes before mounting this assembly to the base with strong glue. Mounting the metal plate beforehand ensures you don't drill it wrong and have to reprint the 45-degree body. Since you'll be drilling holes in the 45-degree adapter, print it with 4 outside layers and at least 30% infill. Avoid over-tightening your screws to prevent stripping the plastic. I printed this design, and the parts work well together. Although I haven't tried mounting it yet, as I don't need my Nest Hello at a 45-degree angle, I'm confident it will work since I used the same hole locations on a larger mounting plate I created, which also works fine.
With this file you will be able to print Nest Hello 45 degree mount and 1/4 inch spacer plate with your 3D printer. Click on the button and save the file on your computer to work, edit or customize your design. You can also find more 3D designs for printers on Nest Hello 45 degree mount and 1/4 inch spacer plate.
