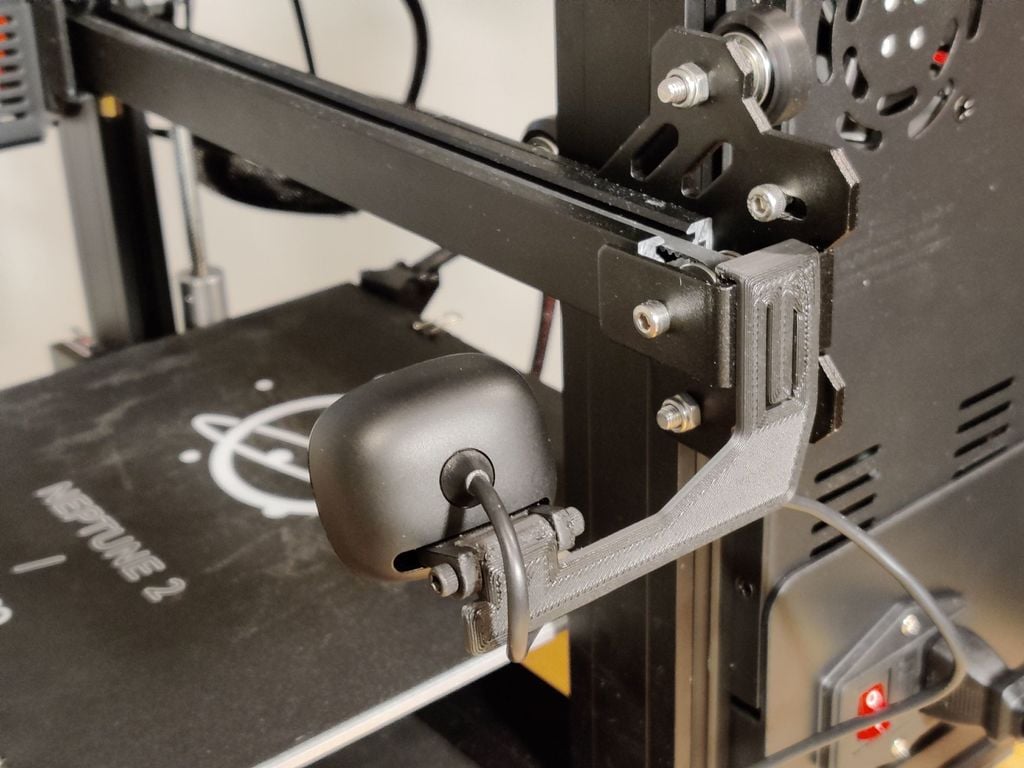
Neptune 2 - LifeCam HD-3000 Camera Mount
thingiverse
The problem : Since my printer is in the basement, and my office on the second floor, I needed a way to monitor my print sessions. Beautiful timelapse and framing was not a requirement for me. So a minimalist setup that doesn't get in the way was the main objective. The solution : OctoPi with a camera; obviously. I decided for an x-axis mount using a two-part design that provides some orientation adjustment. What you need : 1x Microsoft LifeCam HD-3000 2x M3x12 screw 2x small cable tie Printed parts :-) Printing : - The STL files are oriented the way I think it print best. - 0.4 nozzle, - 0.2 mm resolution, - infill 100% - Support is needed. - I used PLA with success. Assembly : The hardest part is to disassemble the camera to remove the stand and replace it with the printed one. I found this video that shows how to do it : https://youtu.be/lOU6rBUK0Do it is not obvious, but the little metal bracket is a "cutter pin"; you need to pull it towards you with a small pliers to remove it. The M3 screw will self-thread if you are careful. I suggest doing it first before attaching it to the camera bracket. Finally, use two small cable ties to attach the cable to the bracket. Now you can just mount the completed assembly to the printer. Hope you like the design!
With this file you will be able to print Neptune 2 - LifeCam HD-3000 Camera Mount with your 3D printer. Click on the button and save the file on your computer to work, edit or customize your design. You can also find more 3D designs for printers on Neptune 2 - LifeCam HD-3000 Camera Mount.
