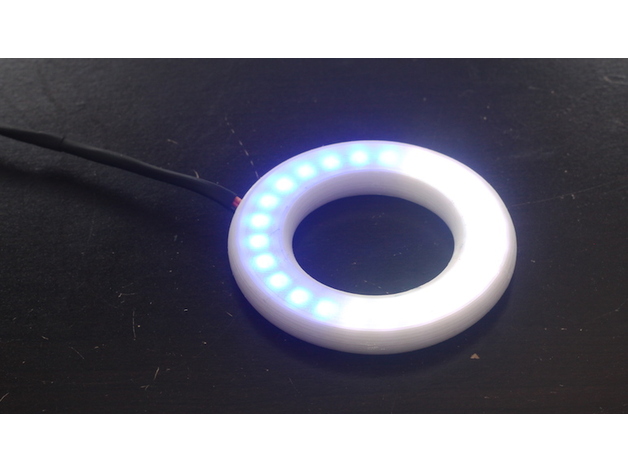
NeoPixel Ring Housing
thingiverse
LED Housing for a 24 Ring of NeoPixel LEDs. Designed to seamlessly integrate NeoPixel rings into projects with style and ease. Instructions: 1. Print the housing from high-quality PLA or PETG materials. 2. Use a layer height of approximately 250 microns when printing Body.stl in any desired color. 3. Print Diffuser.stl using a clear material, achieving an ideal layer height of around 100 microns. 4. Thread the leads through the carefully designed hole for secure positioning. 5. Gently insert the NeoPixel ring while taking care to position the leads around the strategically placed standoffs. 6. The housing is engineered to friction fit snugly against the outside of the LED ring, ensuring a precise fit. Optional Steps: 1. Apply a small drop of CA glue to reinforce the connection between the ring and the body for added security. 2. Secure the Diffuser in place using a thin layer of CA glue. 3. To create an ultra-durable housing, seal the diffuser and wire hole completely with additional layers of glue. Parts Included: 1. Body.stl: A flat-mount design featuring wires feeding out through the side. 2. Body_RearMount.stl: A panel-mount alternative where wires exit from the back. 3. Diffuser.stl: The front lens element that provides optimal light diffusion. 4. Body Mounting Holes.pdf: Detailed specifications for mounting holes on Body_RearMount.stl. 5. [Part].step: An editable CAD model for designers to modify and refine their own designs. Printer Settings: 1. Printer: MonoPrice Select Mini 2. Rafts: None 3. Supports: None 4. Resolution: 0.25mm (Body) / 0.1mm (Diffuser) 5. Infill: 30% (Body) / 100% (Diffuser) Important Notes: * Print Body.stl in any desired color. * Print Diffuser.stl using clear material for optimal light diffusion.
With this file you will be able to print NeoPixel Ring Housing with your 3D printer. Click on the button and save the file on your computer to work, edit or customize your design. You can also find more 3D designs for printers on NeoPixel Ring Housing.
