NeoPixel NeoMatrix 8x8 - 64 RGB Arduino box
thingiverse
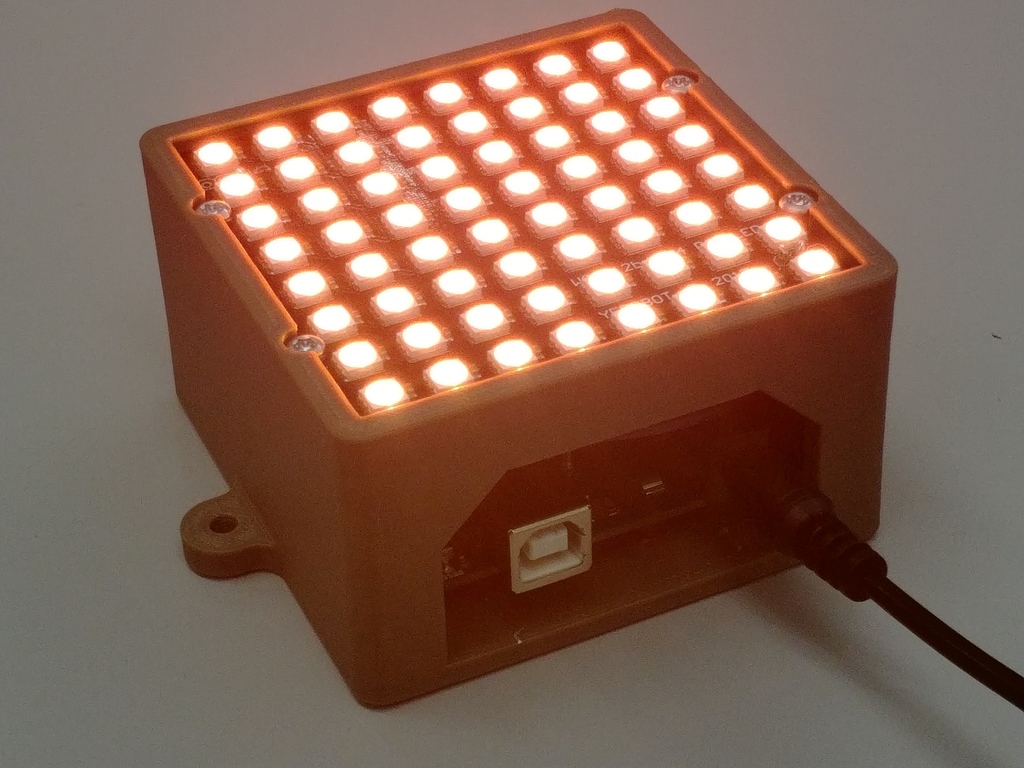
The box can be easily printed in any material with some support for the front opening part. Three screws, M3x10mm, are required to mount the Arduino. For the Neopixel matrix, four screws, M3, 10-16mm long, will suffice. An external power supply (5V DC, 3A) is used to power both the Arduino and the Neopixel matrix. Connecting wires is a straightforward process. The DIN of the Neopixel Matrix must be connected to a PWM pin on the Arduino, with pin number 6 being the default choice for the Adafruit library. The ground of the matrix needs to be connected to the GND of the Arduino. The 5V of the matrix does not need to be connected to the 5V of the Arduino due to current limitations. To resolve this issue, it is recommended to solder the 5V directly to the positive pin on the 2.1mm Jack connector of the Arduino, allowing the matrix to receive power from the external supply. For added safety, follow the instructions provided by Adafruit: https://www.adafruit.com/product/1487. To program the Arduino, connect the external 5V power supply to the 2.1 jack connector and the USB cable to your computer. This setup worked seamlessly in my case.
With this file you will be able to print NeoPixel NeoMatrix 8x8 - 64 RGB Arduino box with your 3D printer. Click on the button and save the file on your computer to work, edit or customize your design. You can also find more 3D designs for printers on NeoPixel NeoMatrix 8x8 - 64 RGB Arduino box.