Neje Laser Engraver Barrel Etching Jig
thingiverse
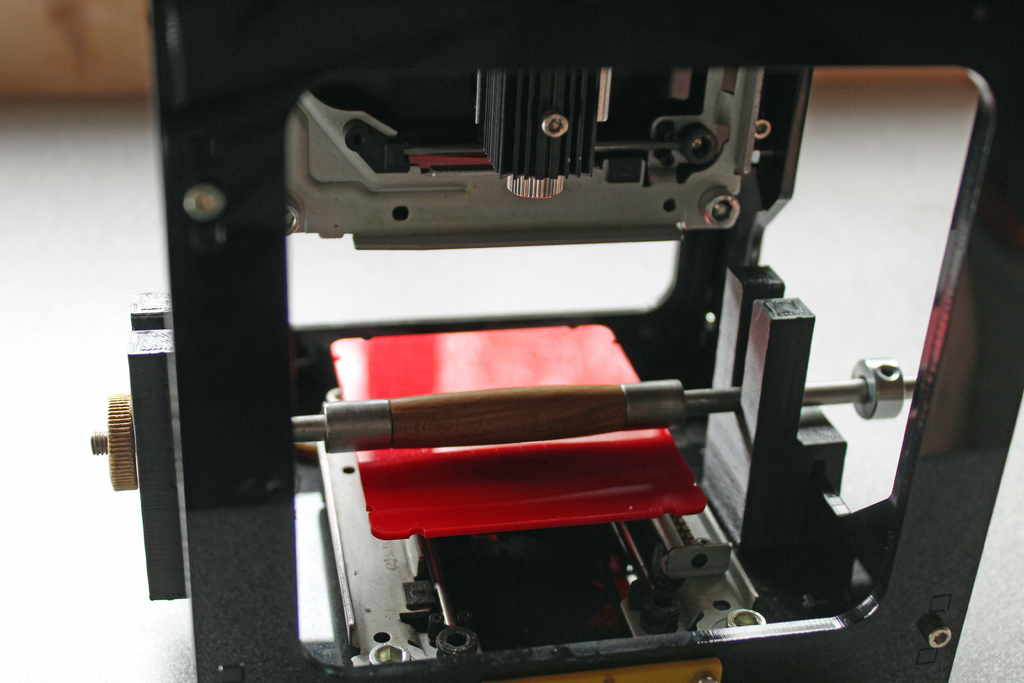
I make handmade pens as a hobby, and I love being able to engrave someone's name or initials along the barrel. However, if you want to engrave an image or words around the barrel, an additional jig is necessary. I have created these guides to hold the pen mandrel in place while allowing it to rotate freely. The guides have longer sides than needed for etching pens because this project is still a work in progress. I am currently working on designing a drive roller for the mandrel to enable me to engrave rings. An update will be posted soon. Required Equipment: * NEJE Mini Laser Engraver * 3D Printed Part * Painters Tape * Pen Mandrel * 7mm Locking Collet Procedure: 1. Slide the pen blank and bushings onto the mandrel. 2. Center the X & Y Axis using the knob and aligning the guides. 3. Add tape to secure the Bushings to the mandrel and the blank to the bushings. 4. Attach elastic bands to the mandrel. 5. Place the mandrel between the guides. 6. Fine-adjust the x-position by turning the knob on the mandrel. 7. Tighten the retaining collet. 8. Loop elastic bands around the build plate. 9. Focus the laser. 10. Double-check the roller motion by clicking "send" to the machine. 11. If the roller is not moving freely, loosen either the knob or the collet. 12. Start Engraving. I designed this project in Fusion 360 and printed test versions in ABS on a MK1 Wanhao Duplicator. Although my printer is not the newest model, it should work equally well with PLA on newer printers. I hope you enjoy engraving those pens!
With this file you will be able to print Neje Laser Engraver Barrel Etching Jig with your 3D printer. Click on the button and save the file on your computer to work, edit or customize your design. You can also find more 3D designs for printers on Neje Laser Engraver Barrel Etching Jig.