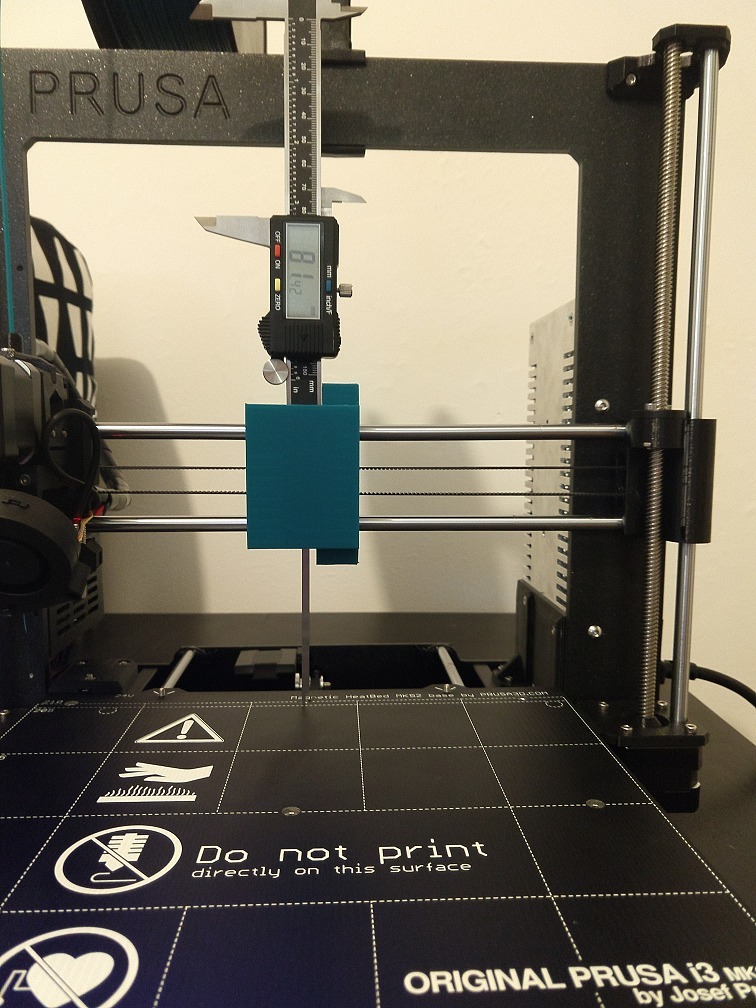
Neiko caliper fixture for calibration - Prusa i3 MK3
thingiverse
This is a fixture that lets you easily attach a Neiko 01407A Electronic Digital Caliper to the Prusa i3 MK3 extruder axis rails so you can calibrate your printer's bed. Why should you use this? Well, there are plenty of forum posts talking about how inaccurate pinda probes can be at different temperatures. Also, this jig measures the distance from the rails to the print bed, which is a direct measurement of what your printing head experiences. This measurement isn't affected by any software calibration adjustments. It's a more direct and in my opinion, accurate way than using the probe. The simple jig is easy to use: (1) Slide the Neiko caliper into the main block from the side, making sure the top of the caliper is on the "top end" (the side with the diamond cutout). The larger hole on the side of the block is for the bottom of the caliper where there are two screwed-in bars. (2) Slide the caliper towards the top of the main block until it stops. There's a step on the key that matches a cutout in the block - when the caliper rests on this step, it will stop moving. Moving the caliper towards the top lets the key slide in without getting caught on the caliper itself. (3) Insert the key with the "step" on the bottom and facing into the block (see picture). (4) When the key is flush with the outer surface, the two diamond features should be square with the holes. Push the key down and everything will be secure. (5) Mount the jig onto the rails. All fitted pieces have a tolerance of 0.5mm. My printer has good first layer calibration, which resulted in a sliding fit.
With this file you will be able to print Neiko caliper fixture for calibration - Prusa i3 MK3 with your 3D printer. Click on the button and save the file on your computer to work, edit or customize your design. You can also find more 3D designs for printers on Neiko caliper fixture for calibration - Prusa i3 MK3.
