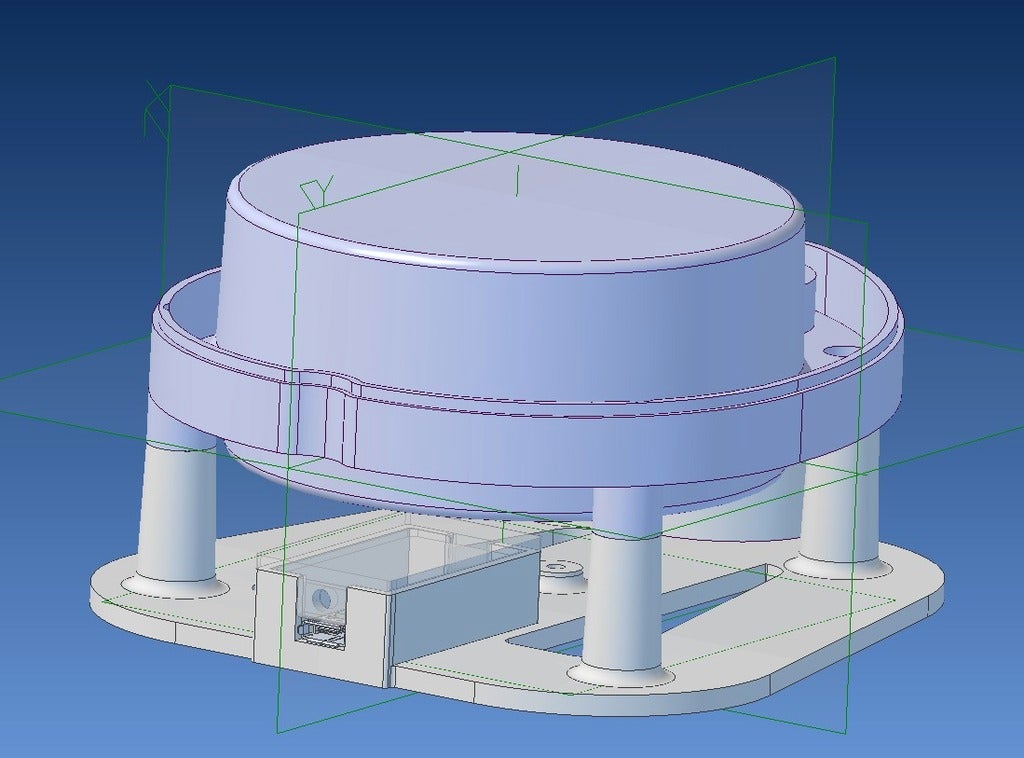
Neato XV11 LIDAR Controller + Stand
prusaprinters
<p>The LIDAR unit salvaged from a Neato XV11 Robotic Vacuum Cleaner is a cheap LIDAR for robotics that reports accurate range information up to 3-5M in a continuous 360 Degree scan.</p> <p>This is a stand to suit the XV11 Lidar and has primarily been designed for working on the desk while testing or demonstrating, but could be attached to a base of a robot as is.</p> <h3> Credits</h3> <p>The controller and firmware is a remix of a similar Teensyduino Controller by Get Surreal (<a href="http://www.getsurreal.com/product/xv-lidar-controller-v1-2">http://www.getsurreal.com/product/xv-lidar-controller-v1-2</a>)</p> <h3> Hardware</h3> <p>Designed to suit Sparkfun 5V Pro Micro board. (<a href="https://www.sparkfun.com/products/12640">https://www.sparkfun.com/products/12640</a>)</p> <p>Motor control is via a dual H-Bridge L9110 that sits on the centre standoff, where I'm only using 1 channel. (<a href="http://www.dx.com/p/l9110-dual-channel-h-bridge-motor-driver-module-for-arduino-black-157149#.VT8B38622NU">http://www.dx.com/p/l9110-dual-channel-h-bridge-motor-driver-module-for-arduino-black-157149#.VT8B38622NU</a>) I may look at incorporating one of dx.com MOSFET boards as I only had the L9110 on hand and is a bit of overkill for the application, however it works as its currently designed.</p> <p>The Lid is snug push fit and I've included a 3mm LED hole for the status LED.</p> <h3> Firmware</h3> <ul> <li>Firmware: <a href="https://github.com/madeinoz67/XV_Lidar_Controller">https://github.com/madeinoz67/XV\_Lidar\_Controller</a> </li> <li>Visual Test Software: <a href="http://www.getsurreal.com/products/xv-lidar-controller/xv-lidar-controller-visual-test">http://www.getsurreal.com/products/xv-lidar-controller/xv-lidar-controller-visual-test</a> UPDATES:</li> </ul> <hr/> <p>2015/07/29 Added Geomagic Design Package, i.e. CAD Source files</p> <p>2015/04/30 Schematics PDF now available in Thing Files</p> <p>2015/04/28 V4.0 Lid now with 3mm LED, increased height of pro micro enclosure, fixed slight misalignment on main standoffs.</p> <p>2015/04/28 V2.0 Lid fixes</p> <h3> Instructions</h3> <h3> Printing:</h3> <p>Tall standoffs require cooling fan on and can be turned on at approx. layer 15</p> <p>Lid will need to be flipped 180Deg for printing.</p> <p>LED Hole will more than likely need a drill run through it.</p> <h3> Hardware</h3> <p>1x X11 LIDAR unit from ebay<br/> 1x 3mm LED and resister<br/> 1x Sparkfun Pro Micro - <a href="https://www.sparkfun.com/products/12640">https://www.sparkfun.com/products/12640</a><br/> 1x dx.com L9110 H-Bridge (but any MOSFET driver board will do) - <a href="http://www.dx.com/p/l9110-dual-channel-h-bridge-motor-driver-module-for-arduino-black-157149#.VT8B38622NU">http://www.dx.com/p/l9110-dual-channel-h-bridge-motor-driver-module-for-arduino-black-157149#.VT8B38622NU</a></p> <h3> Connections:</h3> <p>See Thing Files for Schematic</p> Category: Robotics
With this file you will be able to print Neato XV11 LIDAR Controller + Stand with your 3D printer. Click on the button and save the file on your computer to work, edit or customize your design. You can also find more 3D designs for printers on Neato XV11 LIDAR Controller + Stand.
