NASA Mars Curiosity 2D Fridge Magnet
thingiverse
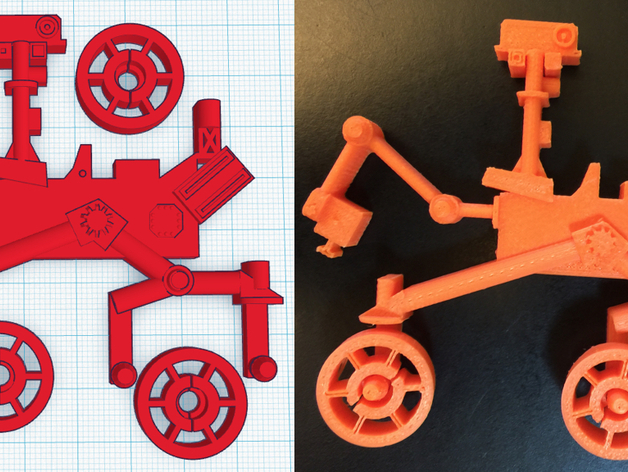
This is a replica representation of the NASA Mars Curiosity rover. The base of the rover has three small snap-fit connectors attached to it. The wheels attach securely to the base and rotate freely. The back side of the rover's body features two cylindrical depressions for fridge magnets to be inserted. Print Settings Printer: FlashForge Creator Pro Resolution: 0.1mm layers Infill: 80% Notes: This is a very straightforward print. I've printed about eight of them without encountering any major issues. Post-Printing Wheel attachment and magnet insertion Wheels: The base of the rover has three upward-facing cantilever posts on it. The three wheels have a central hole, as well as two sides: one with a smaller diameter hole, and the other with a larger diameter hole. To attach the wheels: 1) Wait for the print to cool before attaching the wheels. (10 minutes or so should be enough time for the posts to solidify.) Just wait long enough for them to withstand the insertion process. 2) Place the rover on a flat, solid surface. 3) Take one wheel and position it over a post with the smaller diameter opening facing downwards. 4) Gently press the wheel onto the post (rotating the wheel while pressing downward may help) until it snaps into place. Try not to apply too much lateral pressure, as the posts are thin and prone to snapping: just press down. Fridge magnets: 1) Obtain at least two neodymium magnets with the following dimensions: Diameter: 10mm / 0.4 inches Thickness: 2mm / 0.08 inches I purchased mine from a place called K&J Magnets (ZD2). 2) Insert some glue into one of the holes (Gorlla Glue works well), making sure to coat the sides as well as the bottom. 3) Insert the magnet and press down slightly. Optionally, cover the magnet with another thin layer of glue to seal it into the hole. 4) Wait for the glue to set, then do the same with the other magnet. (Note: You can insert both magnets at the same time, but there's a risk that they may attract each other so strongly that they pull out of the holes. Dealing with two strong magnets, not just magnetically connected but also coated in glue, is quite a challenge!) How I Designed This I used TinkerCad exclusively for this model. I started with a basic snap-fit rotating connection: just a post and a rotatable connector. That led to some ideas of what I could do with it, and I ended up with this model. I found a side-view image of the Mars Curiosity Rover, and simply put together some geometric shapes that resembled it. (Some artistic license was taken with scale and features - this model is supposed to be cute and fun, not necessarily an accurate representation!)
With this file you will be able to print NASA Mars Curiosity 2D Fridge Magnet with your 3D printer. Click on the button and save the file on your computer to work, edit or customize your design. You can also find more 3D designs for printers on NASA Mars Curiosity 2D Fridge Magnet.