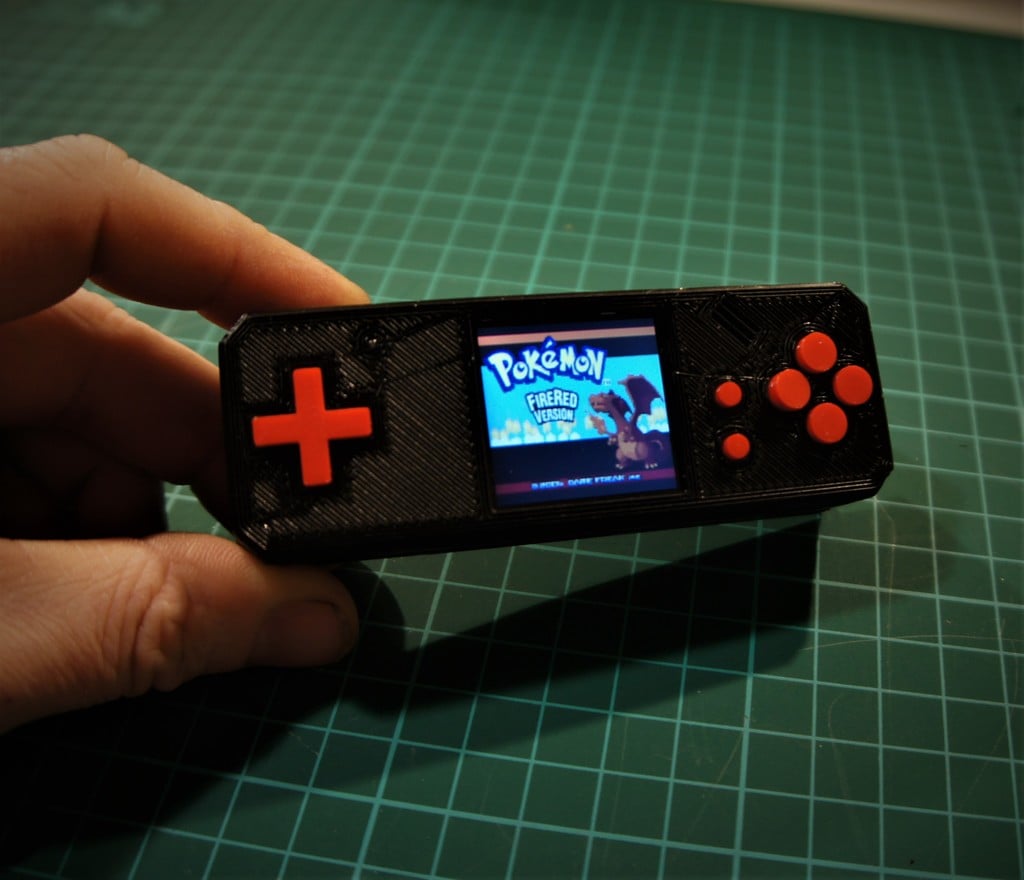
NanoPiBoy: Tiny Raspberry pi based retro gaming handheld console
thingiverse
I successfully designed and built a handheld game console over one weekend using a Raspberry Pi Zero and Retropie OS. The project is based on the popular Raspberry Pi Zero, which I used to create a fully functional retro gaming console. The process was simplified by preconfiguring an image of Retropie with all necessary changes, making it easy for anyone to get started. However, the current image size is too large and will be updated soon with a slimmed-down version. A comprehensive guide in PDF format is included in the files, providing step-by-step instructions on how to build this project along with links to additional resources needed for setup. Please note that building this console comes with some inherent risks. The use of Lipo battery connections requires caution as they can be hazardous and even burst into flames if mishandled. Similarly, soldering may cause pain if not done properly, and the trimming of fibreglass strip-board can be toxic, so it's essential to wear a good quality mask. Although I designed this project to be as easy as possible for users with some electronics knowledge, I still wouldn't recommend it for complete novices. For those who are interested in building this console, I recommend referring to the Sudomod forums for detailed information on various aspects of this build. Below is a list of materials required to build this handheld game console: 1. A 3D printed case 2. Strip-board cut into specific shapes later 3. A 1.44-inch ili9163 128x128 TFT SPI screen module (cheapest option with no touch screen) 4. Raspberry Pi Zero W or non-W (+USB WiFi for the cheaper non-WiFi model) 5. PAM8403 Module Super Mini Digital Amplifier 6. Ten Tactile Switch SPST-NO Top Actuated Through Hole type (or similar) 7. A 10uf electrolytic capacitor 8. A 0.033uf monolithic ceramic capacitor 9. A 150ohm resistor 10. A 270ohm resistor 11. A 100ohm resistor 12. A ferrite bead with a 2mm hole (if available) 13. A PSP 1000 speaker 14. A 750mah 3.7v Lipo battery (designed to use the type used in cheap drones) 15. A red SMT LED 16. An Adafruit PowerBoost 500 17. A Micro SD card (size dependent on the number of games planned) 18. Four M2 20mm screws (hex cup heads used) 19. One M2 6mm countersunk screw 20. A 5V 0.3A Black Mini Size SPDT Slide Switch On-Off 3-Pin 21. A breadboard (semi) optional I consider this stage a beta test, and I welcome any feedback to improve the guide. The link below is a video demonstrating the build process: https://www.youtube.com/watch?v=OSaHBE5SD7g
With this file you will be able to print NanoPiBoy: Tiny Raspberry pi based retro gaming handheld console with your 3D printer. Click on the button and save the file on your computer to work, edit or customize your design. You can also find more 3D designs for printers on NanoPiBoy: Tiny Raspberry pi based retro gaming handheld console.
