NanoLeaf
prusaprinters
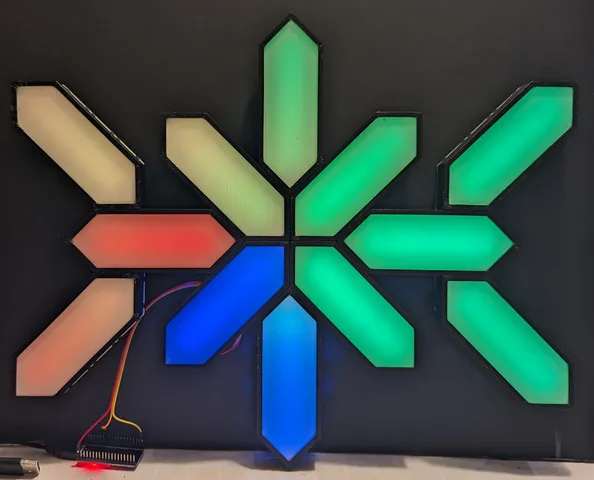
Update 2/27/24Added a wall mounting bracket. Could use command strips or a hook/screw Printed using black & white ASA, supports are not rerquiredI really liked this NanoLeaf design but could not for the life of me get the clips to work, watching the video it looked super simple. I printed out 2 bodies and connectors but could'nt get them to clip into both no matter how hard I tried.So I set about recreating the design in F360 and created a new means of connecting the parts. Initially I used pegs, which were great. However it turned out to be impossible to get 3 Leaf's joined together in an arrow type format. So back to the drawing board.Now it uses small U shaped clips to hold the leaf's together. It's not as easy as ProjetcsWithRed makes their connectors look, but it works OK. No glue required.However, if you don't plan to make different designs with the leaf's I think I would glue it all together.Check ProjectsWithRed's GitHub for an explanation on how they did their setup, this is the basics of mine.I printed the base's in white for the first 4 layers, then switched to black to get the most reflected light. Once all the parts were printed (17hrs) I glued the white diffuser panels to the bodies with B7000 glue and then laid them out in the patter I wanted. Using 2 connectors per connected side. Each base has 6 LED's (WS2812B BTF-LIGHTING Chasing Effects 5050SMD Individually Addressable 5M 60Pixels/m 300Pixels). Taking note of the data arrow direction I soldered on female connectors on one end and male on the other. These where then stuck onto the white side of the base. Using an ESP32 flashed with WLED each LED set was checked individually and all together before final assembly.The base's where then addred to the bodies and aligned the clips to the recesses in the base, this was the most tedious part. Each base was screwed into the body using M2 self-tapping screws.Second most tedious job, wiring up each leaf. I followed ProjectsWithRed's layout with the addition of an additional cnetral top & bottom leafDone! I really liked doing this project, may look for a more powerful PSU, just using USB at present, and/or brighter LED's. If I do another I'd likely model it so that the Leaf's aren't seperate and the design layout would be fixed - wasy easier to do I think My Original versionFirst version used pins, but as mentioned earlier was impossible to connect 3 Leaf's together in an arrow like design. Included it here for completeness. These parts are slightly different from the newer version that uses clips
With this file you will be able to print NanoLeaf with your 3D printer. Click on the button and save the file on your computer to work, edit or customize your design. You can also find more 3D designs for printers on NanoLeaf.
