My Build Log of Scott_3D's Hypercube Evolution
thingiverse
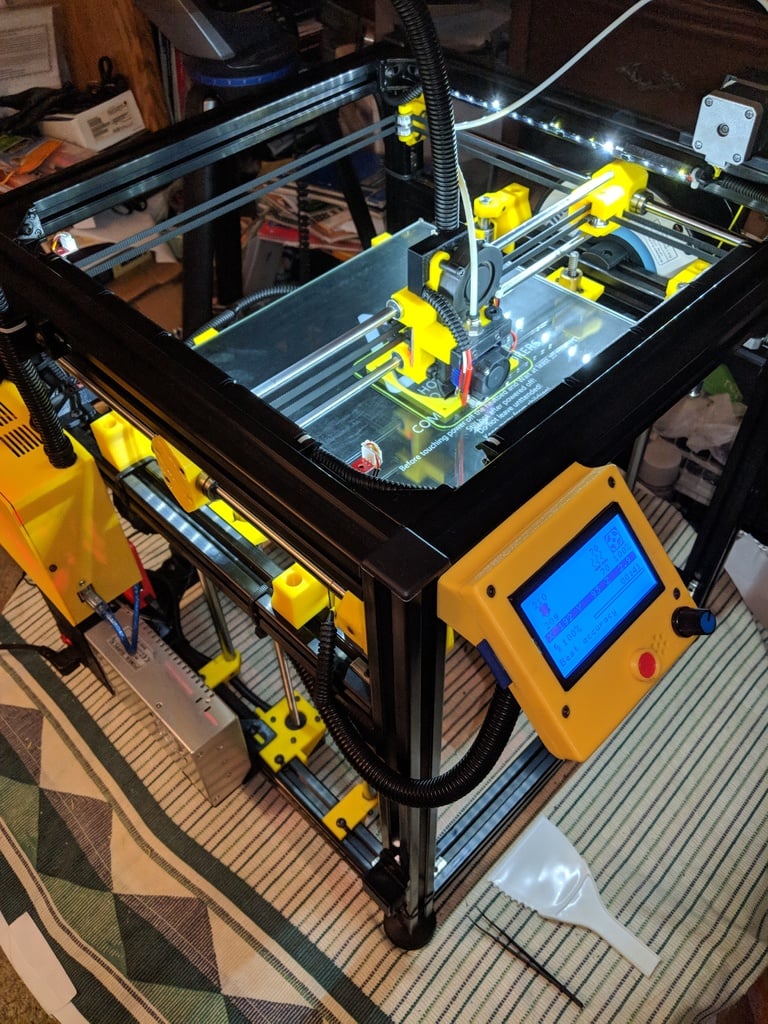
# Update 9/22/2019 Just finished rebuilding the X carriage for a direct extruder. Used my E3D V6 / Titan Extruder Mount. I had to make some modifications which I will update it with. See Updates Section. ----------------------------------------------------------------- Thank you to Scott_3D for the shared HyperCube Evolution design. The build was, and still is, a very rewarding experience. My printer is operational and printing parts as fine as those proudly presented in Scott's introduction video. I hope that this build log makes future builder experiences as enjoyable as mine. I will try to document those items that I needed to research and/or experiment with to resolve. Scott_3D made a series of videos that are linked here. Thank you again Scott. *** My build utilized a parts kit from Components Explorer. The makeup of the bill of material is always evolving. Do not assume that the parts I received in the kit are the same as what is currently being supplied. I have been adding my experiences and thoughts to this as I continued my build. The printer is still not complete, although it is currently fully operational. (at least until I break it again trying something new.) The printer is still sitting on the table I used to build it; a 1-1/2 inch thick, very flat, table that I've had since the late 60's. I never imagined that one day I'd build a 3D printer on it. #### Current Specifications: #### - 300x300x300 build - E3D-V6 Clone - Titan extruder Clone - Mega2560 / RAMPS1.4 / Marlin / 24 Volt - Raspberry Pi 3B+ / Octoprint - BLTouch Probe - LED Lighting - Bed Cooling Fan - Raspberry Pi Camera # Parts Sourcing # After sourcing and pricing the parts needed to build the HEVO, I decided to purchase the box of parts from Lin. (AliExpress - Components Explorer) I purchased the 300x300x300 parts list which at that time included the following (In no particular order): - Precut 3030 and 2020 extrusions - Frame brackets - Corner blocks - End stops - Limit switches - Rod ends - Knurled nuts - Dowel pins - End caps - Leveling feet - Timing pulleys and idlers (Flat and Toothed) - Inductive sensor - 2, 3, and 4 core 24AWG UL2464 shielded cable - 14AWG Silicone Wire - 24 Volt 500 Watt Power Supply - AC rocker switch with power inlet socket and fuse (No power cord though) - Some tools, crimp connectors, solder, rosen, and a 40Watt soldering iron # Additional Purchased Parts # - Crimp Connectors - PLA, PETG, ABS filament (I had this already except for the PETG in Yellow which I selected as my HEVO color.) - 5A and 10A automotive fuses - 24 volt hotend heater - MOSFET for heated bed. - Split cable loom (1/2 inch and 1/4 inch) - M6x12mm Button Head screws - M4 washers - JST PHR-6P connector plugs. (To make up stepper cables) - JST SM 2 and 4 pin connectors (To make up stepper and Fan cables) - Heat shrink tubing - Dial indicator. (To level bed) - 24 volt part cooling fan - 12 volt controller cooling fan - USB extension cable - RTV Silicone. (To mount thermistor to heated bed.) - Kapton tape - 22awg stranded wire (Black, Red, Green) to wire Power Supply. - Additional quantity of 4 core 24AWG UL2464 shielded cable - 24 volt to adjustable output Buck Converter # Suggested Tools # - Long nose pliers - Wire stripper - Crimping Tools - Metric Hex Screwdrivers (Allen wrenches are tough on the hands) - Strap and large clamp. (Optional but makes squaring the frame easier.) Clamp is used to pull extrusions together for a tight fit. Strap is used to pull diagonally opposite extrusions into square prior to tightening screws. - Tape measure - Combination Square, Framing Square, and a plastic drafting square (from the days before CAD) - Volt/Ohms Meter - Small table top vice to hold parts while installing knurled nuts, soldering, etc.
With this file you will be able to print My Build Log of Scott_3D's Hypercube Evolution with your 3D printer. Click on the button and save the file on your computer to work, edit or customize your design. You can also find more 3D designs for printers on My Build Log of Scott_3D's Hypercube Evolution.