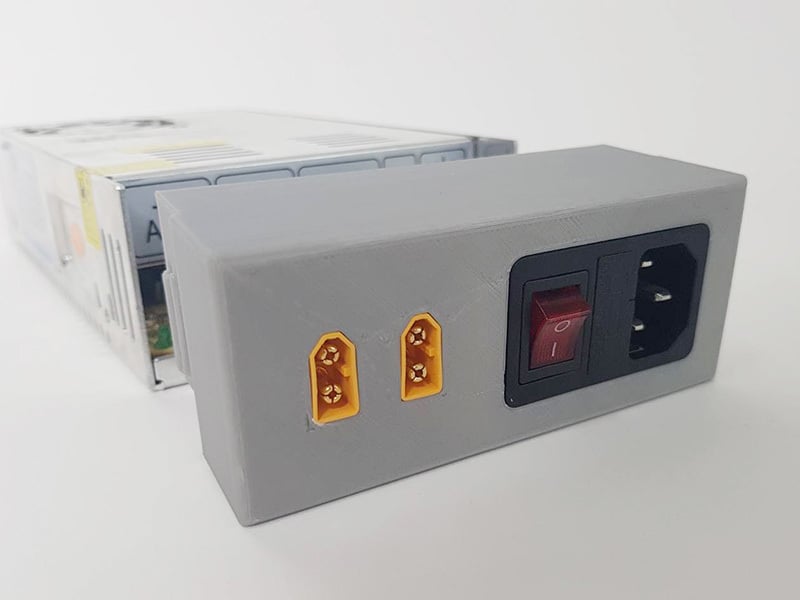
MW NES PSU cover with switch and XT60 connector (Mean Well Power Supply Switch)
thingiverse
**This design is for MW NES series PSU (or compatible) I have another design in development for LRS series.** I am creating a PSU (Power Supply Unit) cover that allows you to integrate a power inlet module (power socket, switch with indicator light and fuse), along with XT60 outlet connectors. This results in a clean and organized working environment. The XT60 connection provides versatility, allowing you to use various power cables for your target device. **Bill of Materials:** * Power inlet module https://goods.ruten.com.tw/item/show?21450964835456 * XT60 male connector x2 https://goods.ruten.com.tw/item/show?21830408985569 * XT60 PCB x2 https://goods.ruten.com.tw/item/show?21830409016813 * Screws M3x8 x8 https://goods.ruten.com.tw/item/show?21450965137081 * AWG 16/18 wires https://goods.ruten.com.tw/item/show?21539749664398 * Power cord C13 https://goods.ruten.com.tw/item/show?21719185380397 * XT60 female connector with cover x2 https://goods.ruten.com.tw/item/show?21830408996044 **Installation Instructions:** 1. Print the cover, placing it face down (front side facing down to the print bed) on the print bed. The part may require support structure when printing; if printed without support, you might need to touch-up with a knife on the trench area because the power inlet module is designed to fit snugly within the cover for a better appearance. There may be a few chaotic strands of filament where no support structure was used. 2. Connect and solder the power inlet module, then install it into the cover (the cover features latches, requiring no screws). 3. Connect and solder the XT60 connectors with the PCBs, then secure them to the cover using four M3x8 screws. 4. Connect the cables to the PSU and fasten them securely using the PSU's screws. 5. Measure the output with a multifunction meter before use. 6. Install the cover and secure it firmly using M3x8 screws. 7. The outlet XT60 connector and cable are dependent on your specific requirements.
With this file you will be able to print MW NES PSU cover with switch and XT60 connector (Mean Well Power Supply Switch) with your 3D printer. Click on the button and save the file on your computer to work, edit or customize your design. You can also find more 3D designs for printers on MW NES PSU cover with switch and XT60 connector (Mean Well Power Supply Switch).
