Multimeter Mount
prusaprinters
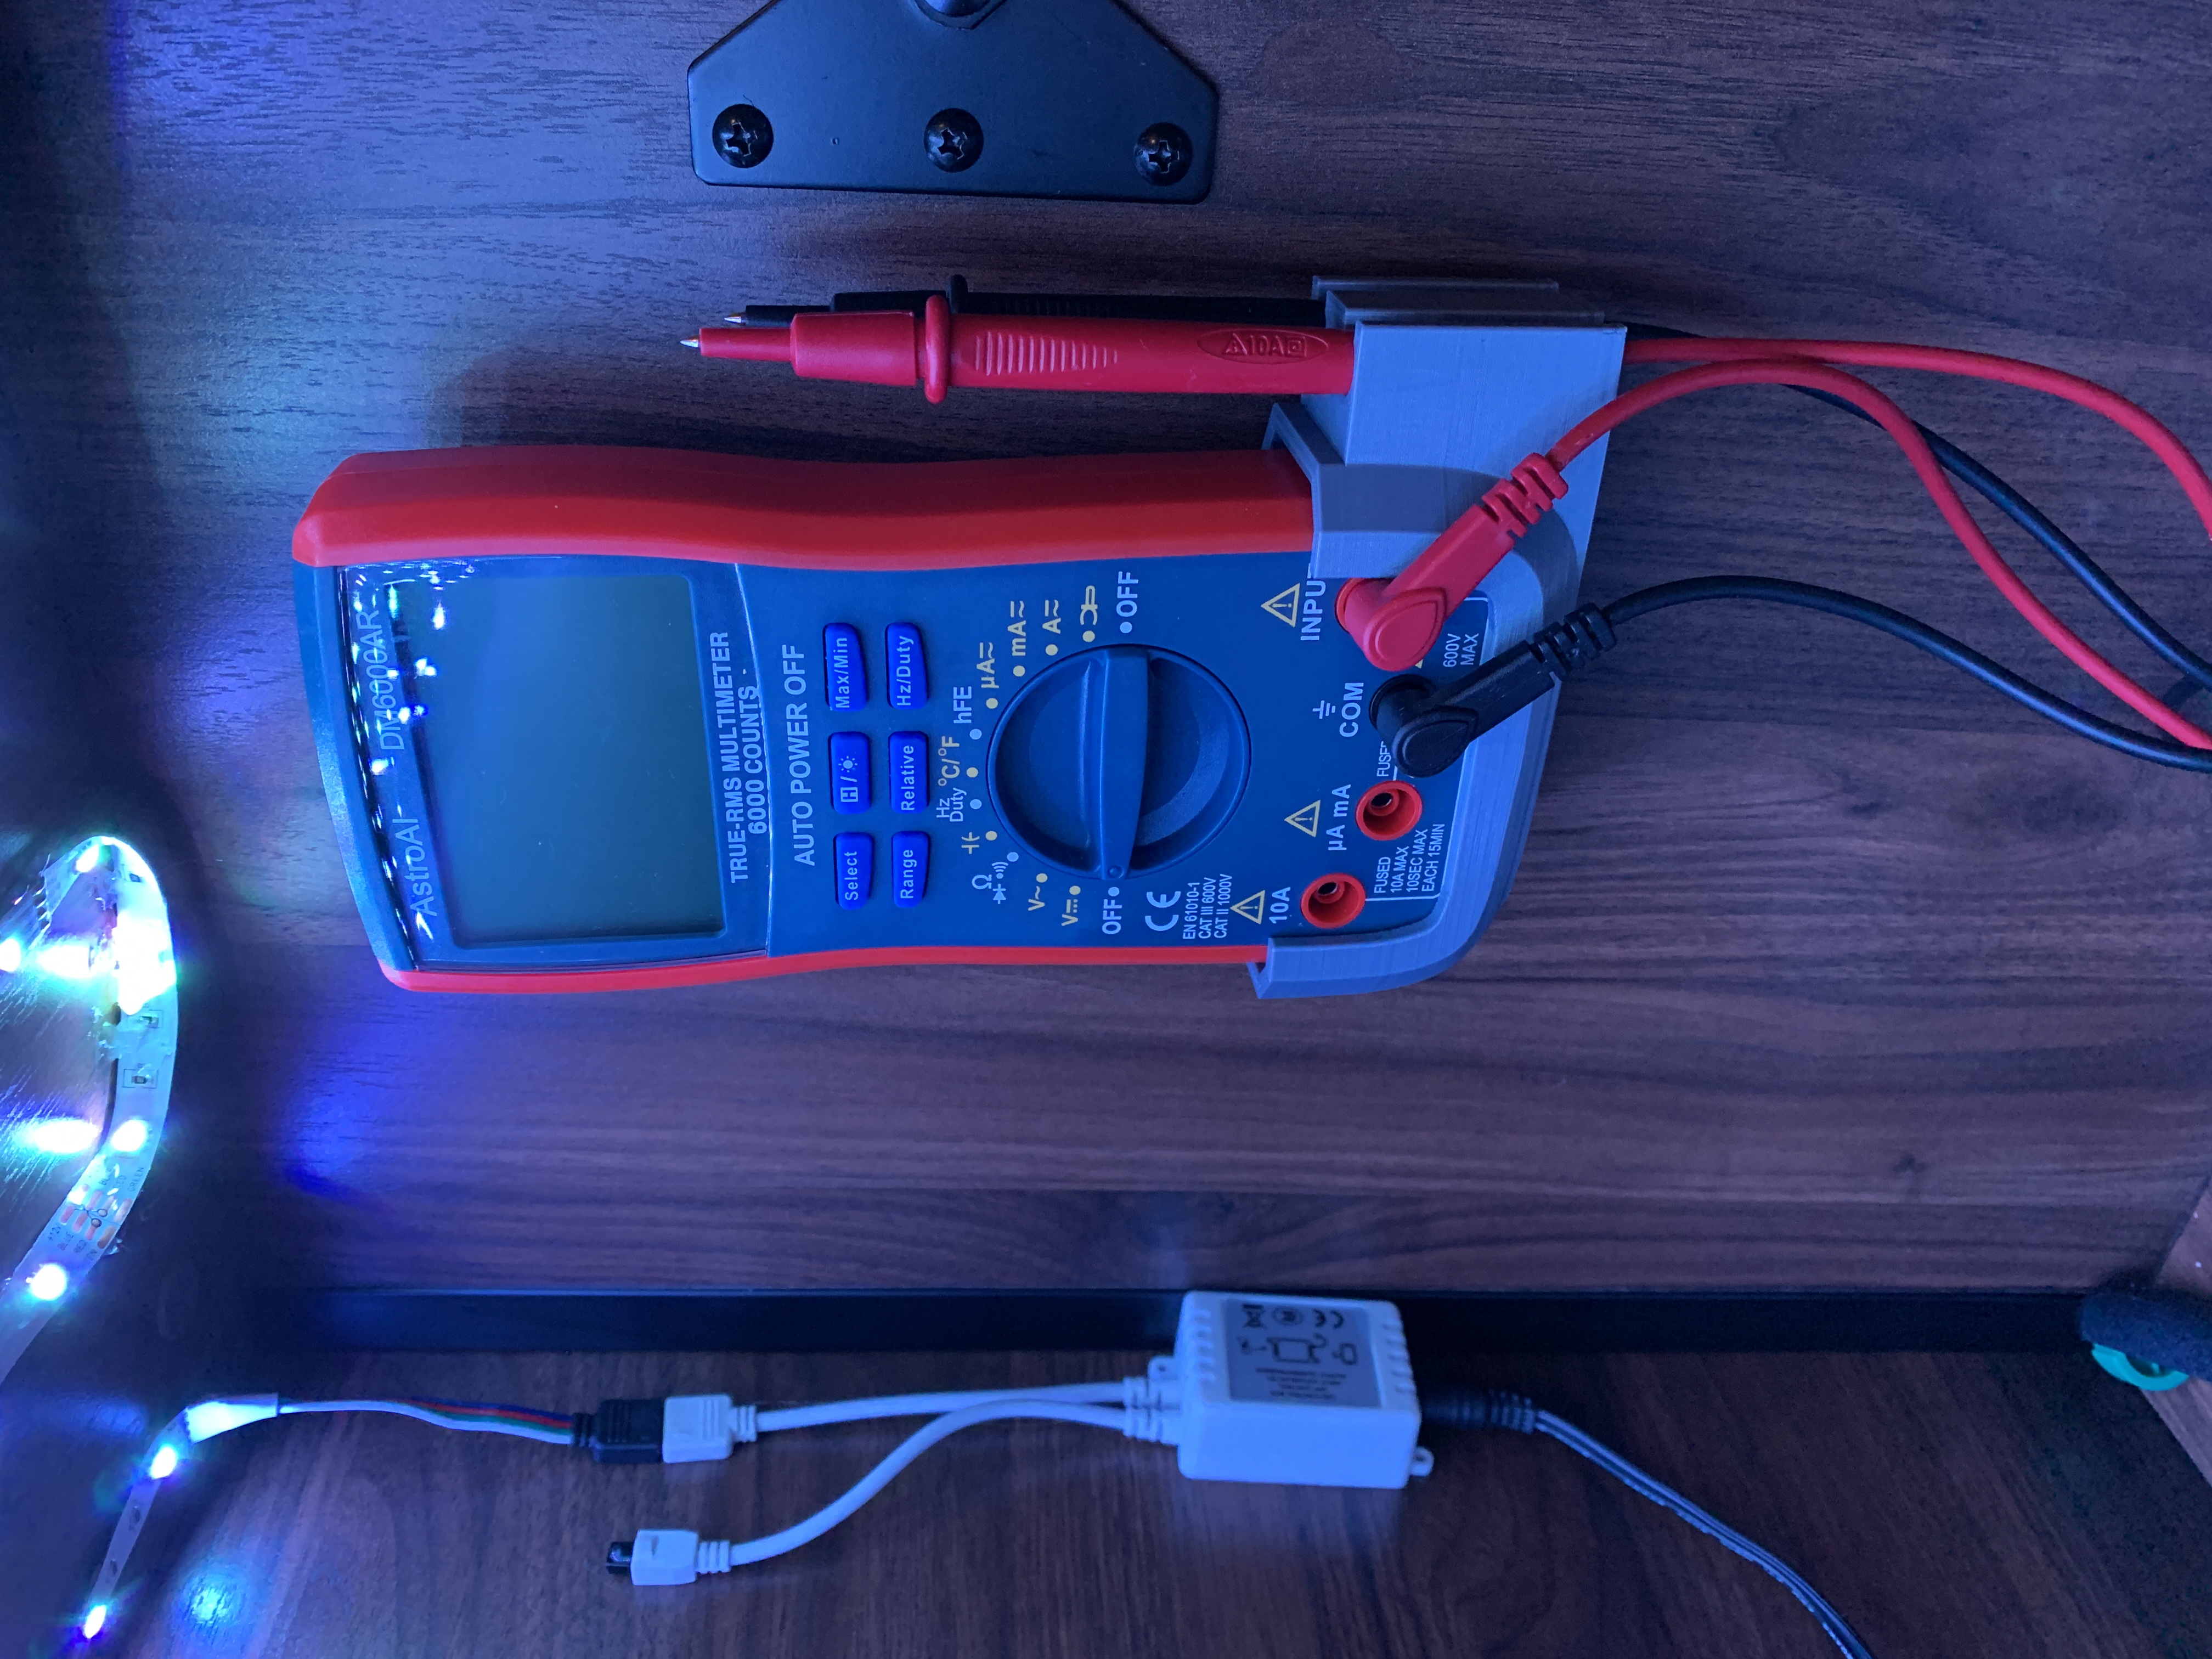
<figure class="media"><oembed url="https://youtu.be/9YHpxET-B80"></oembed></figure><p>This multimeter mount was designed specifically for an AstroAI DM6000AR. However if might work for other multimeters as i have not tried.</p><figure class="image image-style-align-left image_resized" style="width:36.79%;"><img src="https://media.prusaprinters.org/media/prints/72245/rich_content/5b918072-4d11-4854-a972-bc03078223da/image.png#%7B%22uuid%22%3A%228072aad1-4121-40bf-b014-9efa321ed9a0%22%2C%22w%22%3A360%2C%22h%22%3A374%7D"></figure><p><a href="https://www.amazon.com/AstroAI-Multimeter-Resistance-Transistors-Temperature/dp/B071JL6LLL/ref=sr_1_4_sspa?crid=1P3VBKYSYG4IO&dchild=1&keywords=multimeter&qid=1627305046&sprefix=multimet%2Caps%2C200&sr=8-4-spons&psc=1&spLa=ZW5jcnlwdGVkUXVhbGlmaWVyPUExVEEwSTBQVzk3WTRYJmVuY3J5cHRlZElkPUEwMDg5NjM4MTJRRUtMOEVIRkJCVCZlbmNyeXB0ZWRBZElkPUEwNjI3NTMwMTdNVEdIR01MU0FBUiZ3aWRnZXROYW1lPXNwX2F0ZiZhY3Rpb249Y2xpY2tSZWRpcmVjdCZkb05vdExvZ0NsaWNrPXRydWU=">https://www.amazon.com/AstroAI-Multimeter-Resistance-Transistors-Temperature/dp/B071JL6LLL/ref=sr_1_4_sspa?crid=1P3VBKYSYG4IO&dchild=1&keywords=multimeter&qid=1627305046&sprefix=multimet%2Caps%2C200&sr=8-4-spons&psc=1&spLa=ZW5jcnlwdGVkUXVhbGlmaWVyPUExVEEwSTBQVzk3WTRYJmVuY3J5cHRlZElkPUEwMDg5NjM4MTJRRUtMOEVIRkJCVCZlbmNyeXB0ZWRBZElkPUEwNjI3NTMwMTdNVEdIR01MU0FBUiZ3aWRnZXROYW1lPXNwX2F0ZiZhY3Rpb249Y2xpY2tSZWRpcmVjdCZkb05vdExvZ0NsaWNrPXRydWU=</a></p><p> </p><p>My goal was to make a multimeter holder that was both small (in regard to height and the area of the multimeter its holding) and one that could still allow me to use it when on the wall.</p><p>I have attached two versions, one is just for the multimeter and the other is for both the multimeters and its leads.</p><p><strong>Print Settings:</strong> No supports needed. No Brim needed (unless you really want to). I did 10 percent infill with 3 perimeter walls (feel free to do more for a stronger print)</p><p>There is a normal version an a “<i>Hesed</i>” version. The <i>Hesed</i> version has the word <i>Hesed </i>on it. For more information on what <i>Hesed</i> means, please go to my page and read the bio.</p><p><strong>Consider</strong> printing the <i>Hole Tester Piece</i> first to ensure that the screws you have will work. I used some small flat head screws. The tester piece has the same dimensions as the actual print, so if you can fit it you can also fit the actual holder.</p><figure class="image image_resized" style="width:18.59%;"><img src="https://media.prusaprinters.org/media/prints/72245/rich_content/210a4ee2-2a91-484d-bc99-3190b99e45cb/image.png#%7B%22uuid%22%3A%22bb0ee69b-a746-494d-ba7d-324bdec94362%22%2C%22w%22%3A197%2C%22h%22%3A188%7D"></figure><figure class="image"><img src="https://media.prusaprinters.org/media/prints/72245/rich_content/9417b8cd-60d0-43ac-aeef-b59dcacf9e14/image.png#%7B%22uuid%22%3A%2206ac5f46-0cc7-4cd9-a697-78d150d6ed79%22%2C%22w%22%3A629%2C%22h%22%3A338%7D"></figure><p>I hope it is useful to you!</p>
With this file you will be able to print Multimeter Mount with your 3D printer. Click on the button and save the file on your computer to work, edit or customize your design. You can also find more 3D designs for printers on Multimeter Mount.