Multifunction radio
thingiverse
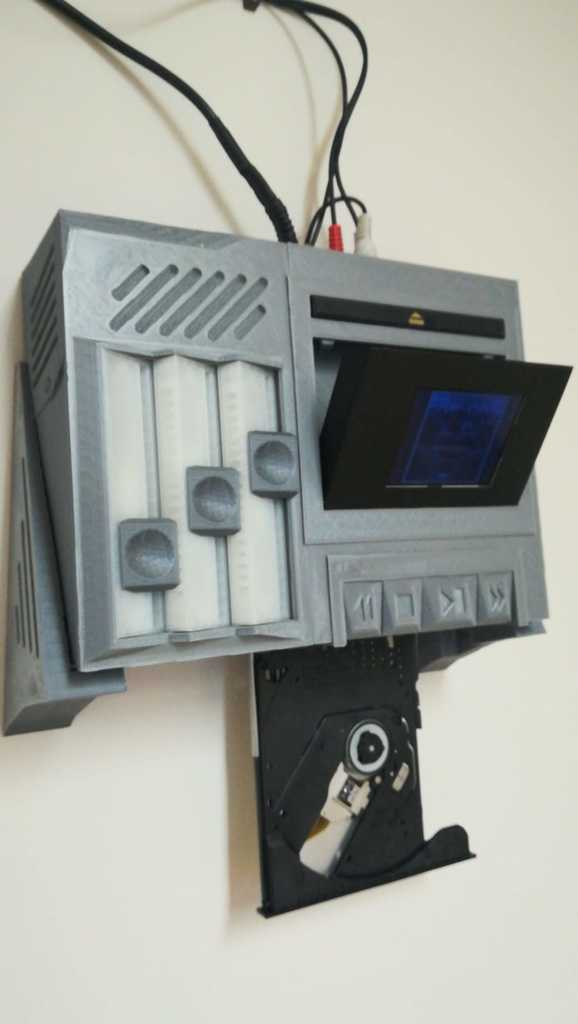
This is a detailed guide for building a custom radio device, and it seems to be related to creating an open-source DIY radio using Raspberry Pi or Orange Pi Zero boards. The guide covers the printing of various parts using a 3D printer, such as buttons, sliders, tape tray, and other components. It also provides wiring instructions for connecting these components together. To summarize: 1. Print case and slider/pot parts. 2. Assemble buttons and add tactile switches. 3. Print tape related parts and assemble them. 4. Add display to tape-tray and secure it with hot/super glue. 5. Cut short pieces of wire and bend them around the tray joint to act as springs that open the tape tray. 6. Insert tape-tray with bended wires and lock them to slots on the tape-bottom part. 7. Sand down the tape-lock-pin and insert it into a slot on the tape-top part. 8. Add pen spring to the pin and secure it with tape until inserted into the main body. 9. Add tape-eject buttons with spring and lock them with 2 pins from the side. The wiring instructions are also detailed, including the connection of: * Display to Raspberry Pi Zero * Display to Orange Pi Zero Please note that this guide is quite lengthy and assumes some level of technical knowledge in electronics and programming. If you're not familiar with these topics, it may be helpful to seek guidance from a more experienced DIY enthusiast or online community.
With this file you will be able to print Multifunction radio with your 3D printer. Click on the button and save the file on your computer to work, edit or customize your design. You can also find more 3D designs for printers on Multifunction radio.