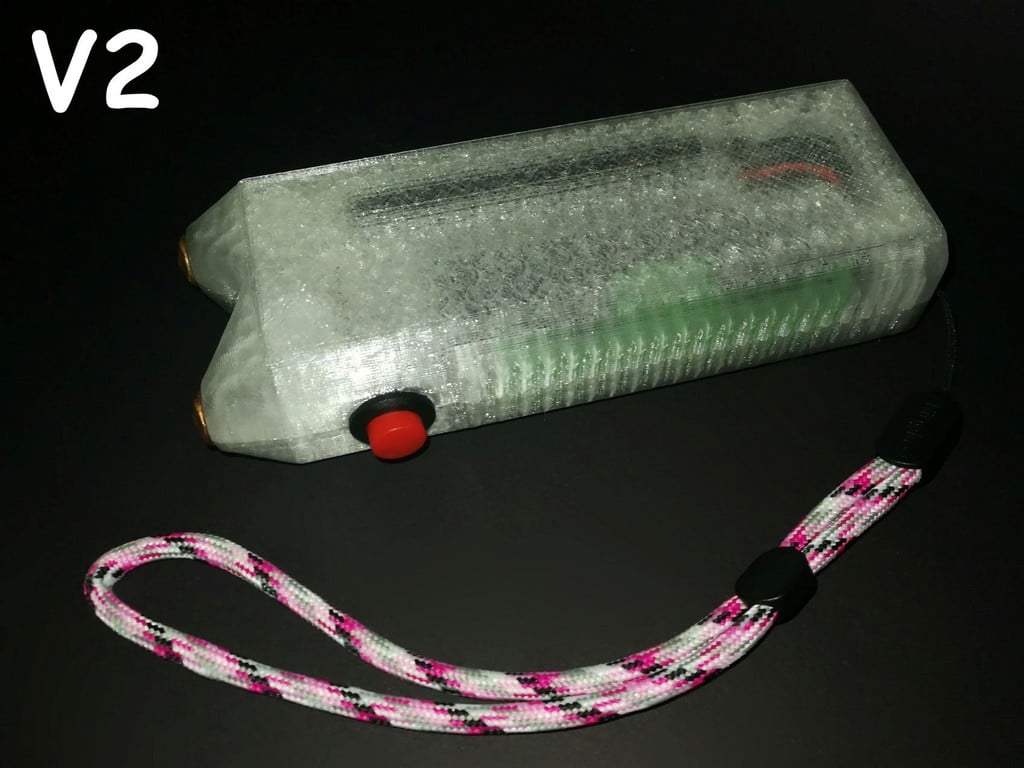
Ms. Zappy V2 - A cute, pocket-able and tacticool stun gun!
thingiverse
---------------- NOW UPDATED TO V2 TACTICOOL EDITION Interesting stuff * Tacticool ribs for maximum grippage * Subtle contours for increased feminine charm * Lanyard attachment variant included for when things get messy Boring stuff * Length increased by 2mm to allow greater recess of rear rocker * Increased diameter of the pushbutton hole to ensure tight seams * Arc gap widened to allow arc up to 12mm. ---------------- <h1>Ms. Zappy</h1> Meet Ms. Zappy, she's a cute little stungun, super cheap, easy to build using standard components and she packs a punch. My priorities in this design were to use space efficiently, creating something compact yet ergonomic, for all components to be readily available and cheap and for the printed parts to print without support. I don't know what Thingiverse's rules are regarding items like this, there are a lot of far more dangerous things on here but I am posting this under a new account in case it incites a ban. <h2>Component list:</h2> Please note, I do not endorse the individual sellers in the links below, I include them simply for reference. <ul> <li>1x TP4056 charging module - <a href="https://www.aliexpress.com/item/4001241394888.html"> Link </a></li> <li>1x 18650 holder - <a href="https://www.aliexpress.com/item/4000445340785.html"> Link </a></li> <li>1x Momentary push button - <a href="https://www.aliexpress.com/item/32965803216.html"> Link </a></li> <li>1x Illuminated rocker - <a href="https://www.aliexpress.com/item/1923347420.html"> Link </a></li> <li>1x 400kV pulse module - <a href="https://www.aliexpress.com/item/32755013751.html"> Link </a></li> <li>1x 18650 cell</li> <li>4x 20mm M3 socket cap machine screws</li> <li>2x Nails</li> <li>Some wire</li> <li>Basic soldering equipment/skills</li> </ul> The casing prints easily, everything should slot into place. The charging module snaps into place firmly and is held tight to allow secure insertion and removal of a charging lead. There are channels and pockets to allow wiring to be routed. The electricals are straightforward with a couple of caveats. These TP4056 boards have over-discharge protection at <2.5v and over-current protection at >3a. This is a problem for us as we want to draw (marginally) more than 3a. On the bench the pulse modules tested like this: @3.5v - 3a @3.7v - 3.2a @4.2v - 3.5a This was with a spark gap of 5mm. I tested again at 10mm and was surprised to get the exact same results. So, we will be pushing enough current to trip the protection circuit and in testing this did occur. To avoid this I bypassed the boards outputs, connecting the pulse module directly to the bat +/-, with the positive still running through the switches. This solves the issue but obviously now the battery is free to drain to a damaging level, I don't think this a major problem for this device as it is not intended to be used continuously or for extended periods and you're not going to drain it down with a few short bursts. You could use a battery with an integrated low voltage cut-off to mitigate this problem. Second issue, regarding the external arc/spark gap. Everyone loves cool flashy arcs but these pulse modules are whack. I've tested them with a gap up to 16mm but they don't live very long. For this reason I kept the spark gap on mine short, 6mm to be precise. Feel free to increase/decrease this as desired, the design as is allows for a gap of up to 10mm but it's easily edited. Even with a narrow gap this is for intermittent and short use, like for a second or less at a time, I burnt through three modules during testing, it's a good thing they're cheap because they are fragile, buy multiple! Wires should be soldered to the backside of the charging board, the case is designed around this. If you solder to the top, the wires will interfere with the case. I've included a picture showing how I wired things up. That is literally the limit of my circuit diagram proficiency. For the terminals I used square shank copper nails, 3.6mm square. They were sold to me as "boat nails", feel free to substitute them for something else and adjust the model accordingly. For the spark gap I used a couple of bits of single stranded wire, these can be substituted for something else, multi-strand wire, needles, nails etc.. You could bend nails into an "L" shape for both the terminal and the arc gap but that seems like a hassle to me. The M3 screws thread directly into the casing, this is something I do a lot and it works well for items that rarely need to be opened. The TP4056 board has LEDs to indicate battery status during charging, I used a translucent filament to make these visible.
With this file you will be able to print Ms. Zappy V2 - A cute, pocket-able and tacticool stun gun! with your 3D printer. Click on the button and save the file on your computer to work, edit or customize your design. You can also find more 3D designs for printers on Ms. Zappy V2 - A cute, pocket-able and tacticool stun gun!.
