Ms. PAC-MAN colorful
prusaprinters
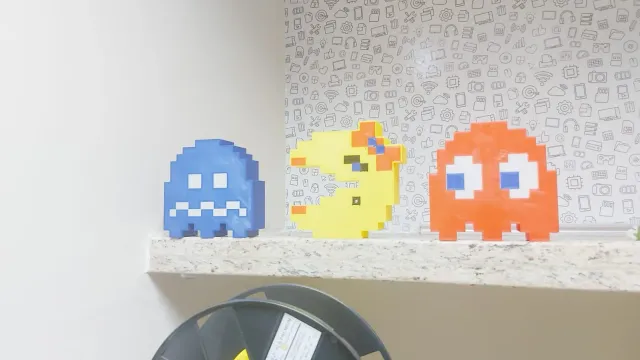
Description8Bit Ms PAC-MAN available as a decoration (and/or light) for your computer desk or the shelf next to it, inspired in PAC-MAN's Ghosts from tksgeo.Easy to print and colorful brings back memories from that golden age where the video games are start to rule the world. It's easy to print (uses the multi pass printing method) and I bringing you all the four “eye looking directions” to choose from. The dimensions are Width: 114mm, Height: 114mm, Depth: 35mm and the filament is common with nothing special. It’s printed thin and becomes semi-transparent. The FilesThere are four files, one for each color (red for the lace and lips, black for the eye and birthmark, blue for the eye and lace knot, and yellow for the body).The face is oriented for right. If you want it oriented for left, merely group the model and use the Mirror option in Cura.The “number” means the order, preferably, of multi pass printing.The “back” file is where you can stick the led stripes in order to light it up. Then glue it to body with glue of your choice. Added two versions for the back part, one with a hole for P4 connector power plug (6 mm), and other full, without hole. It's up to you.You can use a few drops of Cyanoacrylate glue type (instant glue, super glue etc) or can use a softer type of glue. Slicing hintsBefore you slice, you must align them; blue eye part, black eye part, red lace and lips, and yellow body in order to print them correctly afterwards.For Cura, load all the three files and use “CTRL+A” to select all (blue eye, white eye, and body parts) and then use the “CTRL+ALT+G” to align them. Then right click on group and select “center selected” and finally “CTRL+SHIFT+G” to ungroup parts.Sorry for the Prusa Slicer users. Didn't have the chance to use it yet.You can also use the already aligned .3mf file (MS_PACMAN_FULL_aligned.3mf) which contains all the “eye, lace and body” parts.After aligning, DON'T move them; slice em and save em (the g-code file) independently.Optionally see this video of "Make Anything" just to see how the things work with multi pass printing.You can use the “back” file as a test print to see if everything is fine with your bed level, filament transparency and the nozzle. The printing “layer height” must be 0.2 mm with 0.4 nozzle and you should NOT scale it in any way as the dimensions are calculated to keep it transparent and stiff as possible.The blue part of the eye is 0.4mm (two layers) height for transparency reasons of the blue colorThe white part is 0.6mm (three layers) as the face of the rest of the body.Use “wall line count” option to three for the body as width is 1.2mm. So the wall line should be 0.4mm witch is calculated automatically. Also the top/bottom layers should be at least three.Don't forget also to enable the “z hope” at 0.8mm height. And no skirt or anything else for both eye parts. Printing hintsPrint blue parts first, then print the black parts, then the red parts and finally the yellow body. Don't forget to clean the filament from the nozzle well, between the color changes. You can also print everything with white filament and paint it afterwords, (preferably with airbrush) with transparent colors, if you light it up, or any acrylic color, if you use it as decoration. Guides for the eyes should be visible to mask it well.
With this file you will be able to print Ms. PAC-MAN colorful with your 3D printer. Click on the button and save the file on your computer to work, edit or customize your design. You can also find more 3D designs for printers on Ms. PAC-MAN colorful.