MPCNC Belt Tensioner
prusaprinters
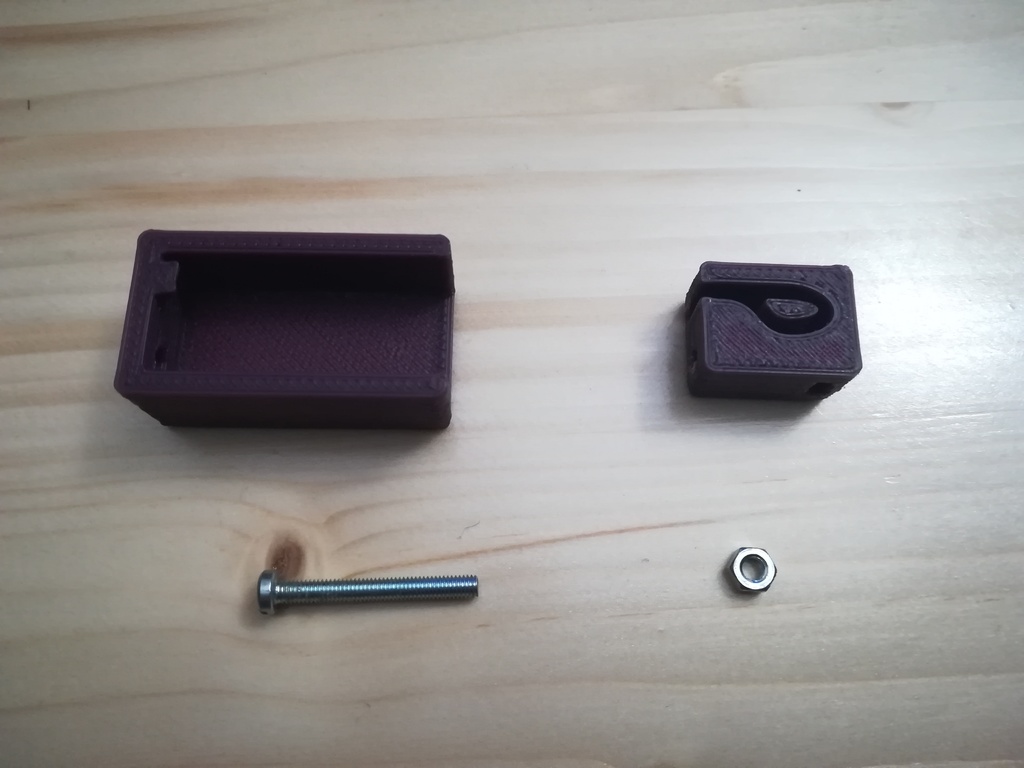
<h3>MPCNC Belt Tensioner</h3> <p>These are my belt tensioner for my MPCNC based on DodgeDerek's version but with a few modifications.</p> <ul> <li>The belt self locks inside the clip.</li> <li>Flipped the side of the tension screw for better/easier access.</li> <li>Clip movement inside the anchor smoother (clip moves straight)</li> <li>Requires M3x30mm screws.</li> </ul> <h3>Each top side belt needs:</h3> <ul> <li>1x belt anchor</li> <li>1x belt anchor M(irrored)</li> <li>1x clip</li> <li>1x clip M(irrored)</li> <li>2x M3 nut</li> <li>2x M3x30 screw (any type of head)</li> </ul> <h3>Each lower side belt needs:</h3> <ul> <li>1x lower belt anchor</li> <li>1x lower belt anchor M(irrored)</li> <li>1x clip</li> <li>1x clip M(irrored)</li> <li>2x M3 nut</li> <li>2x M3x30 screw (any type of head)</li> </ul> <h3>Assembly</h3> <p>Assemble the tensioners by screwing only with a couple of turns on the nut and anchor one of the sides of the GT2 belt to the MPCNC.</p> <p>Place the other tensioner in the MPCNC without the belt and stretch the belt (doesn't need to be tight) and mark where it will enter the tensioner.</p> <p>After that remove the tensioner and insert the GT2 belt at that place and screw the clip again.</p> <p>The tensioner can than be pulled in to place and both screws can be ajusted.</p> Category: 3D Printer Accessories
With this file you will be able to print MPCNC Belt Tensioner with your 3D printer. Click on the button and save the file on your computer to work, edit or customize your design. You can also find more 3D designs for printers on MPCNC Belt Tensioner.