MP Select Mini Layer Heights
thingiverse
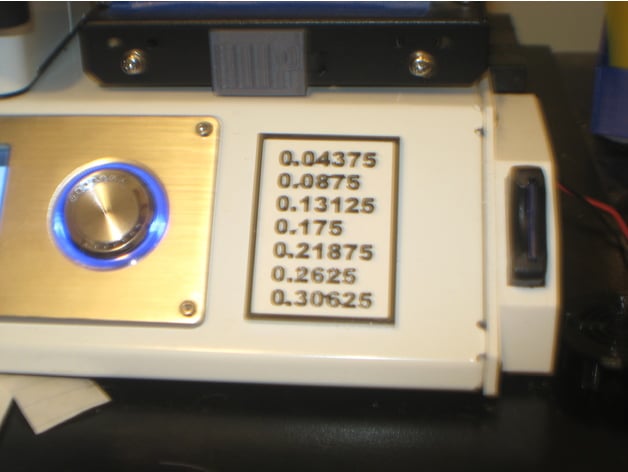
This is a plaque of ideal layer heights for the MP Select Mini. It has recesses on the back side for two Harbor Freight magnets. A 10-pack of Harbor Freight magnets can be found by searching Item Number 67488. I apologize for the poor quality of the picture, as the camera was not cooperating with me. Print Settings Printer: Monoprice Select Mini Rafts: No Supports: No Resolution: .0875 Infill: 20% Notes: I used a sharpie to color in the lettering, but since printing one out, I've learned that the printer can be paused by editing the G-Code and adding the M600 command. To do this, you'll need to use the layers view of Cura to find the layer where you want to change colors, then insert a line before that layer with M600. I use Notepad2 to search for LAYER:n, where n is the number of the layer where the filament change will take place. When the file is run, the printer will pause just like if you had selected pause from the jog dial. Just rotate the jog dial to the unpause position and select it after changing the filament. You'll want to purge the old color by pushing the filament by hand until the new color comes through. Post-Printing Attaching to the Printer The plaque can be attached using whatever method you prefer, but as described above, Harbor Freight magnets can be used. How I Designed This DesignSpark I created this plaque using a free program called DesignSpark. This program is provided by RS Components/Allied Electronics and is a lite version of Space Claim. To add text, I used the method of dimensioning a line, editing the text and font, then projecting it onto the object. It usually takes selecting the project icon twice. Hide the annotation plane, and you can use the pull tool to extrude each character of text in or out as desired. Hopefully, future versions will include adding text directly, but for now, that's the quickest way to do it without using a separate CAD program. I included the RSDOC file for anyone using DesignSpark.
With this file you will be able to print MP Select Mini Layer Heights with your 3D printer. Click on the button and save the file on your computer to work, edit or customize your design. You can also find more 3D designs for printers on MP Select Mini Layer Heights.
