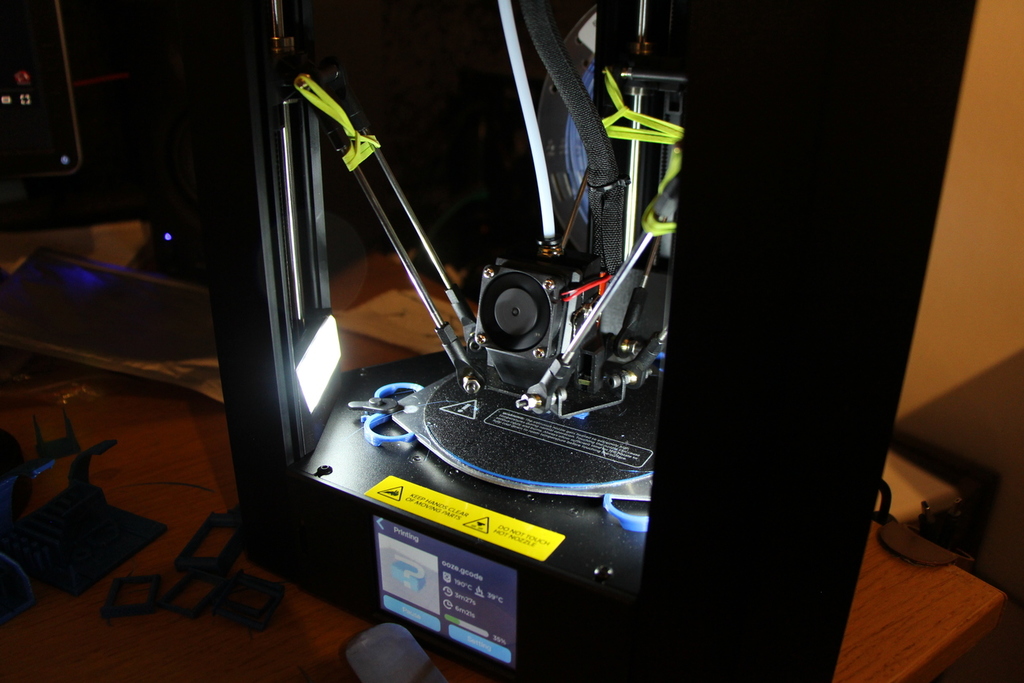
MP Mini Delta V2 Pillar covers (with or without LEDs)
prusaprinters
<p>These will cover the opening preventing most things from falling down in the pillar, where it could jam the motors and belts.</p> <p>If you make the LED-version, you also get a nice light in the printer, but it flickers a bit with power use (you can see it as a feature, not a bug ;-).</p> <p>I recommend two LED in the front pillars and a plain in the back, so you don't have the light shining in your eyes. If you don't want to do the electrical stuff, you can just go with all plain.</p> <p>It uses LED strip segments that is 50 x 8 mm.</p> <p>I recommend using pigtails with connectors for wiring so any part could be easily removed if you need to work on the printer in the future. I used two pairs JST-SH style pig tails and JST-XH style pigtail with a connector:</p> <ul> <li>XH connector soldered to the small power / USB board.</li> <li>Y-adapter with 1x XH -> 2x SH</li> <li>SH pigtails going to the LEDs.</li> </ul> <h3>Print Settings</h3> <p><strong>Printer Brand:</strong></p> <p>Prusa</p> <p class="detail-setting printer"><strong>Printer: </strong> <div><p>I3 MK3S</p></div> <p><strong>Rafts:</strong></p> <p>No</p> <p class="detail-setting supports"><strong>Supports: </strong> <div><p>Yes</p></div> <p><strong>Resolution:</strong></p> <p>0.2mm</p> <p class="detail-setting infill"><strong>Infill: </strong> <div><p>15%</p></div> <p><strong>Filament:</strong> Mixed brands PLA Black / Transparent</p> <p><br/> <p class="detail-setting notes"><strong>Notes: </strong></p> </p><div><p>The upper ledge of the LED version needs support.</p></div> Post-Printing ============= <p><strong>Mount the LEDs</strong></p> <div><p>Clean up the supports.</p> Put the wires in from behind. If you use two, make one with wiring exiting to the right and one with wiring exiting to the left. <p>Solder the wires to one of the two LED strip segments, then connect the segments together with small bits of wire.</p> <p>Press in the LED cover in place</p> <p><strong>Mount the LEDs in place</strong></p> <p>Remove the filament and holder from the back and disconnect power.</p> <p>Put the printer on it's left side (as there is nothing sensitive on that side) and remove the bottom cover, keep track of what length screws go where.</p> <p>You want to put the covers with LEDs on so the wires is towards the back of the printer.</p> <p>Put the wires in to the pillar and fish them out with pliers from the inside, they should enter through the hole in the bracket behind the stepper motor.</p> <p>Clip the pillar covers in place and tug the wires lightly to pull any slack inside the printers electronics compartment.</p> <p>Connect the LEDs to the output of the small Power / USB-board on the right side of the printer.<strong>Double check the polarity</strong>, my printer had red as minus and black as positive.</p> <p>Check if everything works.</p> <p>Put your printer together again.</p> </div></p></p></p> Category: 3D Printer Parts
With this file you will be able to print MP Mini Delta V2 Pillar covers (with or without LEDs) with your 3D printer. Click on the button and save the file on your computer to work, edit or customize your design. You can also find more 3D designs for printers on MP Mini Delta V2 Pillar covers (with or without LEDs).
