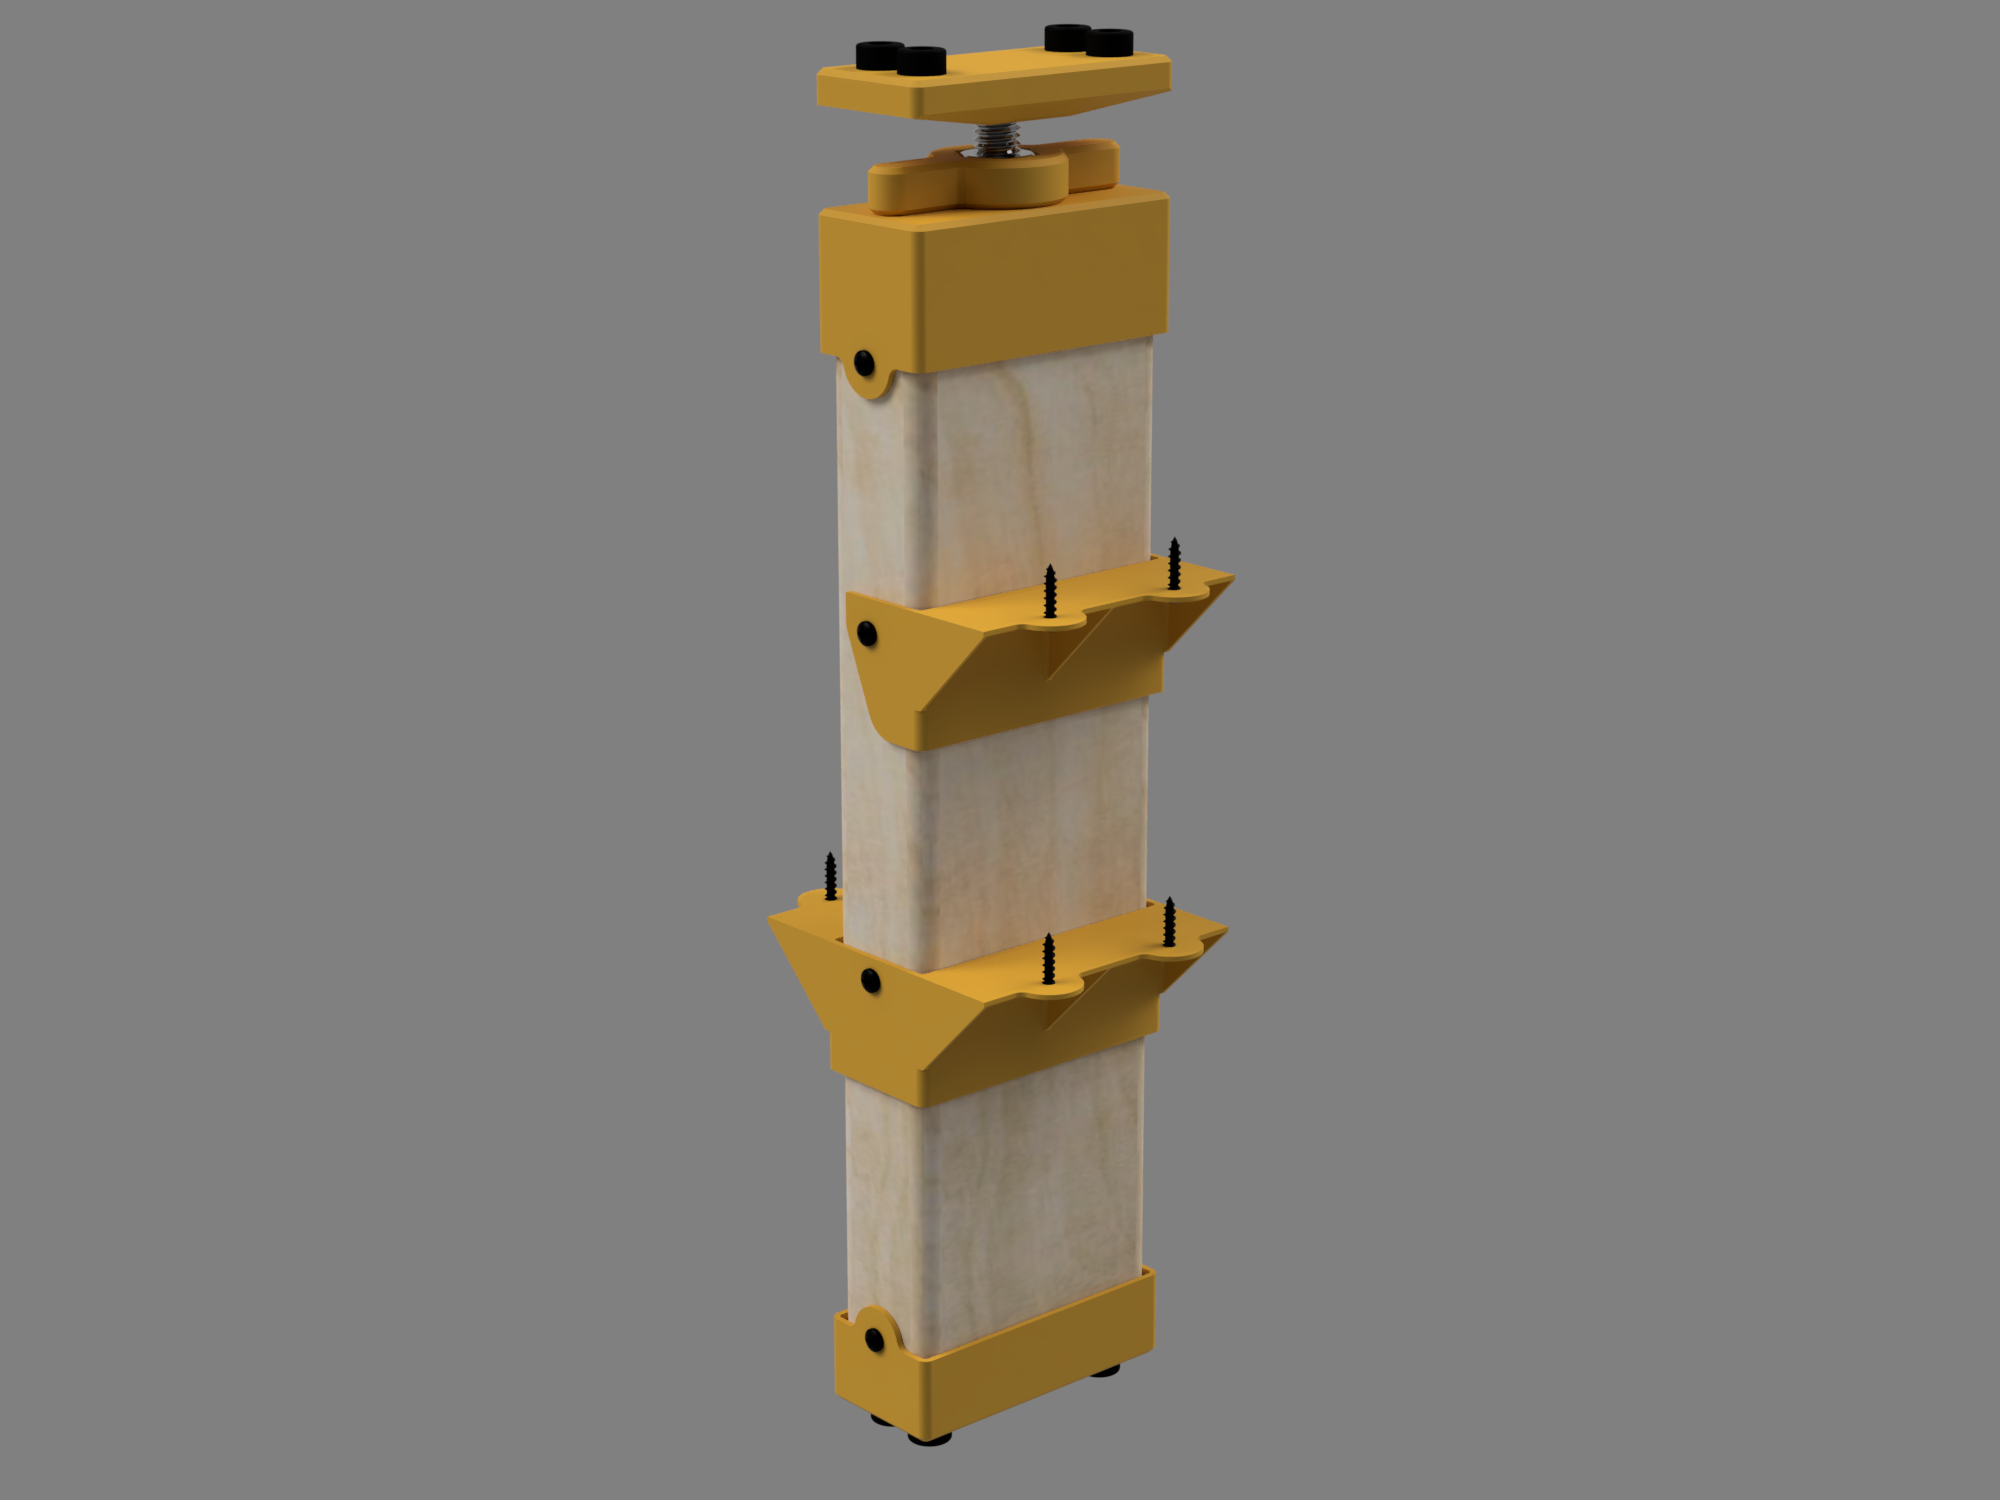
Moveable Partition Wall/Shelf
prusaprinters
<p>The idea was to create a set of models which would make it easy for someone with zero woodworking skills to quickly, easily, and cheaply build a partition or even a full wall inside a room or apartment without drilling any holes in the walls or ceiling. </p><p>This works by creating two or more vertical posts, or studs, which are jacked up into the ceiling by turning a crank by hand. Once the studs are firmly in place, you can start adding horizontal beams or shelves using 3D printed brackets. If you want a wall, cover it up with plywood. If you want a window, slap a piece of acrylic on there. There really is an endless amount of ways to go nuts with this.</p><h4>PRINTING TIPS</h4><p>The 3D printed parts are designed to print 100% solid (except for “PLATE” and “FOOT”) while using as little filament as possible and printing as fast as possible. The STLs I'm posting are optimized for a 0.6mm nozzle with 3 perimeters and 4 solid bottom layers at 0.35mm layer height, but I'll share the Fusion 360 file so you can change the parameters to suit your set up. Go to MODIFY, Change Parameters, and then you can input your settings. I've played around a bit with changing the parameters and so far nothing has broken, but no guarantees. For material, I used Prusament PLA this time.</p><figure class="image"><img src="https://media.printables.com/media/prints/198190/rich_content/56b11405-d613-4e26-9784-46388e1944d7/screenshot-2022-05-07-135612.jpg#%7B%22uuid%22%3A%226e402460-f402-4b68-8027-e45c6a61449d%22%2C%22w%22%3A1246%2C%22h%22%3A452%7D"></figure><h4>WOOD</h4><p>I used 2x4s for my partition because they are cheap (…er than other wood), but you can use whatever kind of wood is available in your part of the world. Similarly as with the printing parameters, in the Fusion 360 file you can input the dimensions of your wood and all of the models should update parametrically (hopefully without causing any errors!). Just remember that wood has nominal and actual dimensions. 2x4s, for example, are not actually 2"x4"! Take a pair of calipers or a ruler to your lumber store and measure the wood before you start printing anything.</p><h4>CUT WOOD TO LENGTH</h4><p>Here is the formula for the verticals: distance from your floor to ceiling - 3.5" (approx. 89 mm) = the length you need to cut your wood to.</p><p>So for example, from the floor to ceiling I measured 96.5", subtract 3.5" and 93" is the length I cut my wood to.</p><h4>NECESSARY HARDWARE</h4><p>You will need some hardware to complete this project. I will list the McMaster Carr part numbers below. If you can't get these exact sizes where you live, get something close and you can adjust the models to fit in Fusion.</p><p>18-8 Stainless Steel Hex Head Screw 1/2"-13 Thread Size, 1-1/2" Long (PN: 92240A715)</p><figure class="image image_resized" style="width:56.13%;"><img src="https://media.printables.com/media/prints/198190/rich_content/01921f84-afa6-4e2a-be63-ea4f12e88ff6/screenshot-2022-05-07-141429.jpg#%7B%22uuid%22%3A%22c7cfb574-57ef-4010-8ac9-b4f7eb74dfe4%22%2C%22w%22%3A985%2C%22h%22%3A532%7D"></figure><p>18-8 Stainless Steel Hex Nut 1/2"-13 Thread Size (PN: 91845A310)</p><figure class="image image_resized" style="width:47.49%;"><img src="https://media.printables.com/media/prints/198190/rich_content/5efbe04f-9d18-4565-b1bc-5c0542841e68/screenshot-2022-05-07-141723.jpg#%7B%22uuid%22%3A%22f40a2e4b-2469-4156-a084-1ff07d52e1ee%22%2C%22w%22%3A1000%2C%22h%22%3A495%7D"></figure><p>Threaded-Stud Bumper 6-32 Thread, 1/2" OD, 1/4" High (PN: 9541K1)</p><figure class="image image_resized" style="width:56.2%;"><img src="https://media.printables.com/media/prints/198190/rich_content/a87350c5-0d4f-4fb9-abd8-9dffc9d9291b/screenshot-2022-05-07-141900.jpg#%7B%22uuid%22%3A%22056bc690-1ced-4cfb-b48a-b09076c261e8%22%2C%22w%22%3A1239%2C%22h%22%3A565%7D"></figure><p>The bumper could be easily printed if you have some TPU.</p><p>And you'll also need some wood screws. I used these from McMaster: 91555A114.</p><h4>ASSEMBLY</h4><p>See the photos for assembly diagrams, it's pretty self explanatory.</p><h4>FINAL THOUGHTS</h4><p>Full disclosure, this design is based on a retail product I saw in Japan c. 2015 sold by a company called Labrico. When I saw it I thought it was cool but a bit pricey, so I decided to make it myself. <a href="https://labrico.jp/series/2x4adjuster/">https://labrico.jp/series/2x4adjuster/</a> I set the license to non-commercial. Let's not be trying to sell these things yall. </p>
With this file you will be able to print Moveable Partition Wall/Shelf with your 3D printer. Click on the button and save the file on your computer to work, edit or customize your design. You can also find more 3D designs for printers on Moveable Partition Wall/Shelf.
