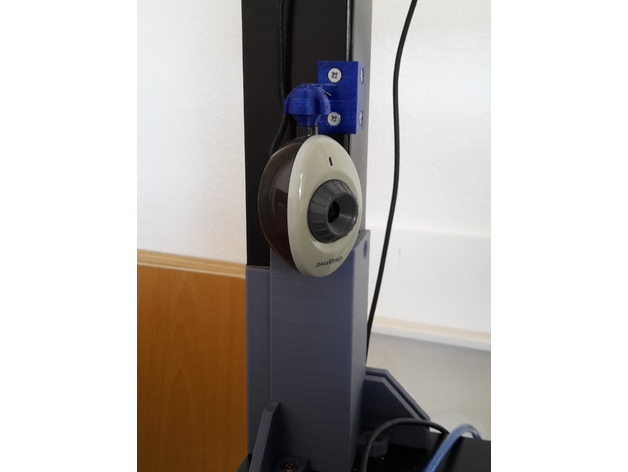
Mounting a Creative Live! Cam Vista IM
thingiverse
Creative Live! Cam Vista IM sits proudly on the IKEA-Lack leg. The camera is connected to an OctoPi, which is a powerful tool for controlling the entire setup. In picture 4, you can see a clear shot of the camera in action. Pictures 5-7 are still experimental, as I'm trying to find the perfect position for the camera - adjusting its height to get the best possible view. For the holders, I recommend using either "Basis1.stl" or "Basis2.stl", depending on whether you want to place the camera on the right or left side. Only one part is required. To ensure proper installation, I suggest installing the camera upside down, which might seem counterintuitive but works surprisingly well. On the OctoPi, open the file /boot/octoprint.txt and add or modify the following line: camera_usb_options="-r 640x480 -hf true -vf true". This will unlock the full potential of your Creative Live! Cam Vista IM, allowing it to capture high-quality footage at a maximum resolution of 640x480 pixels. Before attaching the printed holder "Ball_Kamera.stl" to the camera, remove the original holder. Be gentle when inserting the new holder, as it may sit tightly in place. I recommend using short screws, approximately 3x8mm or shortened to fit the hollow table legs.
With this file you will be able to print Mounting a Creative Live! Cam Vista IM with your 3D printer. Click on the button and save the file on your computer to work, edit or customize your design. You can also find more 3D designs for printers on Mounting a Creative Live! Cam Vista IM.
