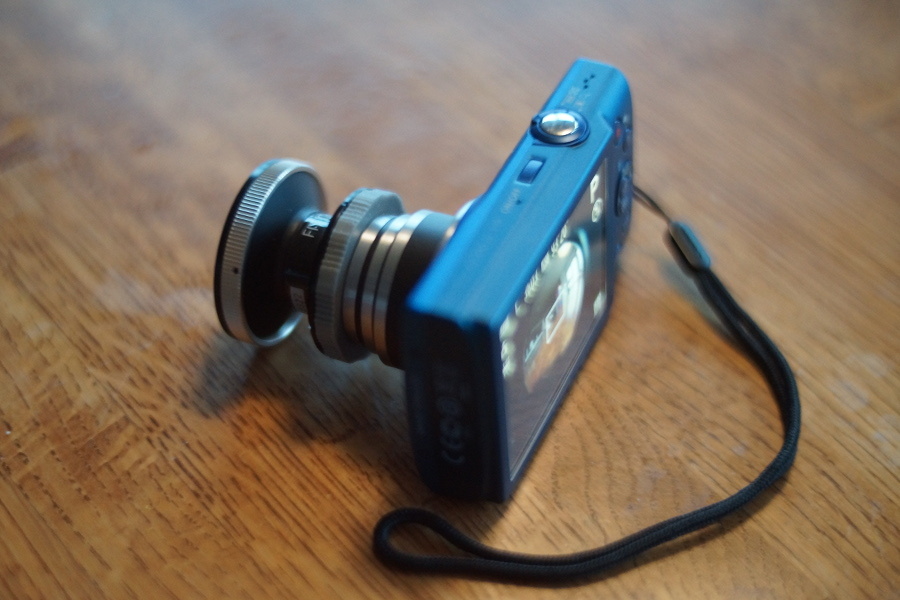
Mount For Fisheye Converter Lens On Canon PowerShot A4000
prusaprinters
<p>I love fisheye lenses, both for artistic and technical purposes, and I have quite a collection from door peepholes to high-quality fisheye lenses. Unfortunately, few cheap options give full 180-degree views, and almost none give more than 180. Here's a simple part to allow mounting an old 185-degree converter (originally sold by IPIX for use on a long extinct 1.3MP Olympus) on a 16MP Canon PowerShot A4000.</p> <p><em>You might not have either this lens or this camera, but the mounting method easily can be adapted for many camera and adapter lens or filter combinations....</em></p> <h3>Instructions</h3> <p>The big problem here is evident in the photo of the Canon PowerShot A4000 by itself: there is nothing to mount an converter lens on. Worse than that, this converter needs to be very close to the front of the lens, which extends dramatically in three sections as power is turned-on (that's all that changed between the last two photos of the camera) or if the zoom is operated. In the past, I've often used 2-sided tape to stick converter lenses on such cameras... but removing the lens has then often removed the metal front plate from the lens assembly!</p> <p>A Permanently-Attached Adapter</p> <p>--</p> <p>My solution here is to simply print an adapter that can be permanently taped/glued to the lens front plate; thus, the converter lens simply screws into the printed adapter. The adapter is designed to be as small as possible, yet is big enough to avoid vignetting when the converter lens is not attached. The same method can be used to place standard screw-in filters on the lens.</p> <p>Printing the adapter is trivial; I used 0.25mm extrusion of gray PLA, 25% fill (which only affects the space between the thread and the outer grip). However, be warned that filter screw threads have a mere 0.75mm pitch and my converter's thread pitch is a still small 1mm -- I print such fine threads on my MakerGear M2 all the time, even using 0.25mm extrusion. If your printer isn't up to that, you may be able to use the metal thread of the converter as a tap to cut the thread... or at least to shape the thread enough to hold the converter. Alternatively, just print a little ridge cut into segments that can pop over the converter's thread to hold it in place (that's what Thing 308456 does for M42 lenses).</p> <p>Mounting The Adapter</p> <p>--</p> <p>Mounting the adapter to the camera is easy enough -- just be careful not to let glue/tape get on any parts of the lens assembly that are supposed to move independently, because it's easy to strip the lens drive gears. Also,<strong>attach the mount with the converter installed in it!</strong> Why? Most compact cameras have fairly serious misalignments of lens mount parts, so you'll want to use the live view to make sure the converter is optically centered... which will probably happen when it appears not to be mechanically centered. As the last photo shows, it probably will not be perfectly centered no matter what you do, because there is play in the lens barrel and the weight of the converter also causes some drooping, but even this is good enough.</p> <p>Using The Camera WIth The Converter</p> <p>--</p> <p>In use,<em>many converters will require/work better when your camera is set in macro focus mode</em> -- macro mode usually doesn't change the optics, but just allows the camera to search the full focus range for the best focus. For circular fisheye images, you also want both the focus point and exposure to be taken from the center. You'll also need to hold the camera out in front of you to avoid getting your shoes in the photo. ;-)</p> <p>A neat little trick is that the zoom still works, so you can adjust the zoom to make the circle as big as possible or zoom-in to fill the entire frame with the image (what's often called a "full frame" or "rectangular" fisheye image). If you're using a Canon PowerShot, also consider using CHDK so that you can get raw capture and can use scripts to quickly and precisely set the zoom, etc., as desired. In fact, it isn't even all that hard using CHDK to de-fish the image in camera, although that does require a little custom code (C programming).</p> <p>Well, those are long instructions! If there's demand, perhaps I'll put up an Instructable explaining all of this in more detail with more examples....</p> Category: Camera
With this file you will be able to print Mount For Fisheye Converter Lens On Canon PowerShot A4000 with your 3D printer. Click on the button and save the file on your computer to work, edit or customize your design. You can also find more 3D designs for printers on Mount For Fisheye Converter Lens On Canon PowerShot A4000.
