Mount for attaching IKEA SKÅDIS pegboard to side of IVAR shelves
prusaprinters
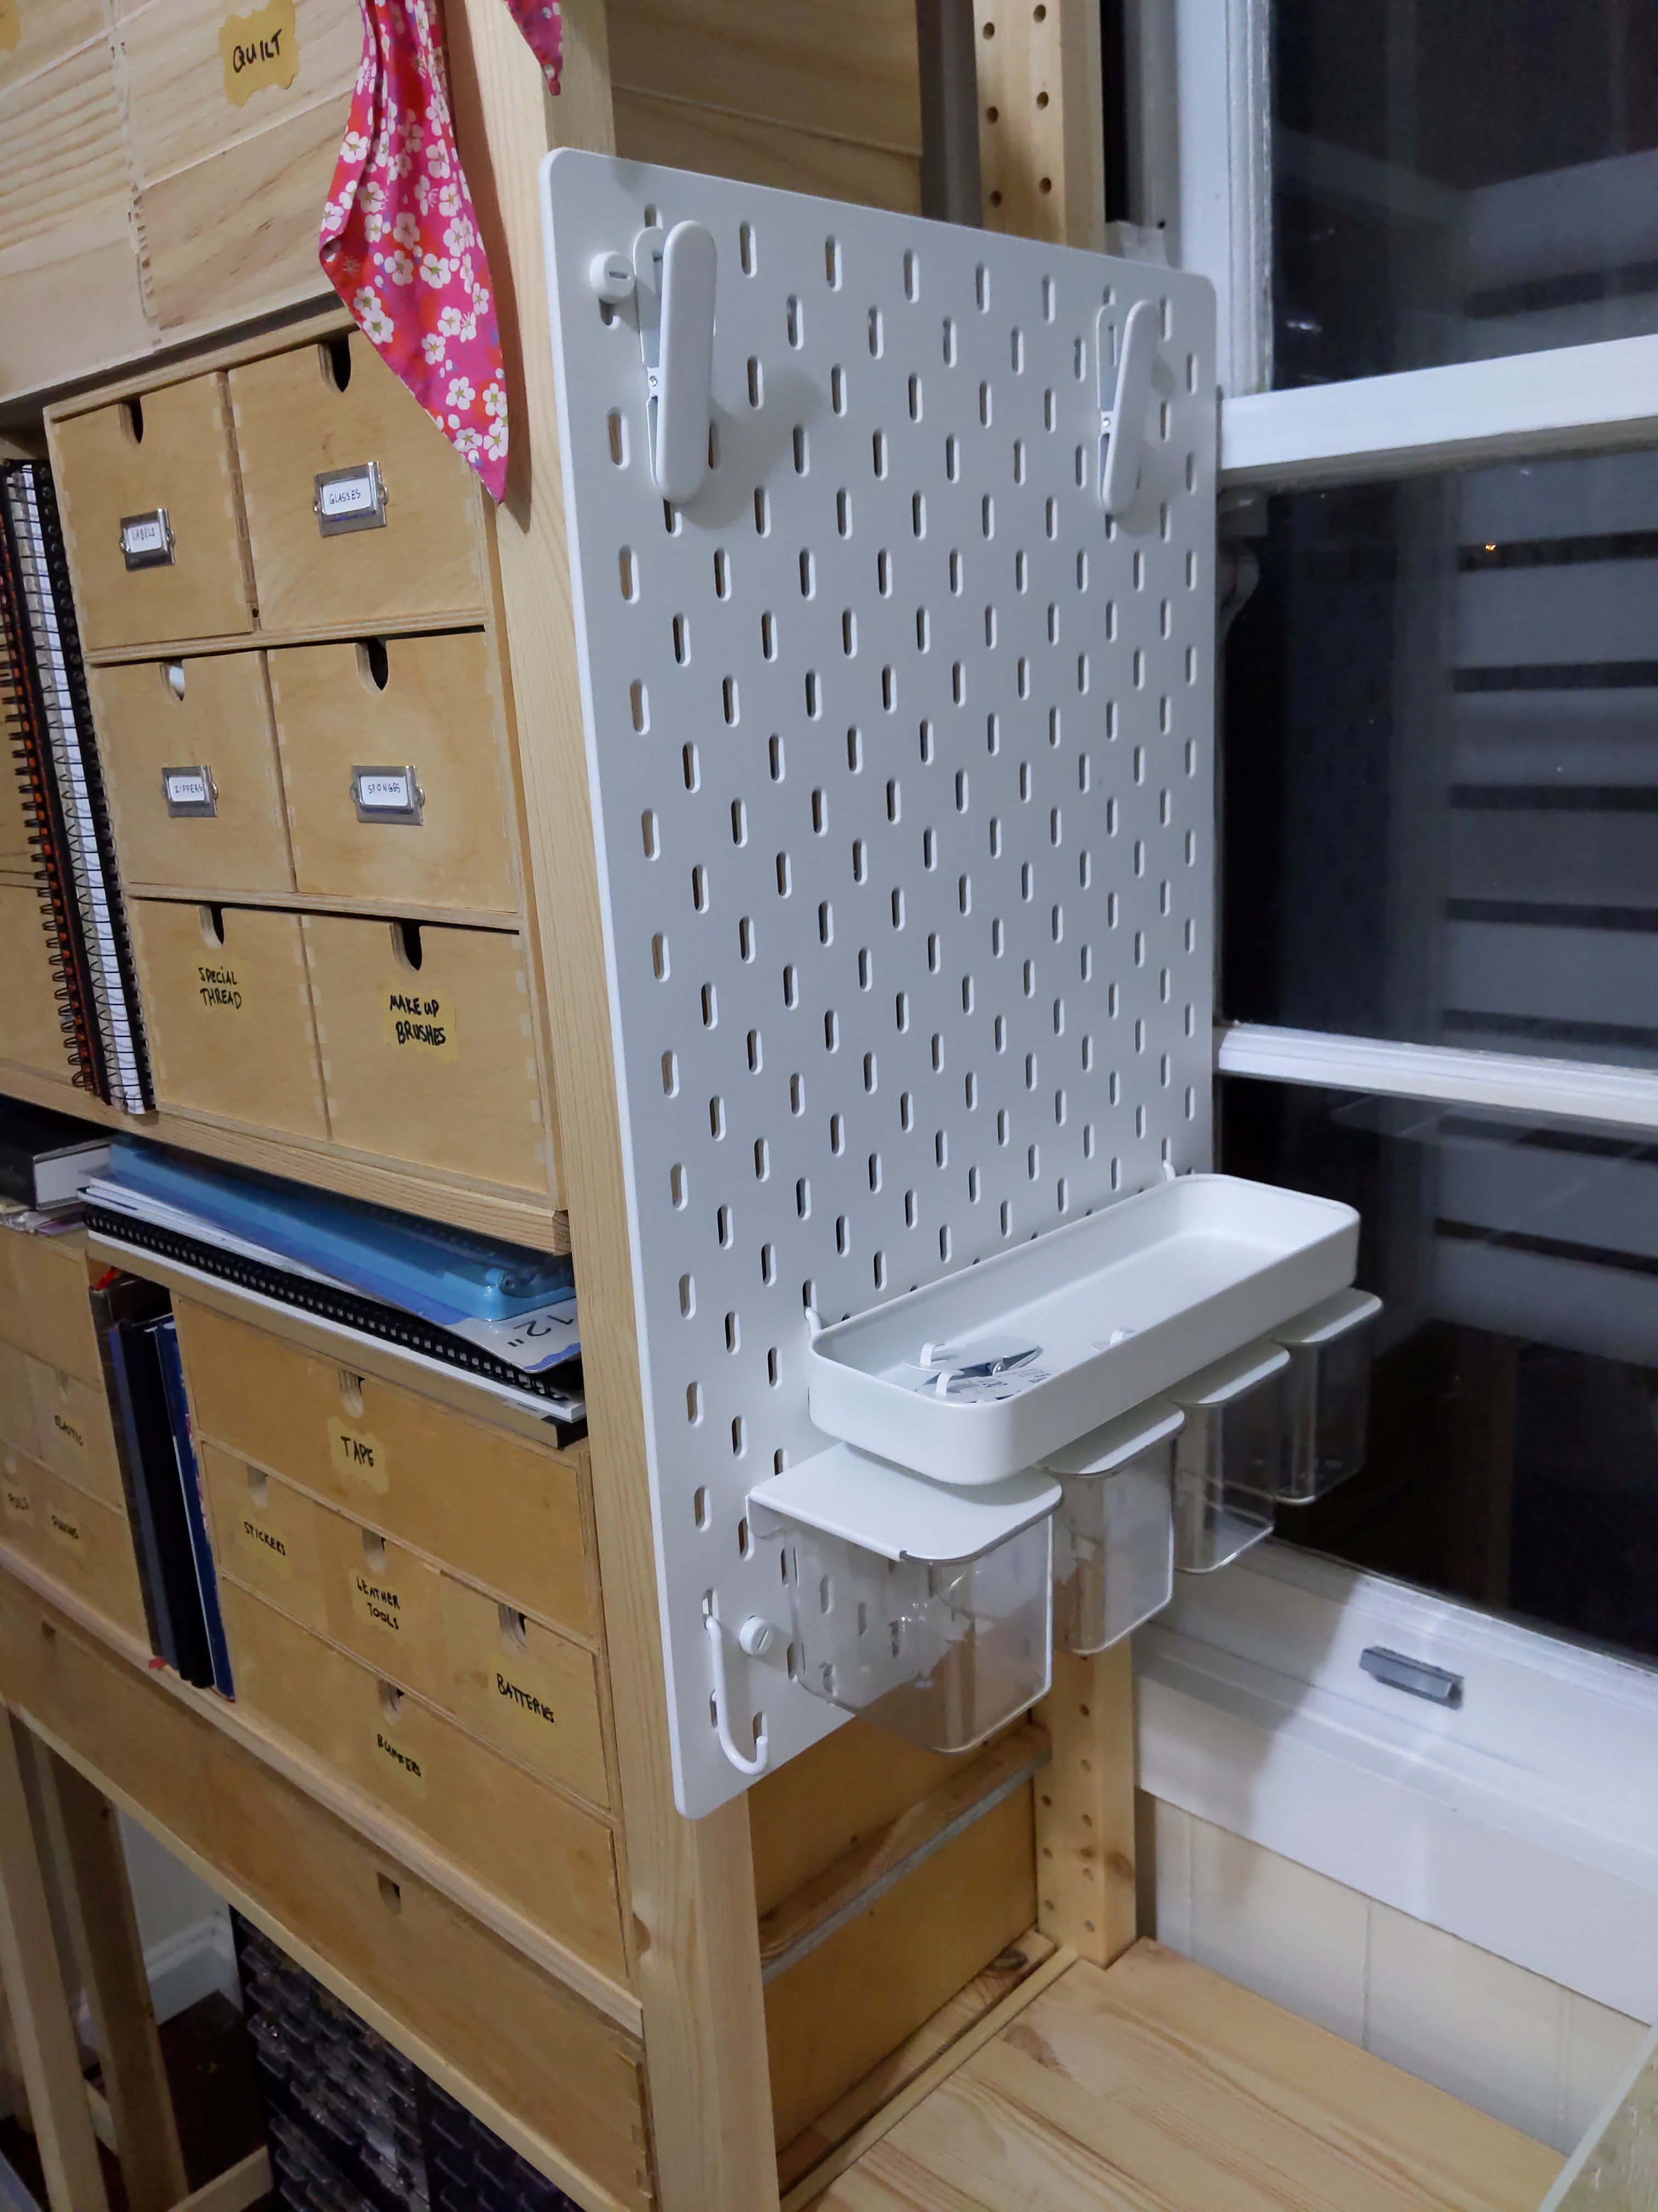
<p>These little attachments will allow you to mount the 36x56cm Skadis to the side of the 30cm deep Ivar shelves (both from IKEA).</p> <p>They are very economical, all parts printing in less than an hour total and using about 15g of filament.</p> <p>They're offset deliberately, given most people will be mounting their shelves against a wall.</p> <p>I've included 2 versions, one that is secured via the original screws and another that's able to be lifted off similar to the IVAR shelves.</p> <p>You will need two spare IVAR pegs to attach these to your shelves. I recommend metal/original ones, or wood pegs but you might get away with printed pegs if you aren't hanging much on your board (the original IVAR pegs are 6*40mm)</p> <p>Links to products:</p> <p>Pegboard: <a href="https://www.ikea.com/au/en/p/skadis-pegboard-white-80320804/">https://www.ikea.com/au/en/p/skadis-pegboard-white-80320804/</a></p> <p>Shelf Side: <a href="https://www.ikea.com/au/en/p/ivar-side-unit-50192841/">https://www.ikea.com/au/en/p/ivar-side-unit-50192841/</a></p> <h3>Print instructions</h3><h3>Slicing</h3> <ul> <li>For each SKADIS print one of each brace (A&B) and two pegs.</li> <li>Keep everything in the same orientation that the files appear in (for strength). </li> <li>Use support. You might want to add a support blocker to the hole on brace A if you don't like cleaning support out of holes. </li> </ul> <h3>Assembling the secured version</h3> <ol> <li>Once printed, attach brace B to the mount that comes with the SKADIS, with the hole facing out, secure with a peg. </li> <li>Add a peg to your IVAR and slide then place that end of your mount onto it. </li> <li>Add brace A and a peg to the other side of the IVAR and slide the mount onto it, securing with a peg. </li> <li>Secure the SKADIS board to the mount with the original (skadis) screws.</li> <li>Add the original SKADIS spacer feet to the base of the board so they rest upon the IVAR sides.</li> </ol> <h3>Assembling the lift-off/ quick-change version.</h3> <ol> <li>Once printed, attach the braces to either end of the SKADIS mount (that comes with the board) with the holes facing out and secured with the pegs. </li> <li>Place your pegs onto the IVAR at the desired height. </li> <li>Place the mount on the pegs. </li> <li>Secure the board to the mount using the original screw hardware. </li> <li>Add the spacer feet (original SKADIS parts) so they sit against the side of the IVAR.</li> </ol>
With this file you will be able to print Mount for attaching IKEA SKÅDIS pegboard to side of IVAR shelves with your 3D printer. Click on the button and save the file on your computer to work, edit or customize your design. You can also find more 3D designs for printers on Mount for attaching IKEA SKÅDIS pegboard to side of IVAR shelves.