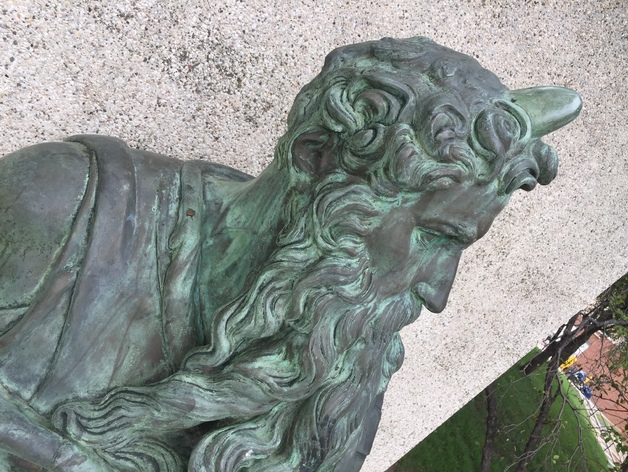
Moses by Michelangelo
thingiverse
The first almost completely textured model of Moses I've ever successfully created is now complete. Earlier models were missing textures from the top or rear due to insufficient photo coverage. I'm impressed with how well this model turned out, considering all 340+ photos were taken using only my iPhone 6 Plus and the standard Apple Camera app. The overcast sky helped even out exposures, while using a 12-foot painters pole and my Apple Watch to remotely fire the camera greatly aided the process. Although I looked silly to passersby, the result is highly satisfying. Here are a few photos of the original bronze model that I used as reference. If anyone wants access to all 348 JPG photos covering nearly the entire sculpture, please don't hesitate to reach out – they're available for free. How I Created This I attached an old Pentax film camera to a 12-foot painters pole and secured my iPhone 6 Plus to the rear with blue tape. Using my Apple Watch, I was able to remotely trigger the Camera app as I raised and lowered the pole while carefully walking around the sculpture multiple times. I likely took shots from nearly identical angles several times, and certain areas like the head, beard, feet, etc., were photographed more heavily due to their complexity or detail. As you look at the photographs of the bronze model, it's clear why complete shots of Moses from the far rear are challenging, especially where his upper back and shoulder blades almost touch the aggregate concrete slab behind him. After exhausting my Apple Watch battery, I finished up with some handheld shots of the overall figure. Back home, I removed any blurry shots resulting from the pole moving since they were out of camera JPG photos and couldn't be processed due to the lossy nature of the format. As a final step, I stripped out location data in the EXIF as it tends to confuse Photoscan when photos are taken so closely together. Next, I started working with 348 photos in Agisoft Photoscan using the 'low' quality settings for matching through point cloud, dense point cloud, meshing, and finally texture. Once satisfied that the photos would work, I restarted at the 'medium' setting, then used the model as a mask on the photographs before moving to the 'high' quality setting. The entire process took all night and into the late morning, but the result was deeply satisfying. With the exception of a butterfly-shaped region on the upper shoulder blades of Moses and the rear of his backwards-projecting right arm holding the tablet, the entire sculpture was rendered and textured with little need for further intervention. Since I didn't want to share a model with holes in it like earlier versions, I exported the mesh into Meshmixer to fill the gaps and smooth out odd artifacts. I then imported it back into Photoscan and recreated the texture map once again. At that point, the model was as closely finished as I could make it given my limited skill set in modeling. To prepare for printing in STL format, I plane-cut the bottom of the model to make it level. I exported Moses in various formats, hoping that the texture map would be copied intact. So far, only the DAE file achieved this; the PLY and OBJ files didn't preserve the texture map. If anyone wants to access all my Moses photos for their own modeling project, please get in contact – they're available for free! I'm curious to see what results other people will achieve using my photos, especially with different software.
With this file you will be able to print Moses by Michelangelo with your 3D printer. Click on the button and save the file on your computer to work, edit or customize your design. You can also find more 3D designs for printers on Moses by Michelangelo.
