Moon Phases
thingiverse
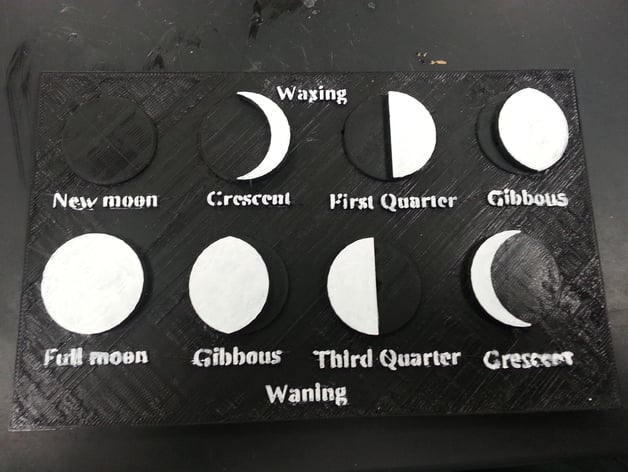
A diagram shows the moon phases. Check the preview before printing to make sure letters are readable at the printed size and resolution. The pictured model was enlarged to 180%, the largest size it would fit on my printer. There's also a model with no labels, which can be printed smaller in a lighter color for students to complete. Unfinished models can serve as an exercise where students fill in the lit part of the moon for each phase. This diagram was created as a proof-of-concept lesson plan for a 7th-grade astronomy and 3D design class using Tinkercad. The topic was changed from my curriculum, so the lesson was never taught to students. The model shown in the picture had some issues with the bottom-right corner labeling due to curling. Standards: NGSS: Overview and Background A diagram displays the moon phases. Check the preview before printing to make sure letters are readable at the printed size and resolution. The pictured model was enlarged to 180%, the largest size it would fit on my printer. There's also a model with no labels, which can be printed smaller in a lighter color for students to complete. Unfinished models can serve as an exercise where students fill in the lit part of the moon for each phase. Lesson Plan and Activity Easy: Have students print out the unlabeled model and label it using a permanent marker. Medium: Print out the unfinished model, let the students color it, then have them label it with a marker. Hard: Allow students to open the unfinished model in Tinkercad.com, where they will complete it. For models printed small, it's better to label after printing. Project: Moon Phases Objective Make a model of the moon's phases. Audience This was initially created for a 7th-grade class, but can be used with younger students if provided with the completed model, which they then color and label. Preparation Complete this project following a lesson on moon phases. If the students plan to finish the unfinished model in Tinkercad.com, ensure they have experience using it beforehand. Steps Easy: Have students print out the unlabeled model and label it using a permanent marker. Medium: Print out the unfinished model, let the students color it, then have them label it with a marker. Hard: Allow students to open the unfinished model in Tinkercad.com, where they will complete it. For models printed small, it's better to label after printing. Results This project hasn't been tested yet; above is an enlarged picture of the finished product.
With this file you will be able to print Moon Phases with your 3D printer. Click on the button and save the file on your computer to work, edit or customize your design. You can also find more 3D designs for printers on Moon Phases.
